the Grand Sewing Studio tour
I hope this will be worth your wait! Here’s my freshly organized sewing room complete with fabric shelves, scrap storage, quilter’s work table, design wall and, of course, my longarm sewing machine. How do I manage to fit it all in one room? Come right in, my friend. I’ll show you around!
Room Layout
When you enter the door to my sewing room, this cozy aqua wall draws your attention to the left, where my quilter’s work table is located.
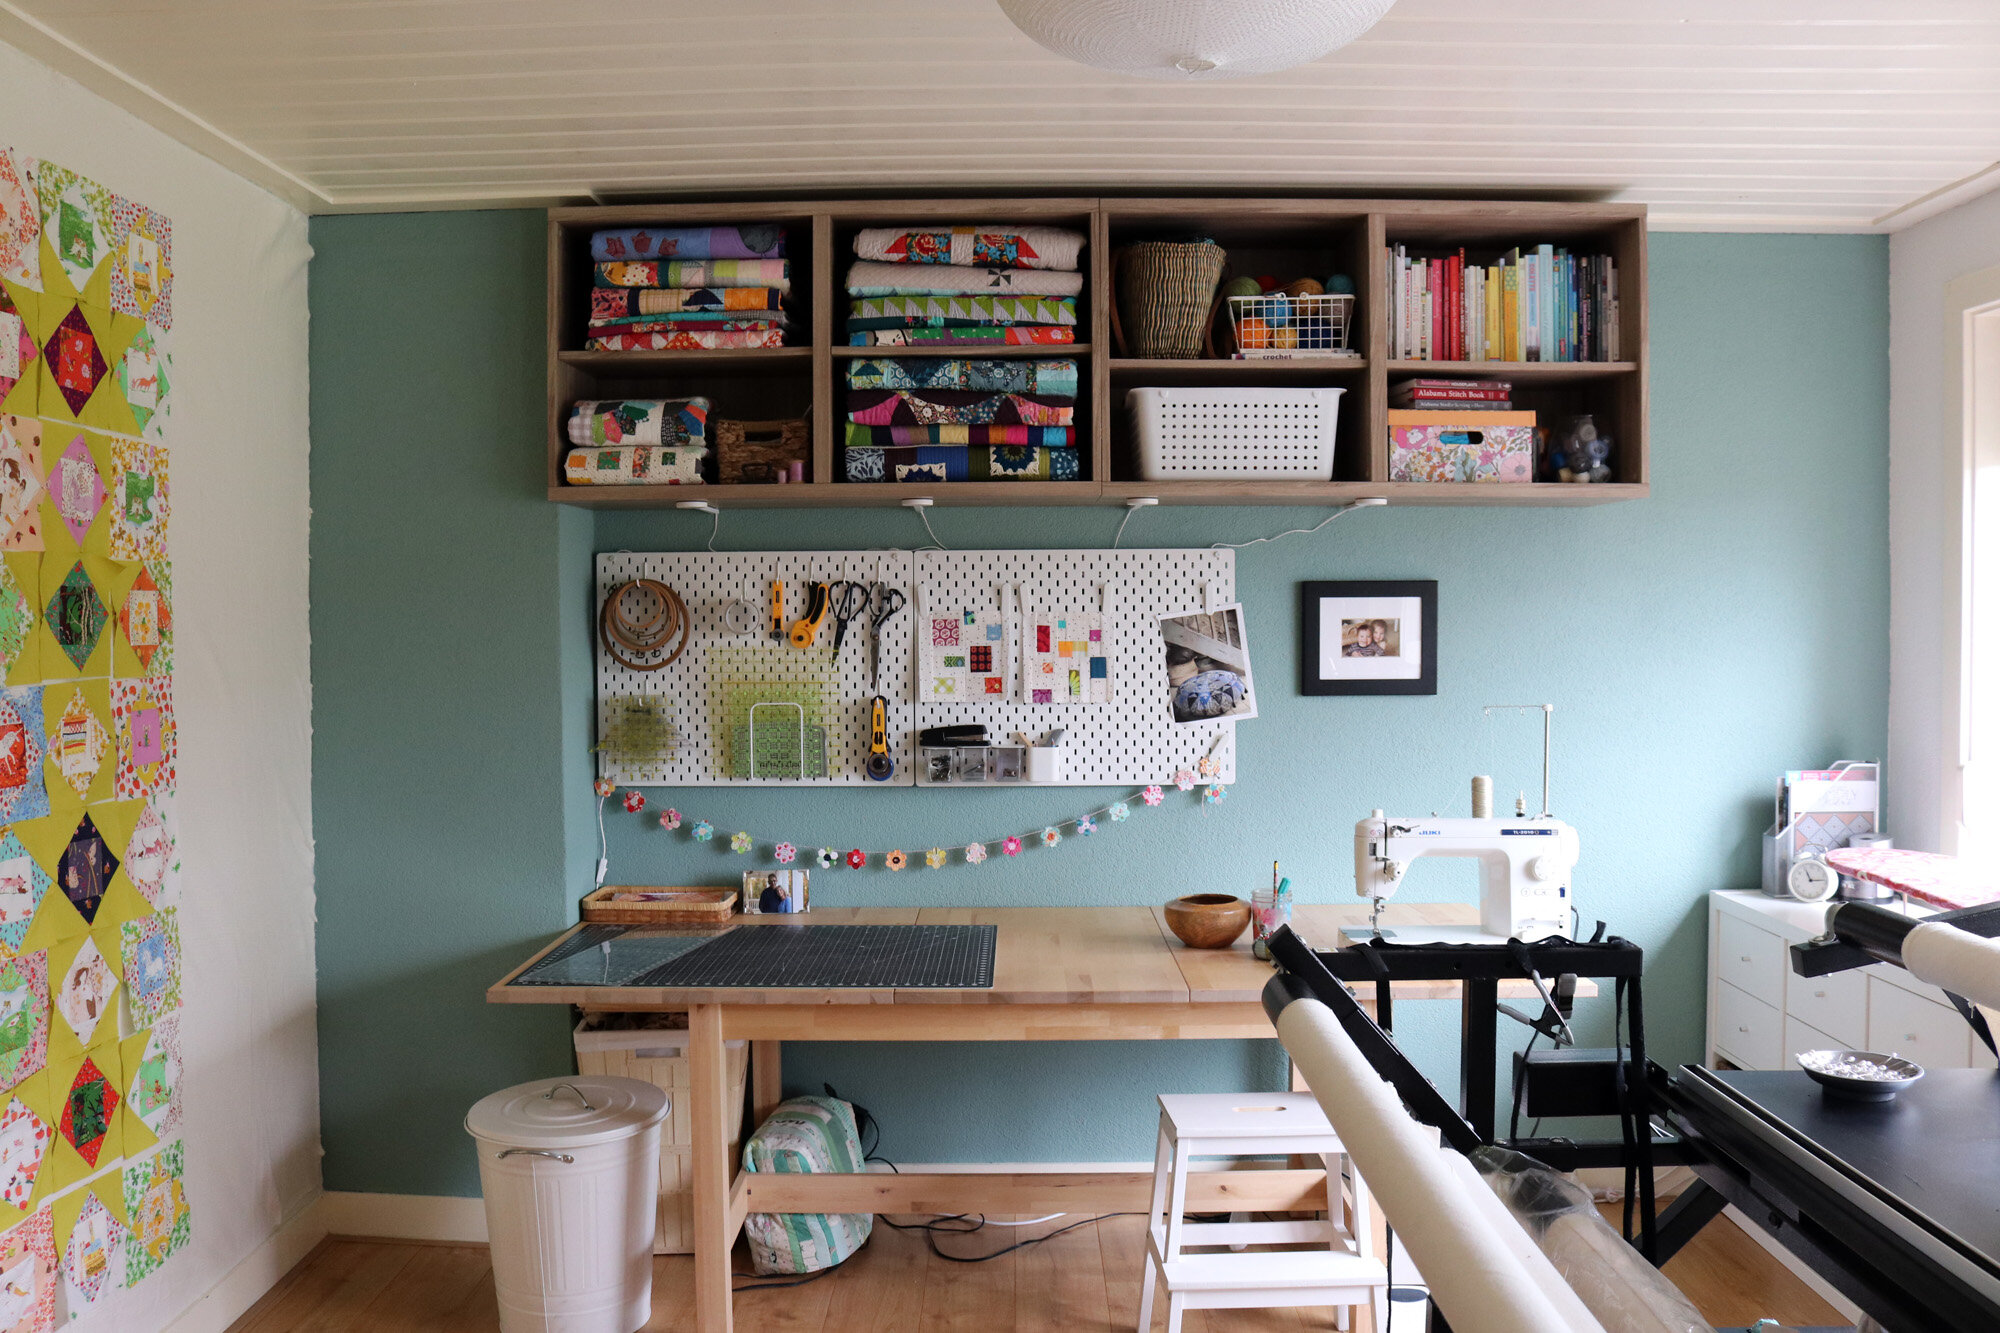
The large table for cutting and sewing is strategically placed with the design wall to one side and pressing station to the other, just under the windows. When I come into the room, the work station attracts me like a magnet! I keep my main sewing machine, the Juki TL2010Q, out all the time. It only sews a straight stitch, but it’s the perfect machine for a quilter. My other sewing machine (for special stitches like zigzag and buttonholes) is under the table for easy access.
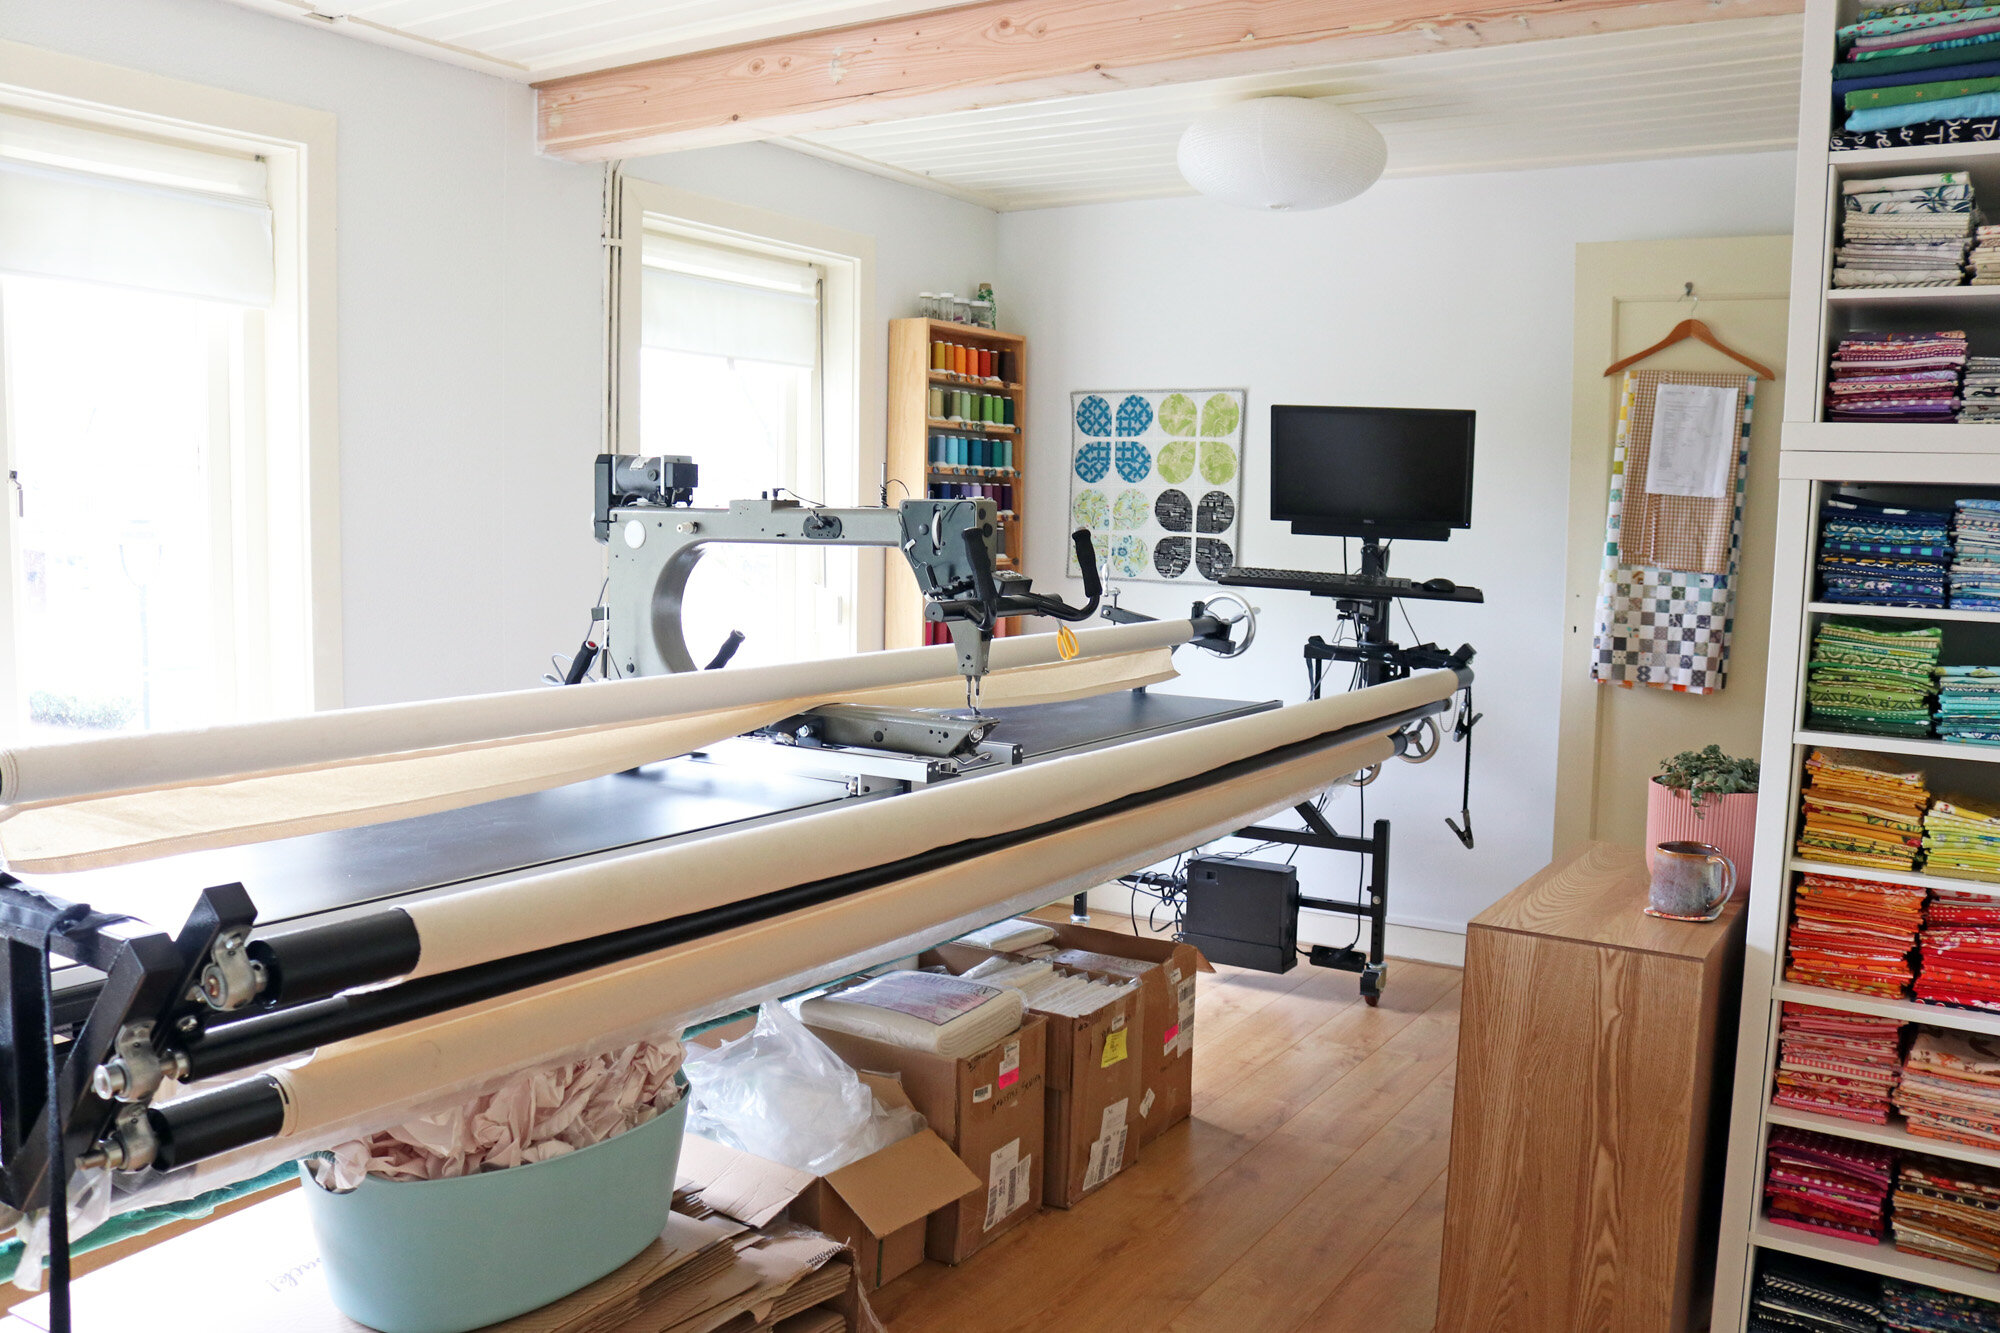
Standing now at the work table, let’s turn around to see the rest of the room. The longarm quilting machine takes up most of this real estate. It’s so big that we had to remodel our 1930’s Dutch house to accommodate, combining two rooms into one. That still-unpainted woodwork along the ceiling is hiding the steel beam placed where the old wall used to be!
Since longarm quilting is a large part of my business, I’m grateful to have everything together in one room. I can multitask while the machine is running (it’s computer-guided) and sew a little on my own projects. Under the longarm I store quilt batting and packing materials for my longarm quilting service.
Fabric Storage
Now that you’re oriented, let’s get to the good stuff - fabric!
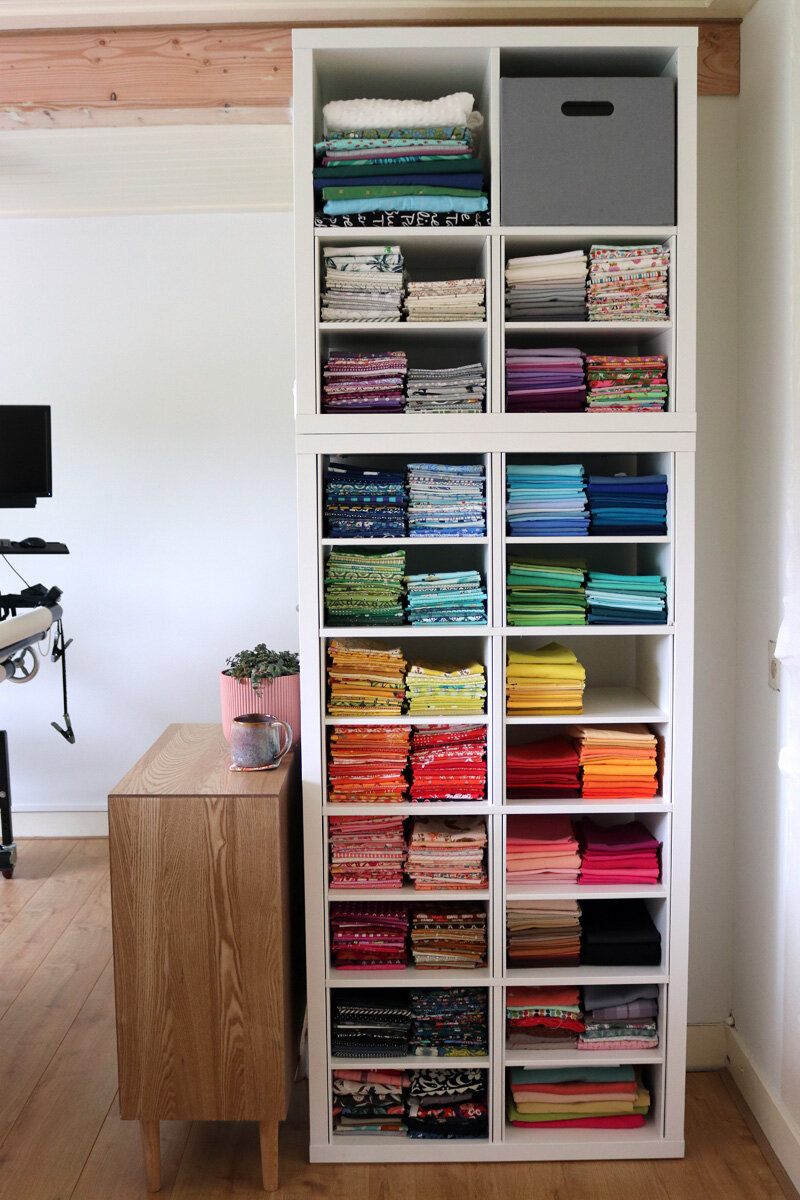
I’m a fan of keeping fabric in open shelving. This spot is out of direct sunlight and right beside my design wall. Ideal!
All fabrics fat quarter and larger are organized on these shelves by color. Generally, prints are to the left and solids are to the right.
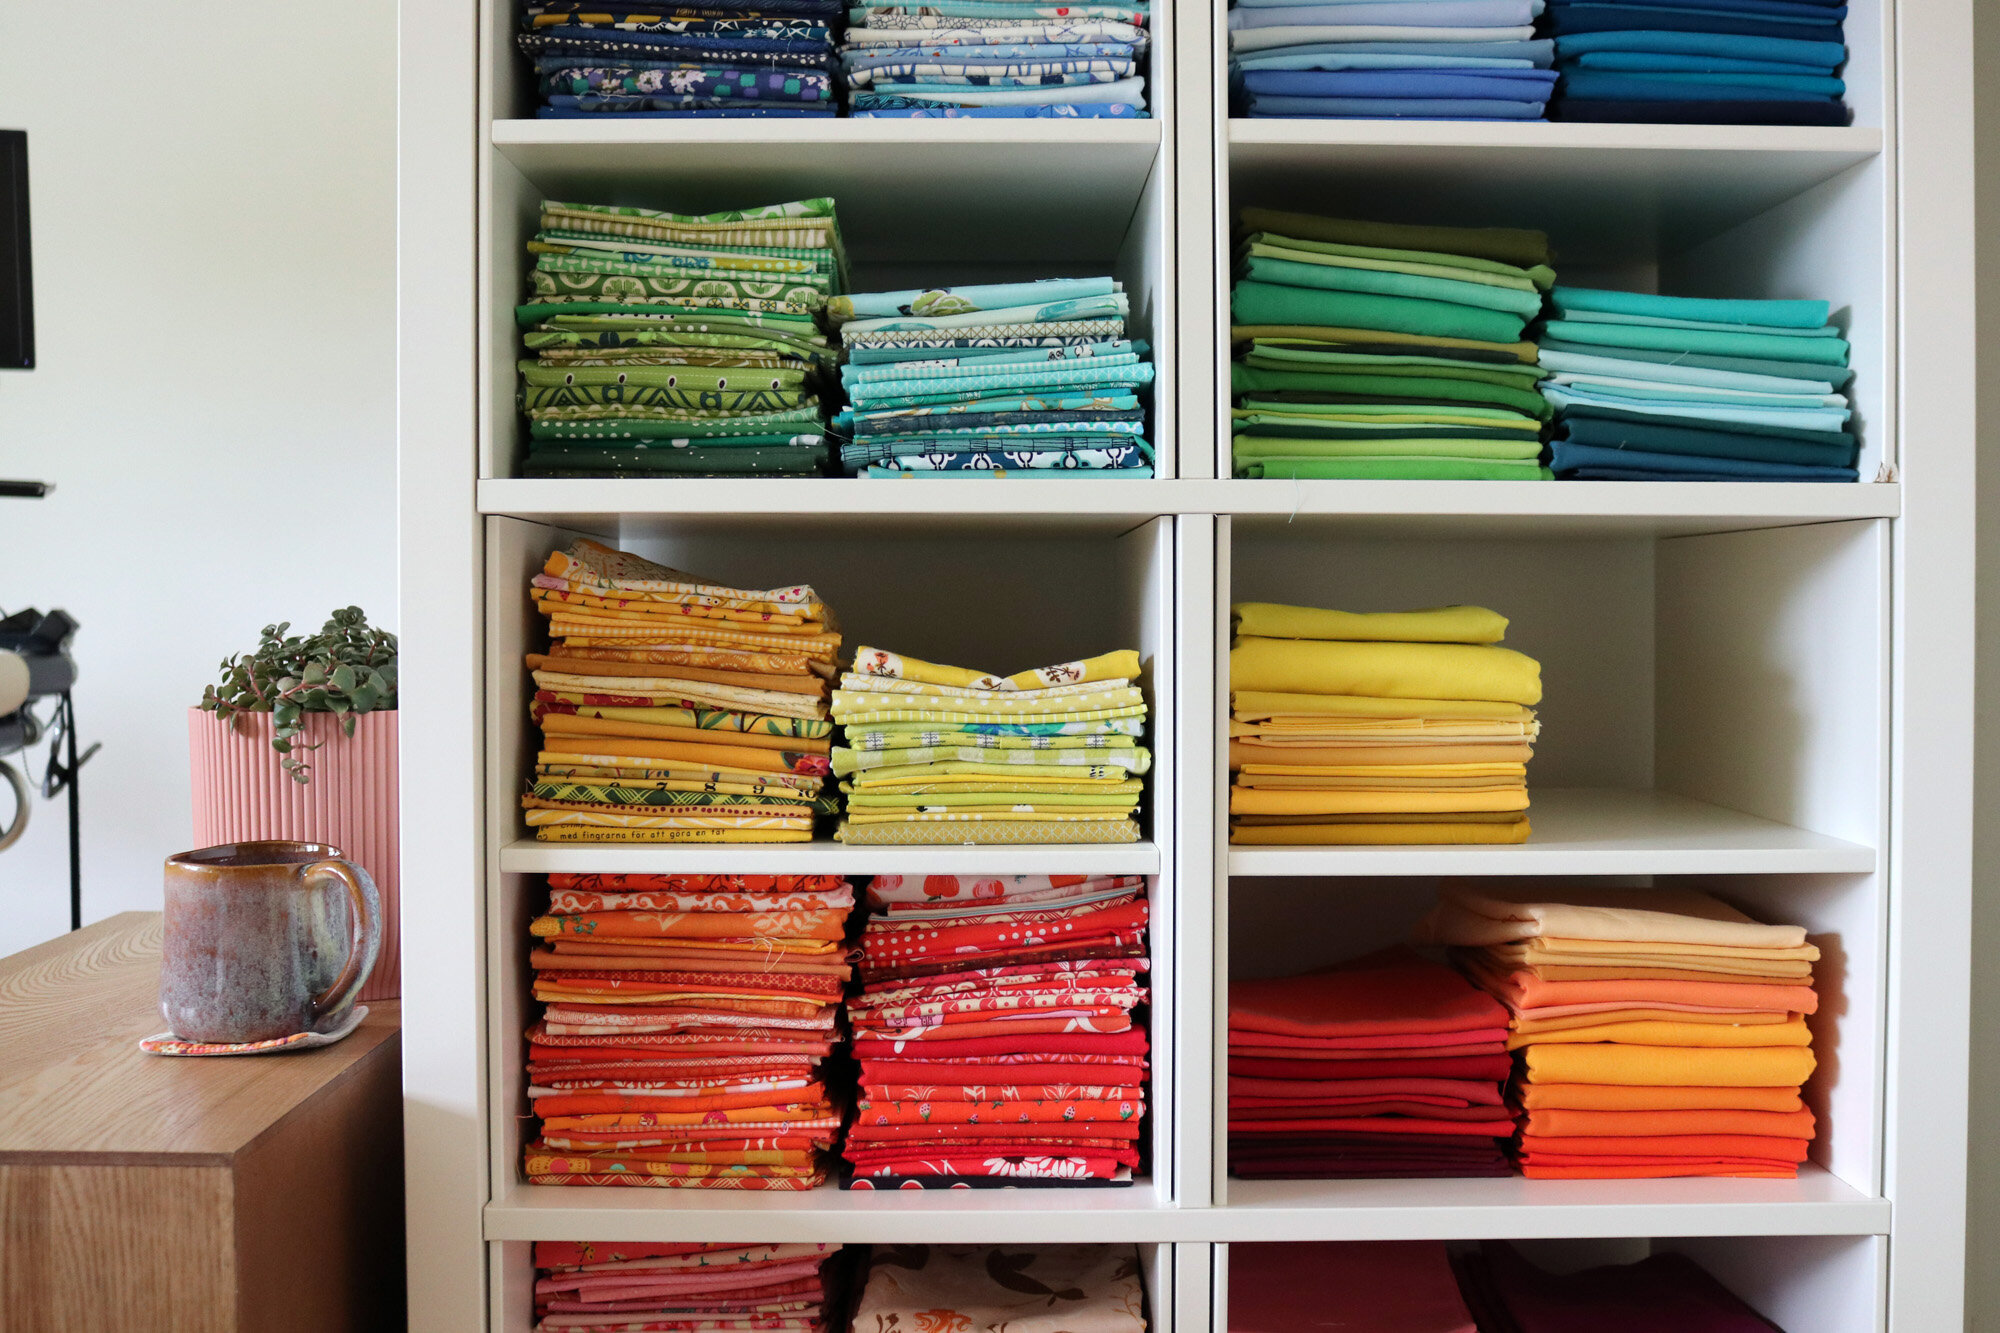
I find organizing fabrics by color to be quite practical. As I accumulate more fabric over the years, I add more distinctions. For example, now I separate my golden yellow prints (left) from my lemon yellow prints (right). I also have separate stacks for pink, magenta and peach. When I’m gathering fabrics for a quilt this helps since color is usually my first design element.

Since I’m a quilter more than a garment sewer, I store my garment fabrics at the bottom of my shelving. These are organized by substrates like voile, double gauze, flannel, knits. etc.
Can you also spot a stack of multicolor quilting cotton prints? Look to the right of the black printed fabric stack. Multicolor prints, which don’t have one main color, are not my go-to fabrics. Still, they can be a lot of fun. I have them grouped by value, so this dark value stack is living by the black prints.

Here at the top of my fabric shelving I’m storing backing fabrics (top left) and my neglected ideas bin (top right). Haha, I’ve never called it that before, but it’s apt. There’s only one abandoned “work in progress” in that gray bin, but there are lots of ideas for new projects in seed form. I’m hoping that placing it here with my fabrics might help me remember they exist!
A sharp eye might also spy my low value and mid value multicolor print stacks. The low value stack has had a growth spurt, thanks to leftover yardage from the Economy Stars quilt!
Work Table + Essential Storage
And where do beautiful fabrics send us? To the cutting table, of course!
Truth be told, I do like to keep my work table rather clean. Every time I finish a project I enjoy putting away the leftover yardage and scraps to create a fresh, new beginning. This wide, open space invites my creativity and welcomes me in.
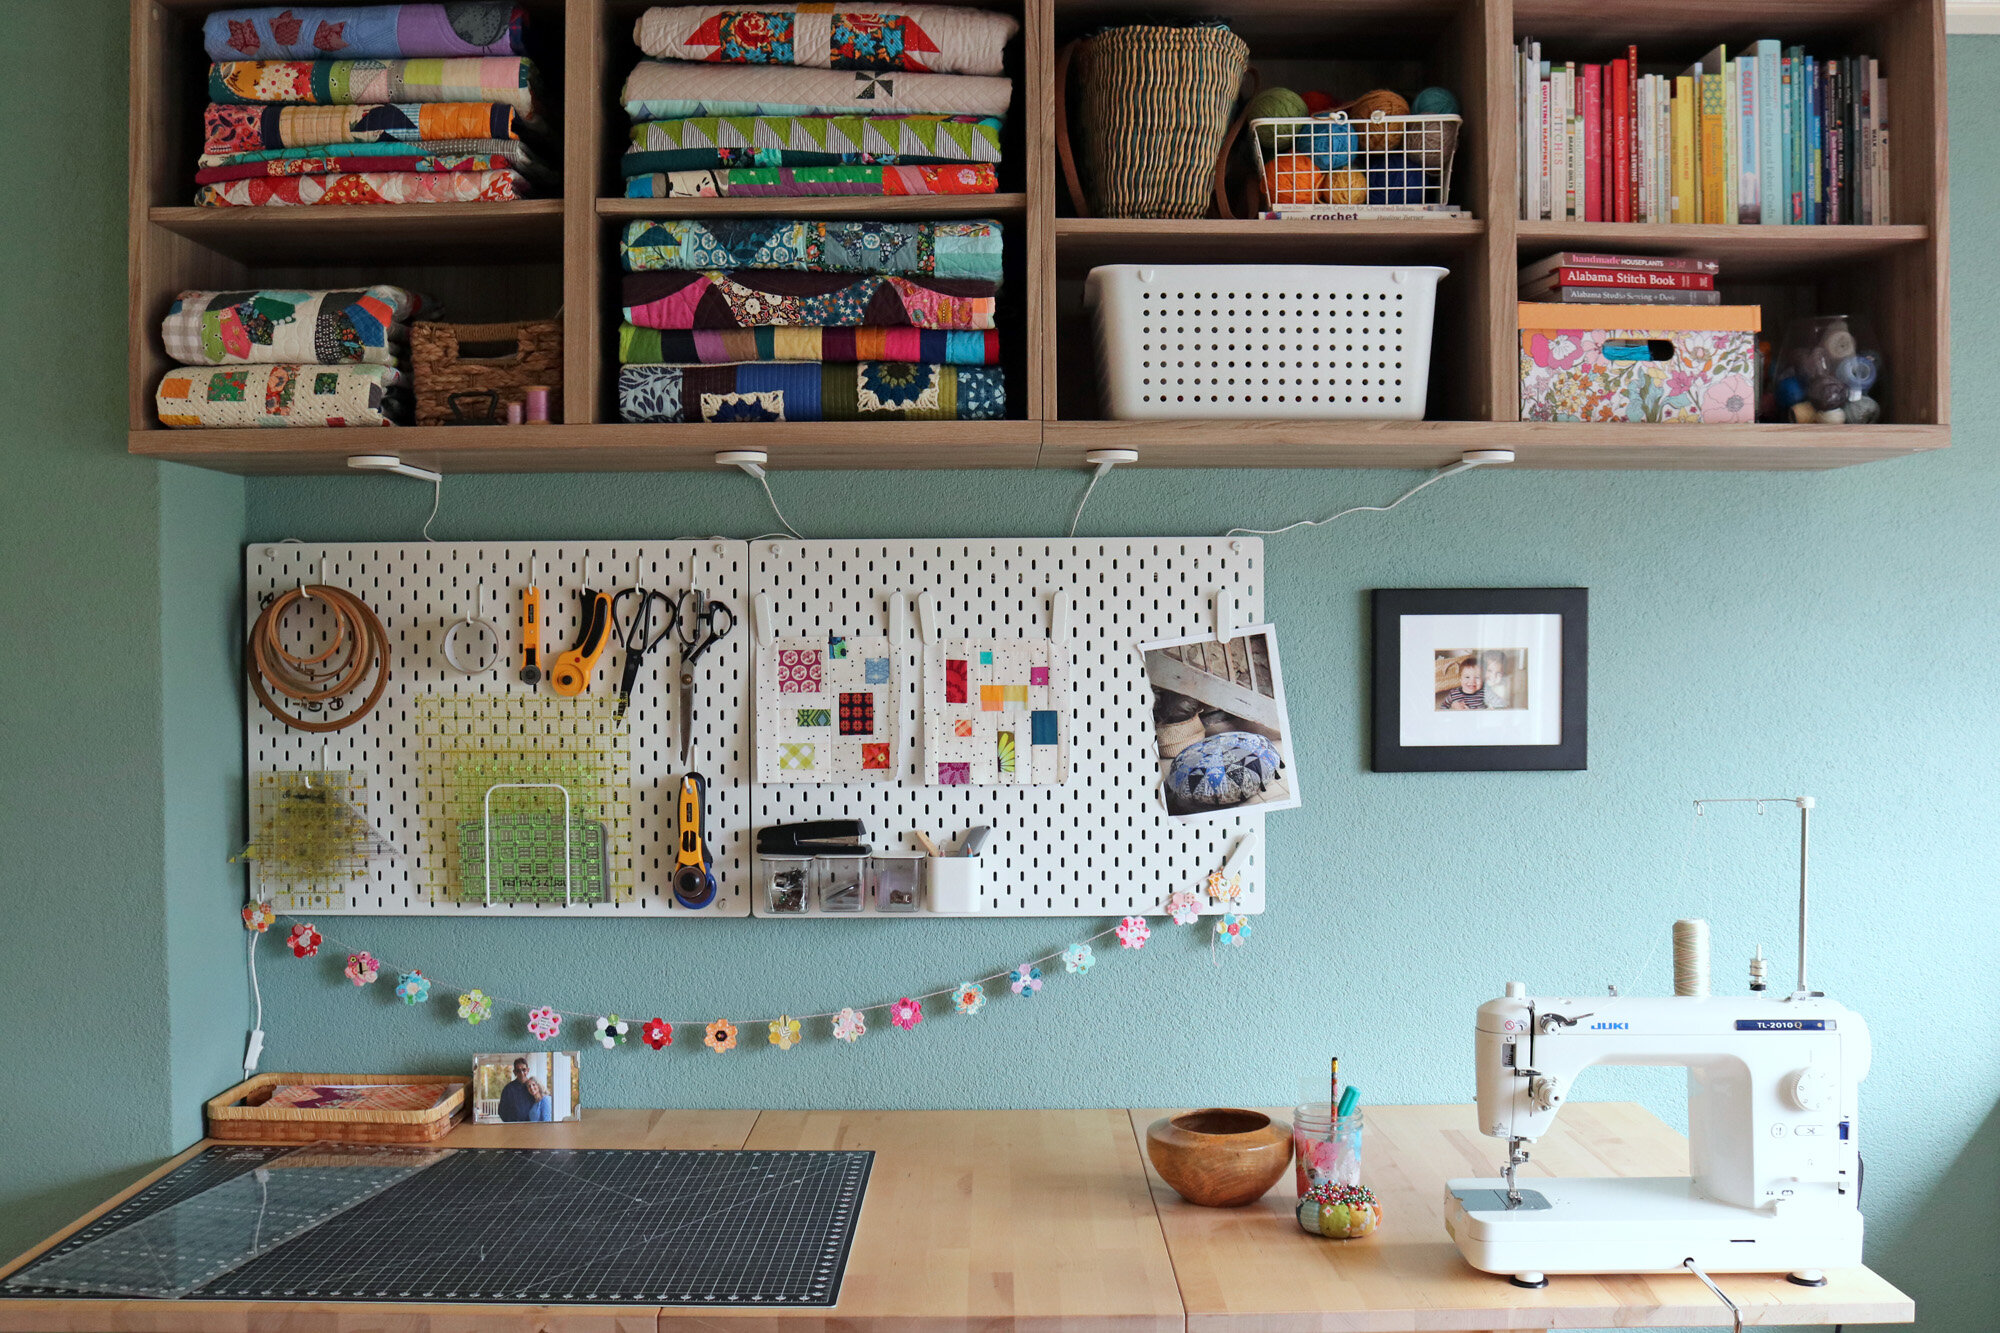
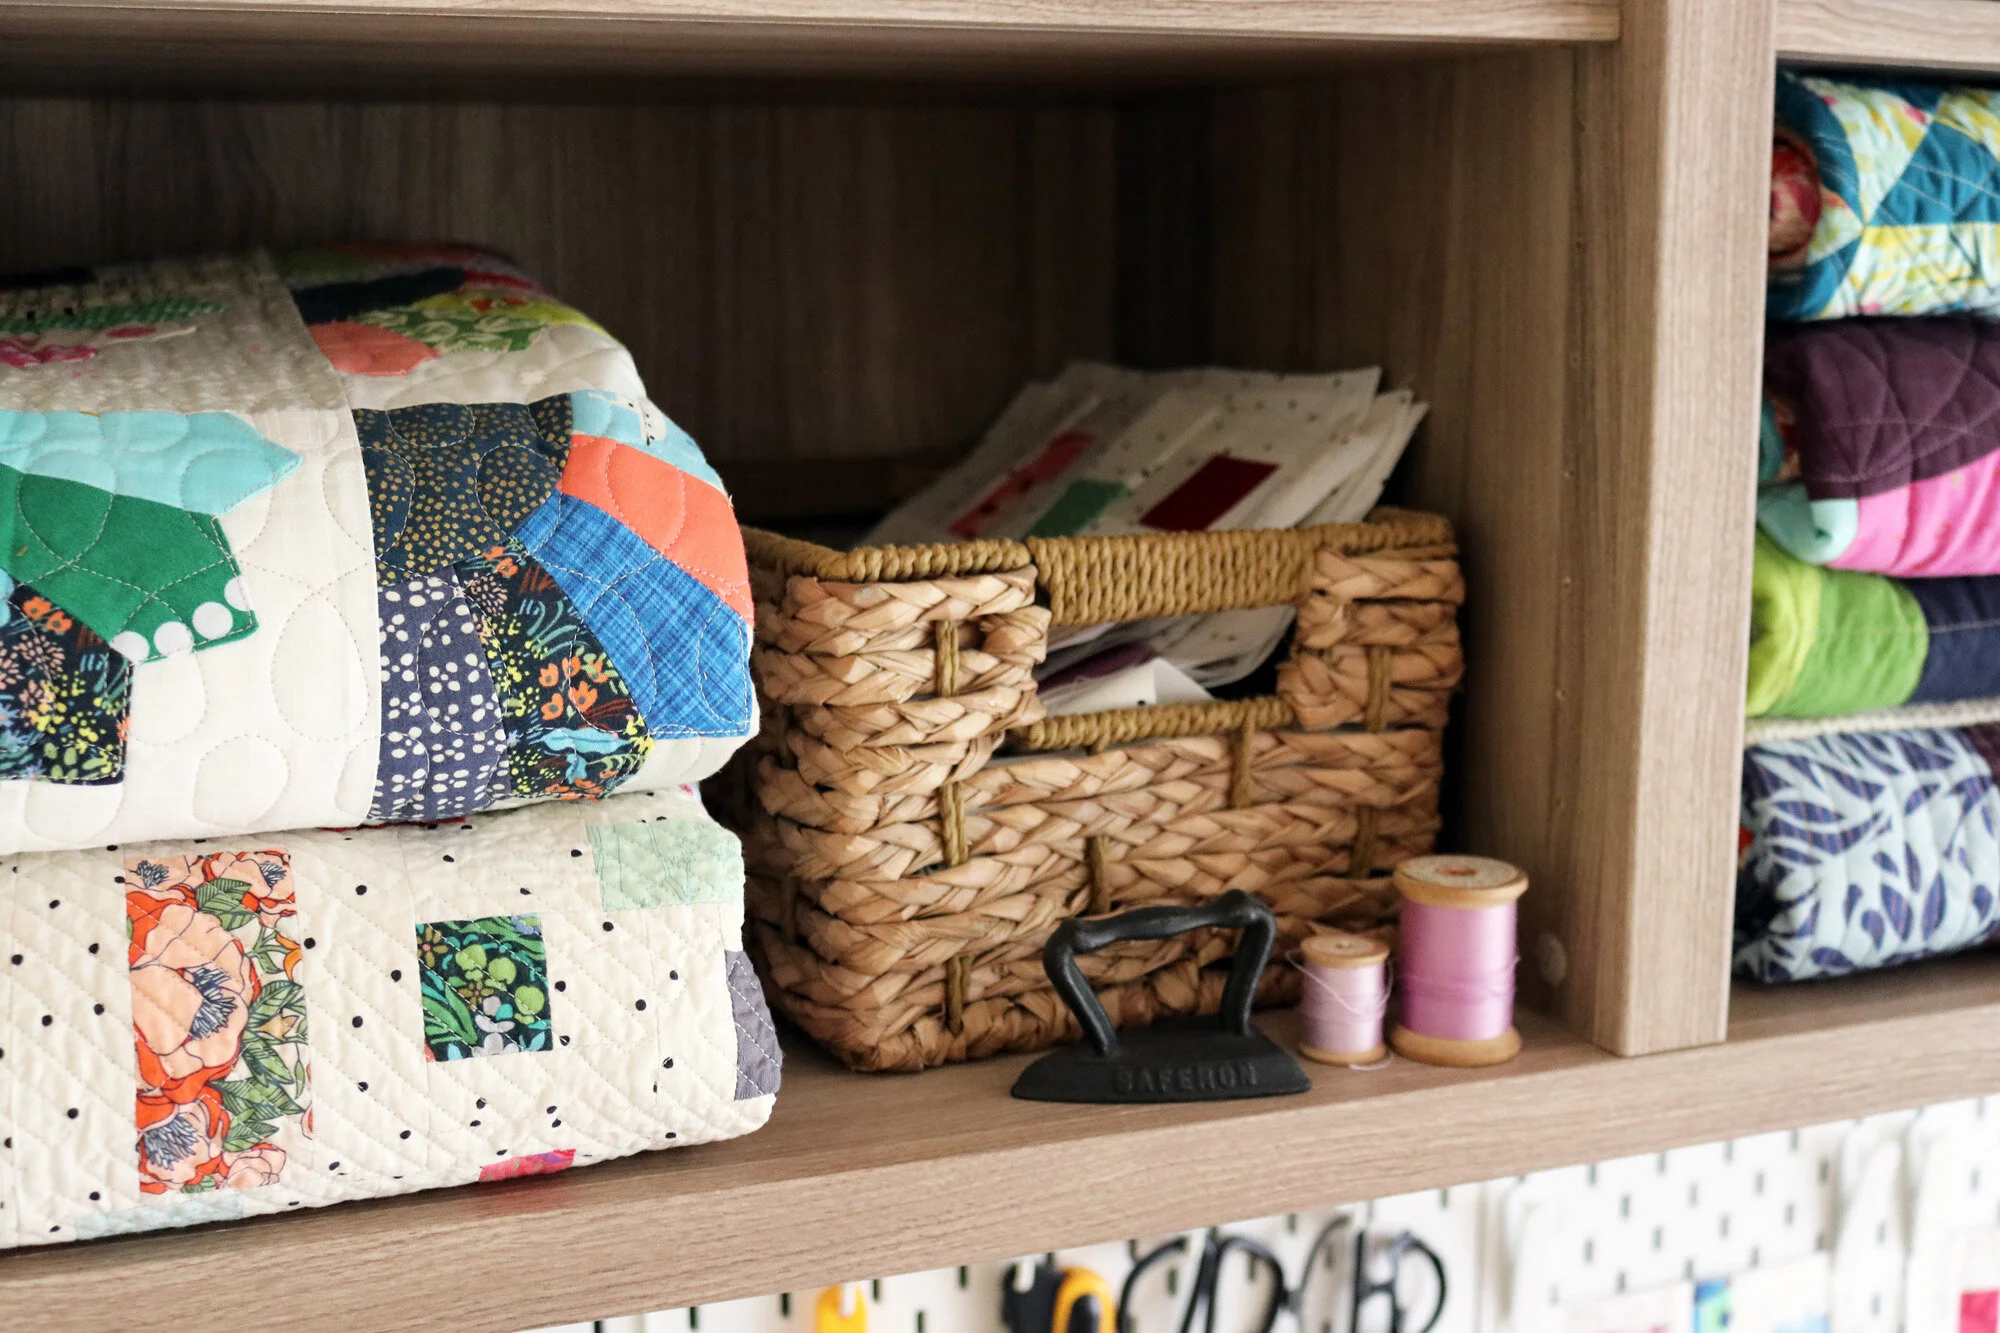
The open shelving overhead is a new feature for this sewing room. Here I’m storing quilts I keep as markers of my artistic development, my quilting books, pretty supplies and true work-in-progress bins.

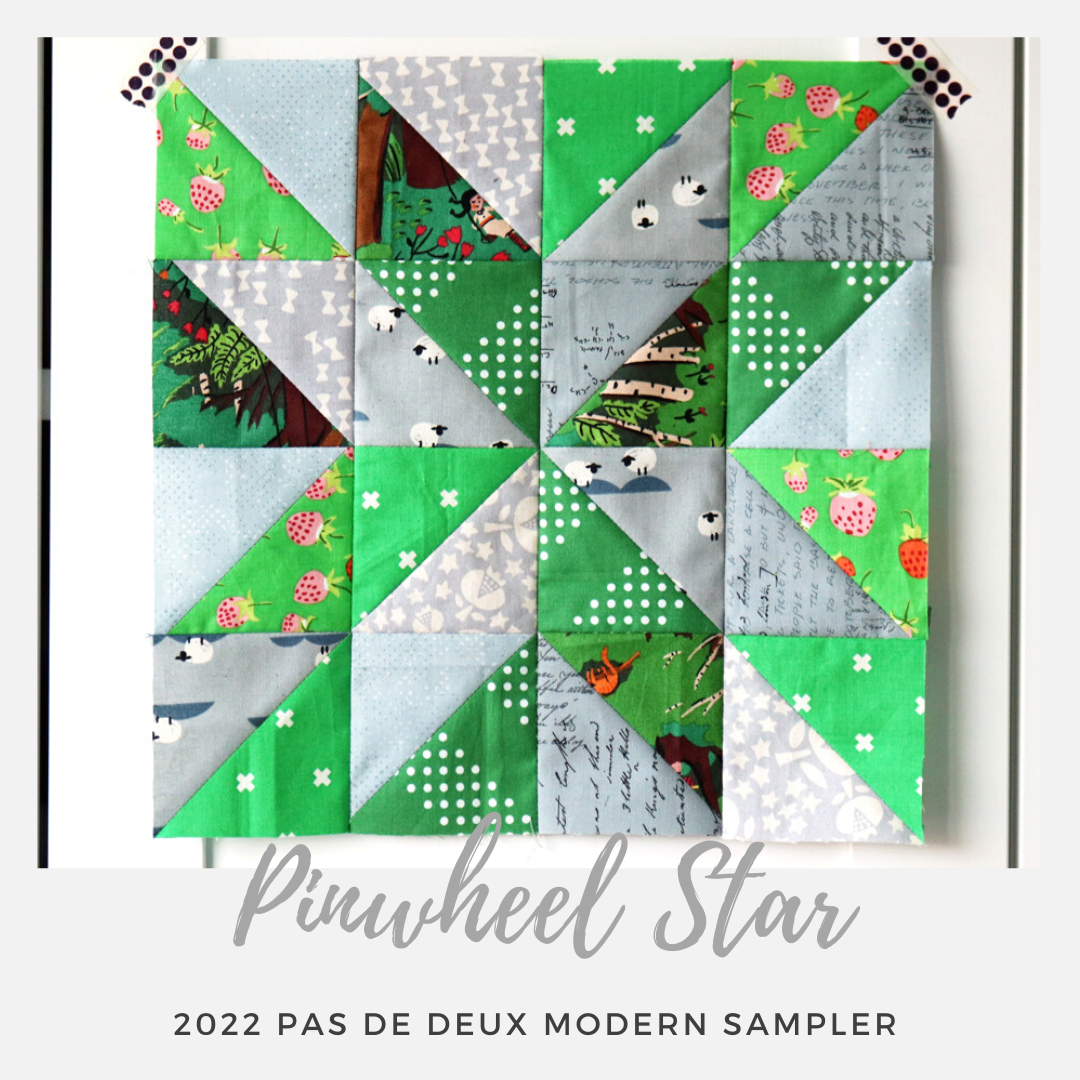
This small bin is for projects that I’m working on intermittently. It allows me to put them away without forgetting about them! Right now I’m storing my Confetti quilt blocks in there. I pull out this basket a few times a month to sew a few blocks.
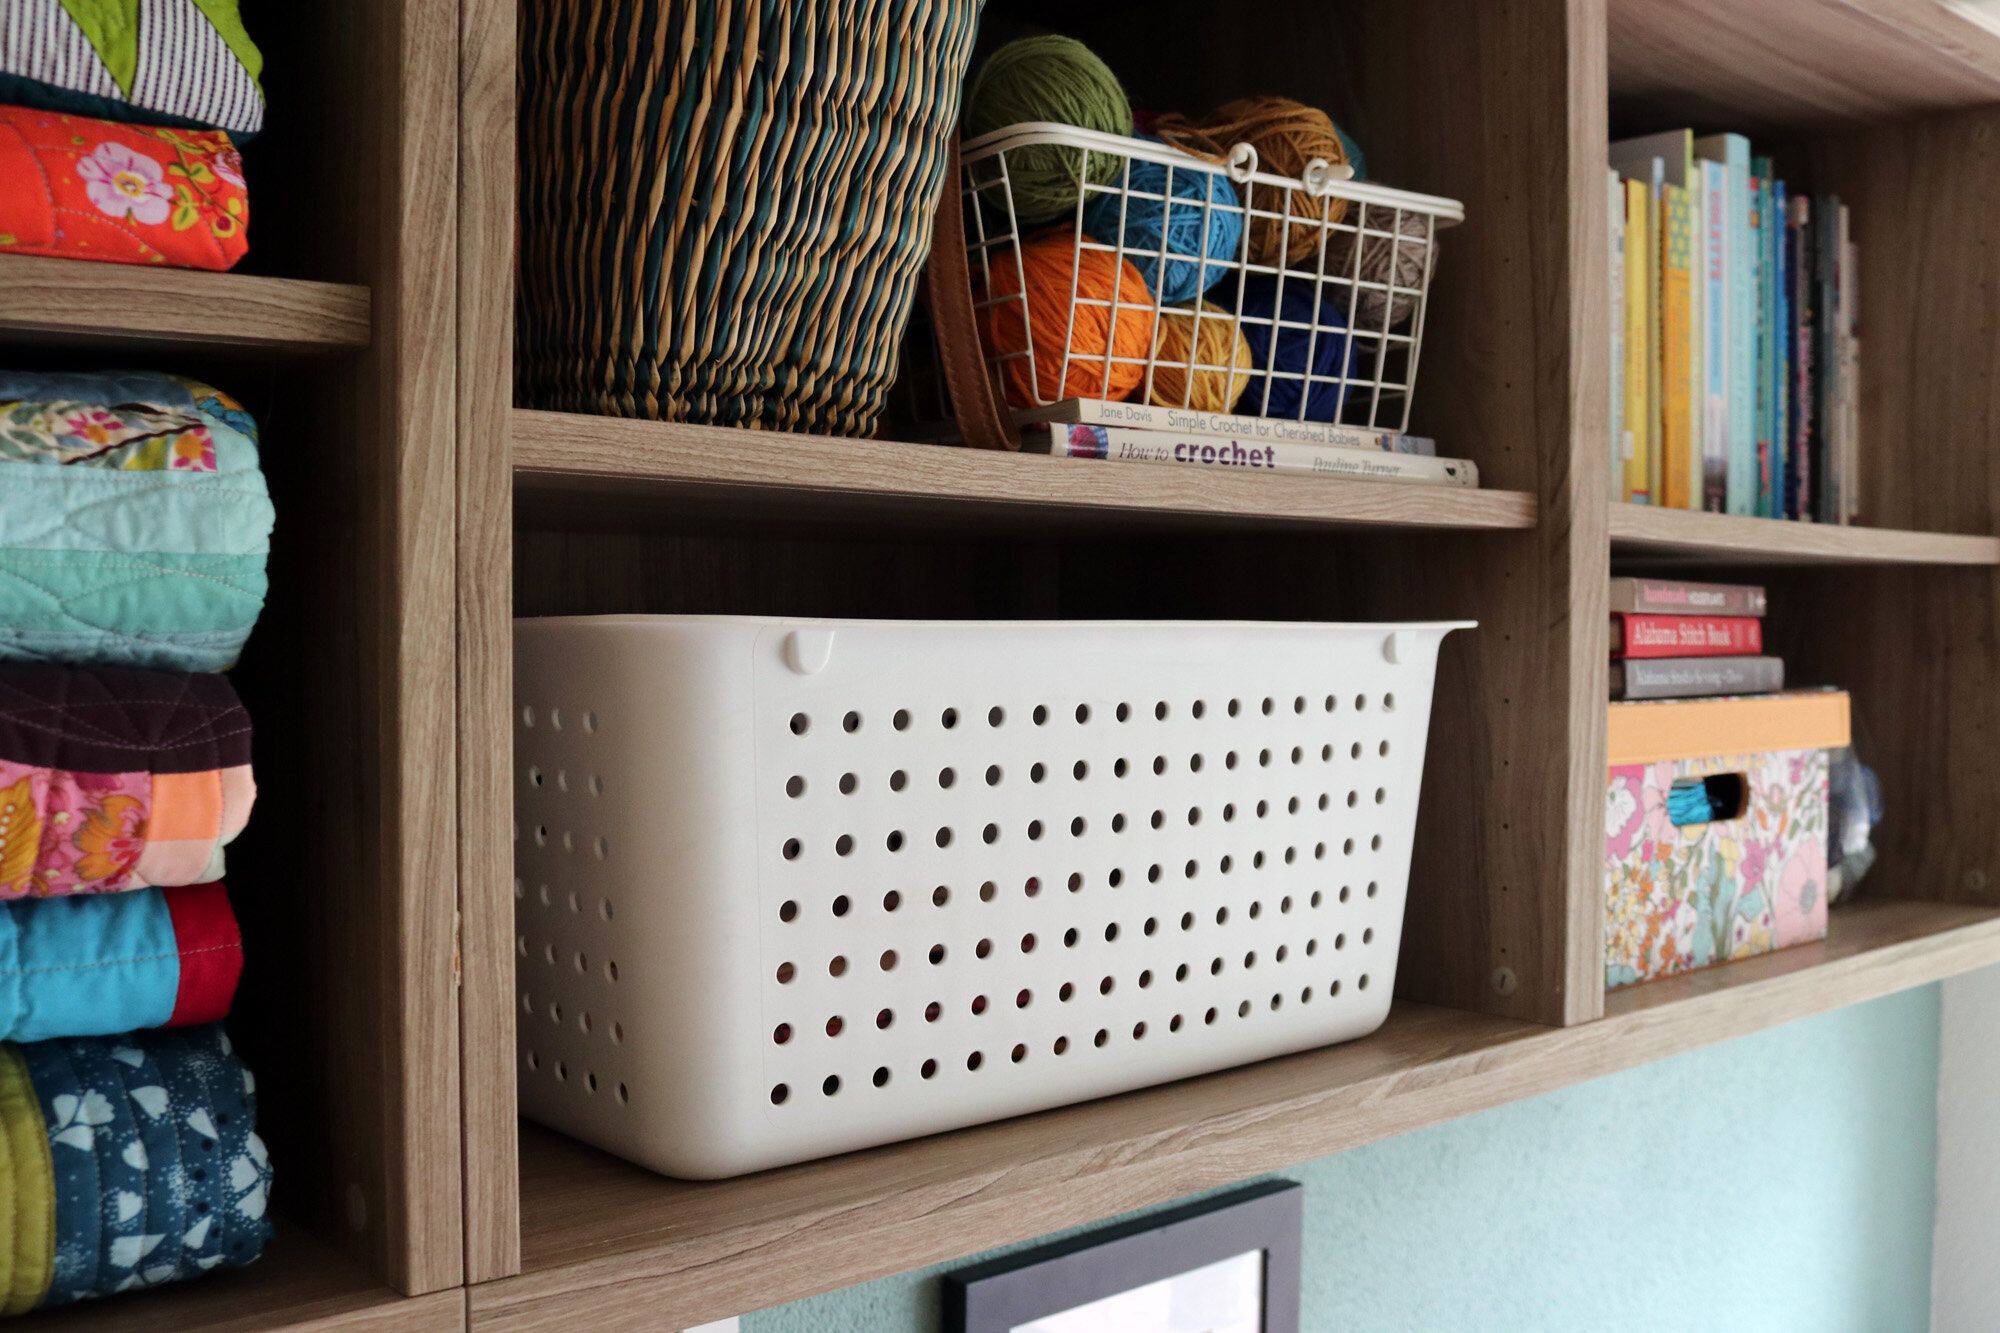
This big white bucket is for larger works-in-progress. It’s nice for block-of-the-month quilts like Penny Sampler or for those times that I pull a bunch of fabrics for a quilt before it’s actually time to start working with them!
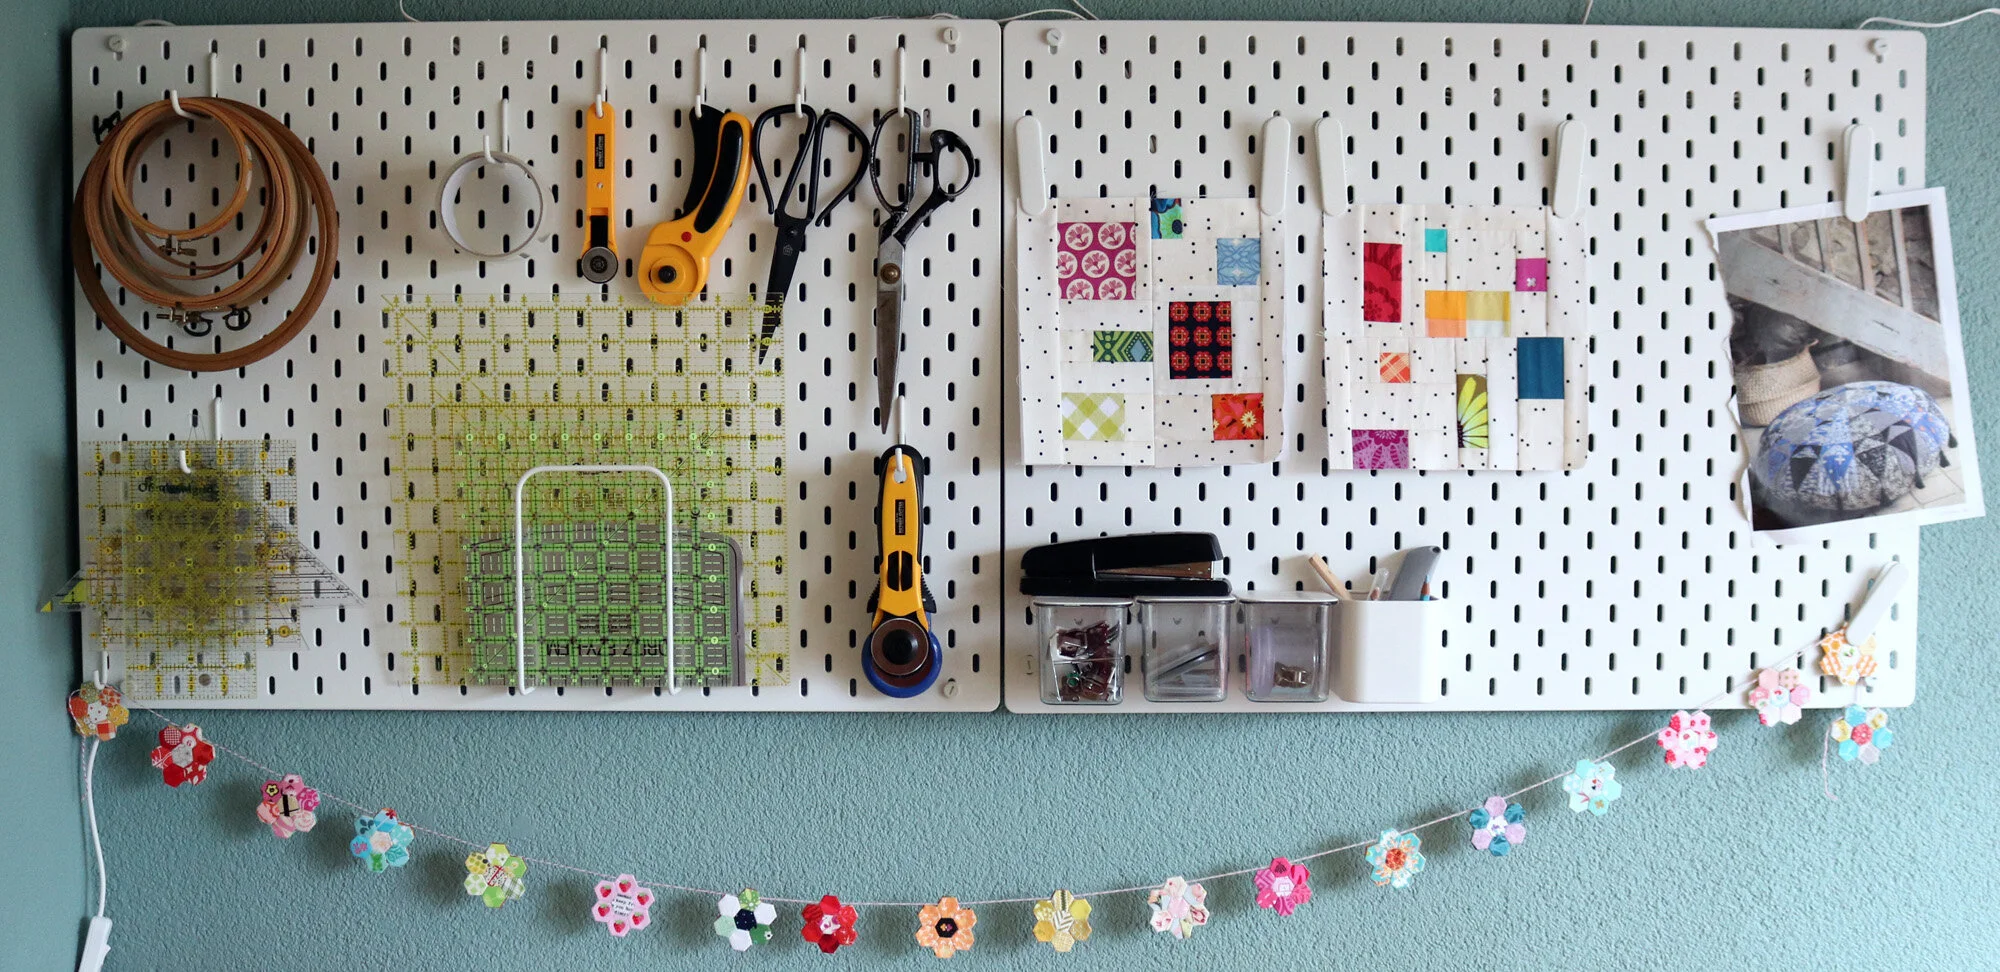
I love, love, love using a peg board for essential tool storage. I didn’t try this until after researching and writing QuilterSpace, my course for sewing room organization. Via the process I realized just how much sense this makes. Everything is out within reach, but off the work table. I think it also looks really serious (wink), so that’s cool. In this sewing room I have extra wall space, so I added a second peg board. Now I have space to display blocks for projects I don’t want to forget or to pin inspirational photos. It’s the “mini design wall” concept I suggest in QuilterSpace.
Design Wall
I’m writing this as a separate section, because it really is so important. This big, empty wall covered in quilt batting is one of my biggest assets. If you want to create your own quilt designs, I encourage you to make space for a design wall if at all possible. It seems like a luxury (well, to be honest, our whole hobby is just that!), but once you have one you will realize that it opens new windows of possibility.

There are lots of different ways to make a design wall. In fact, QuilterSpace goes in detail on that subject. It’s easier than you think!

Pressing Table + Scrap Storage
The grassy square outside our home is a favorite for dog walkers. I’m guessing they’re starting to wonder why the woman who lives in number 10 is so often standing at the upstairs window in exactly the same spot, lol.
Well, you understand - I’m pressing fabric! My ironing board lives on top of my scrap drawer station. I’m really enjoying that it looks out over the square. There’s nothing better than a bit of nature to rest the eyes and the heart.

On that note, check out my newest studio friends. This window is super-sunny, so I hope they’ll be happy here, despite the occasional nibble from Olive the cat.

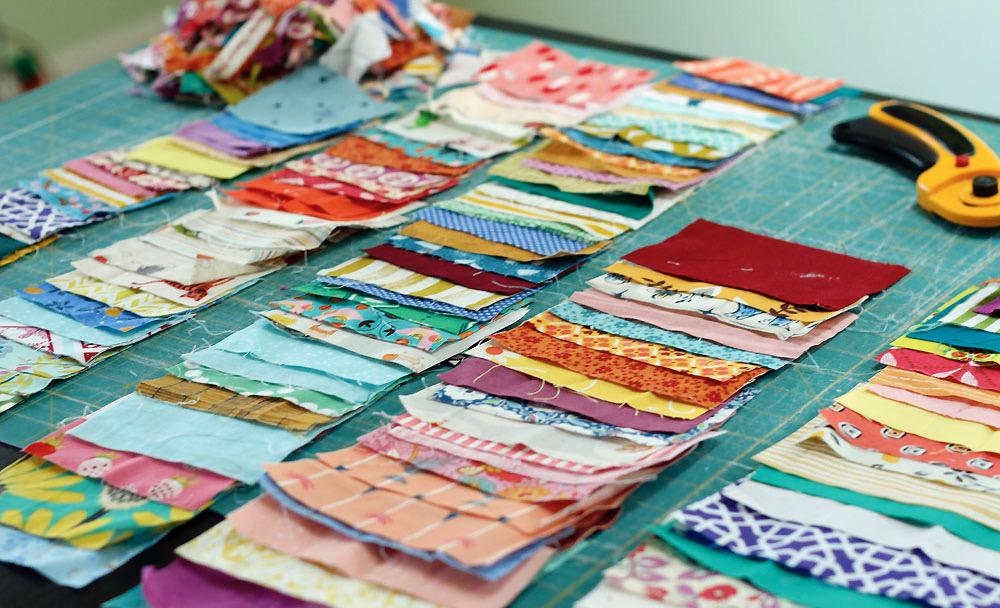
The scrap drawers make me so happy! I really use my scraps so much more, since adopting this storage system years ago. My scraps are organized by color and by size and by substrate. A bit of an organization enthusiast? Yep, that’s me. Well, scrap organization is also a big theme in QuitlerSpace. I really want to help other quitlers in this area because fabric scrap play is my favorite!

These natural fiber bins are new for me. I’m using them for substrates other than quilting cotton. I moved my slinky scraps into one and my chunky fabric scraps into another. Maybe soon I’ll make an all-voile scrap quilt. Those are lovely!
Longarm Supplies + Closed Storage
Hmmmm, what’s left?

Only more than half of the room, haha. But this half goes quicker. That little drawer system on the right houses all of my small notions like spools of thread, bobbins, EPP papers, extra rotary cutters and misc. small supplies. It’s been super handy! Little drawers are the best for dealing with tiny things.
Beside the entry door is a closet door. Every sewing room needs some closed storage for the not-so-attractive elements. In my case this is longarm quilting central. Handy that I can simply shut the door when I’m not on the job.


I’ve hidden my file cabinet, air compressor (for cleaning the longarm), longarm bobbin winder, printer and more inside this closet. If you come by for a visit, I expect it will be closed.
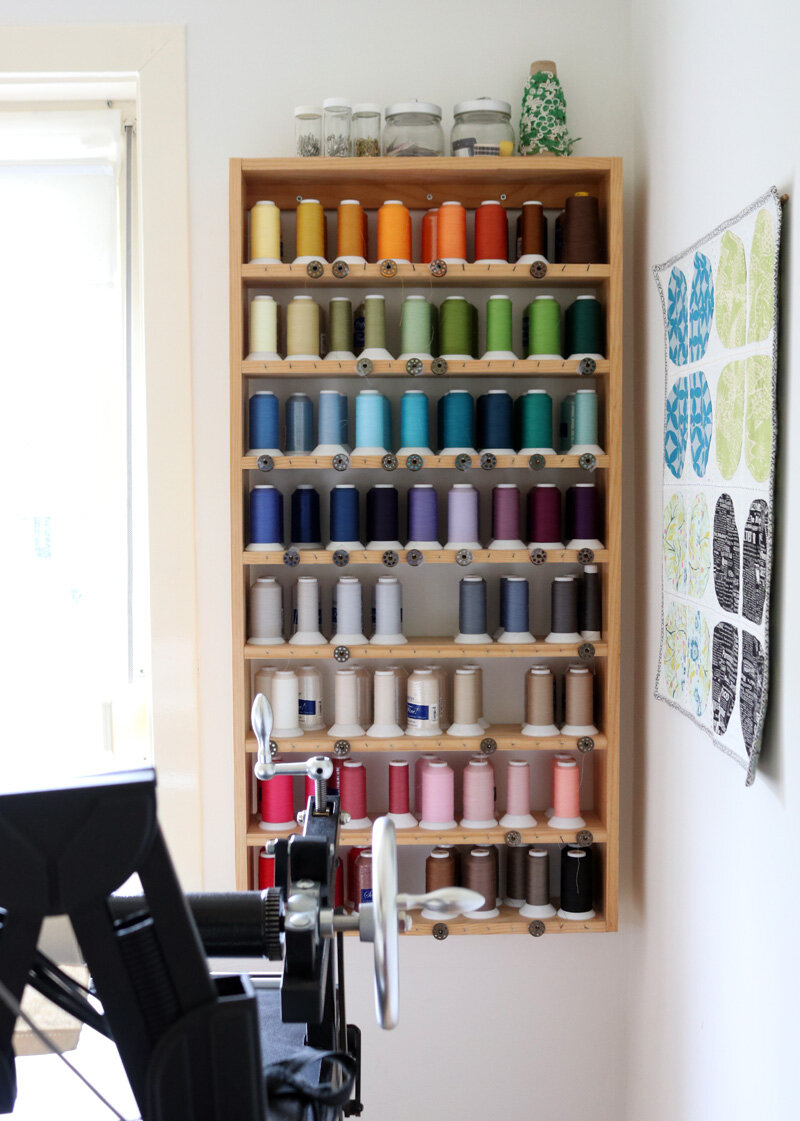
But this rainbow assortment of longarm quilting thread - that’s proudly displayed. My husband built this thread and bobbin shelf, and it’s been a favorite ever since. I love to combine the beautiful with the practical!
Phew! That was a lot of photos and details. I hope you enjoyed! If you’re looking for even more ideas and inspiration for organizing your sewing space (be it big or small), I invite you to consider QuilterSpace. In this 72-page PDF, I guide you step-by-step through the process of decluttering, creating a vision, establishing work stations, using your space efficiently and implementing storage ideas for fabric, scraps, notions, patterns, unfinished projects, upcoming projects and much, much more. Download and unpack the materials at your own pace.
My thanks to the faithful readers who inspired me to write the course in the first place and who have likely already followed along. I think I’ve benefitted a lot from thinking and writing in depth about sewing room organization. It adds to my enjoyment when I have the opportunity to set up a new space for myself.
May your QuilterSpace be a joyful and creative space, now and always!