plum scrappy
Ya know, I really like the word "scrappy". And, scrapilicious. But, today I get to call this project "plum scrappy" which really takes the cake. I made another journal cover with fabric left over from last week's patchwork curtains. Oh, and thank-you very, very much for celebrating with me on that finish. I'm still kind of surprised each morning to find something so very quilty hanging on our walls. The kittens haven't climbed them yet, but you'll probably hear me scream when they do. And, yes, the patchwork is lined... since many of you were wondering. I think that covers it.
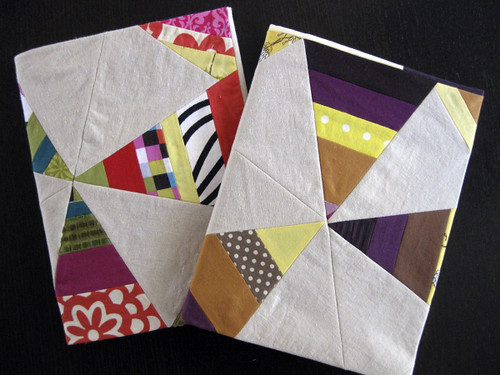
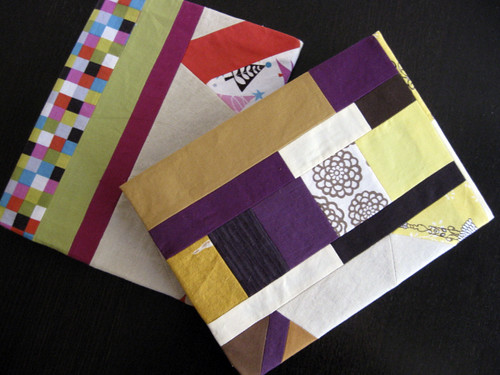
Today is about journal covers. I'd like to walk you through the how and why's for this wonky pinwheel design. In case you want to know. On the left is the first journal cover I made, and on the right you'll find "plum scrappy". hehe.
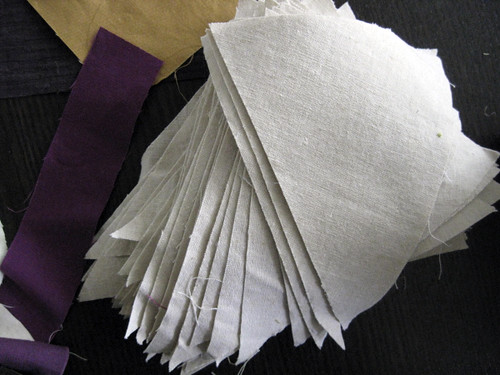
My creativity usually springs from some very practical origin. Case in point: these stacks of linen triangles are fully responsible for that wonky pinwheel design. And why do I have a ridiculous stash of linen triangles? They are trimmings from my Spiderweb Christmas Tree Skirt (tutorial part A and part B), and you're only seeing the half of it. Eight triangles sewn together would create a nice 11" square. But that would be too easy, so...
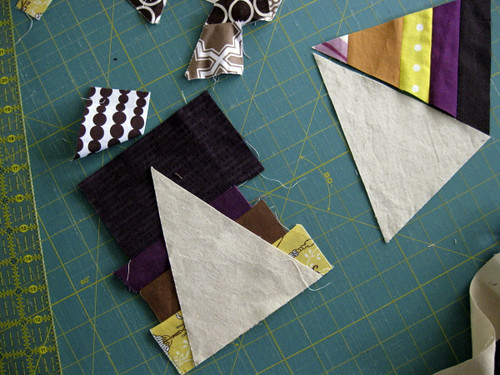
I've pieced scraps without a base, just using a triangle as a reference point to make sure the scraps are the right size.
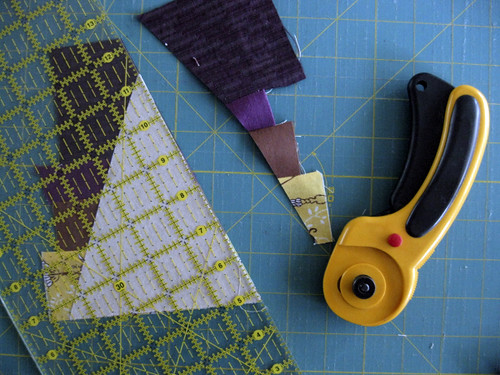
Next I'll lay the triangle on top and trim my piecy business to match. Add 3 pieced and 5 plain triangles together (all the better to use up the plain ones), and you have...

the fabulous, not-so-incredible wonky pinwheel. Which probably would show off better used flat. But I have so far only sandwiched her with other scrappy nonsense and folded her up as a composition journal cover.
Poor thing.
If you'd like to make your own wonky pinwheel and don't have a ridiculous stash of linen triangles, you can create yours pretty easily. Just take a square and lay it flat on your cutting mat. Cut it in quarters and then, slice each of those quarters in half again, always making cuts dead-on through the center of the square. You should have 8 happy triangles willing to do your bidding.
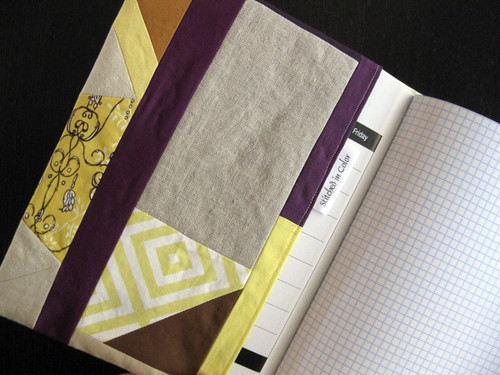
Now, here is the back of my wonky pinwheel journals. I'm always a little put off by combining the straight lines with the triangles, but in the end I like how it looks. All of my journal covers are made loosely following this tutorial.
Oh wait, I have a little something else to share! Look, I have labels!

These are from Gutentags on Etsy. Thanks to Jolene for the recommendation! Cassie of Gutentags was so very nice to work with. She helped me wrap my sadly overtaxed brain around the dimensions and spacing so that my tags came out just right. I chose center fold tags, which are designed to be stitched into a seam and peak out at the side. They are printed on ribbon, so the edges won't unravel. Each piece that you're seeing is 2 tags, so you simple cut to divide them, fold and press, then sew them in.
Tada! Too bad my top-stitching came out so poorly. My machine seems to be sick because she's feeding badly all the time. Not feeling badly, feeding badly. In this case, the thin little tag gave her a hiccup or two. It's probably pretty fishy to blame bad stitching on a machine, though. I think the right thing to do is fix it, yes? Or, get a new sewing machine. Or both.
I wish I could say I was off to work on those, but instead we're headed to homeschool group, our weekly social. Gotta run!
Today is about journal covers. I'd like to walk you through the how and why's for this wonky pinwheel design. In case you want to know. On the left is the first journal cover I made, and on the right you'll find "plum scrappy". hehe.
My creativity usually springs from some very practical origin. Case in point: these stacks of linen triangles are fully responsible for that wonky pinwheel design. And why do I have a ridiculous stash of linen triangles? They are trimmings from my Spiderweb Christmas Tree Skirt (tutorial part A and part B), and you're only seeing the half of it. Eight triangles sewn together would create a nice 11" square. But that would be too easy, so...
I've pieced scraps without a base, just using a triangle as a reference point to make sure the scraps are the right size.
Next I'll lay the triangle on top and trim my piecy business to match. Add 3 pieced and 5 plain triangles together (all the better to use up the plain ones), and you have...
the fabulous, not-so-incredible wonky pinwheel. Which probably would show off better used flat. But I have so far only sandwiched her with other scrappy nonsense and folded her up as a composition journal cover.
Poor thing.
If you'd like to make your own wonky pinwheel and don't have a ridiculous stash of linen triangles, you can create yours pretty easily. Just take a square and lay it flat on your cutting mat. Cut it in quarters and then, slice each of those quarters in half again, always making cuts dead-on through the center of the square. You should have 8 happy triangles willing to do your bidding.
Now, here is the back of my wonky pinwheel journals. I'm always a little put off by combining the straight lines with the triangles, but in the end I like how it looks. All of my journal covers are made loosely following this tutorial.
Oh wait, I have a little something else to share! Look, I have labels!
These are from Gutentags on Etsy. Thanks to Jolene for the recommendation! Cassie of Gutentags was so very nice to work with. She helped me wrap my sadly overtaxed brain around the dimensions and spacing so that my tags came out just right. I chose center fold tags, which are designed to be stitched into a seam and peak out at the side. They are printed on ribbon, so the edges won't unravel. Each piece that you're seeing is 2 tags, so you simple cut to divide them, fold and press, then sew them in.
Tada! Too bad my top-stitching came out so poorly. My machine seems to be sick because she's feeding badly all the time. Not feeling badly, feeding badly. In this case, the thin little tag gave her a hiccup or two. It's probably pretty fishy to blame bad stitching on a machine, though. I think the right thing to do is fix it, yes? Or, get a new sewing machine. Or both.
I wish I could say I was off to work on those, but instead we're headed to homeschool group, our weekly social. Gotta run!