Spiderweb Christmas Tree Skirt Tutorial - Part B
I can't say I ever liked geometry. But, I'll admit that when I realized how modifications of the spiderweb block would make a very cool Christmas tree skirt, I was quite the happy dreamer. I hope you have time to finish this before Christmas!
Part B - Assemble & Finish
Fast forward.... Now that you have all 56 Spinderweb triangles strip-pieced, I'll show you how to assemble your Christmas tree skirt. Yep, this is the good part. All seams are 1/4". Press all seams open.
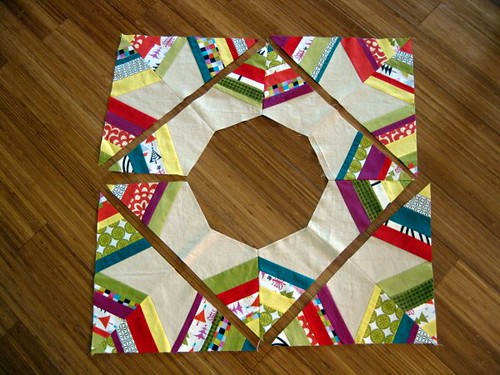
Step 1: Piece the Yoke
Grab your 8 halfway pieced triangles that I told you were "special." Now's their turn. Each piece should have one triangle strip-pieced spiderweb section, the center plain "star" section, and another side that would normally have been filled with spiderweb strip-piecing, but was left plain. Trim off the unpieced section 1/4" past the penciled line. You can still see the pencil lines in my photo. This section you are trimming becomes the center of the yoke.
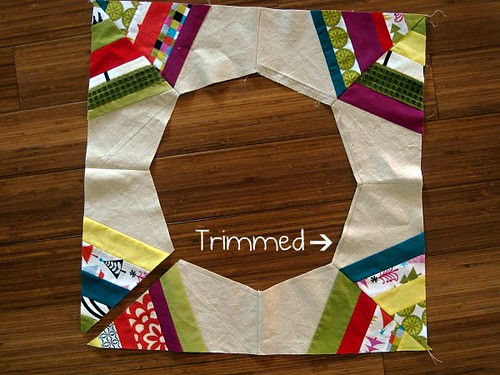
Trim all 8 of your "special" pieces this way. Then, make pairs of them. Set one pair aside (it skips this step). Take the remaining 3 pairs and lay them with right sides together, matching up the spiderweb section. Sttich along the shorter spiderweb side, as shown by the arrows below.
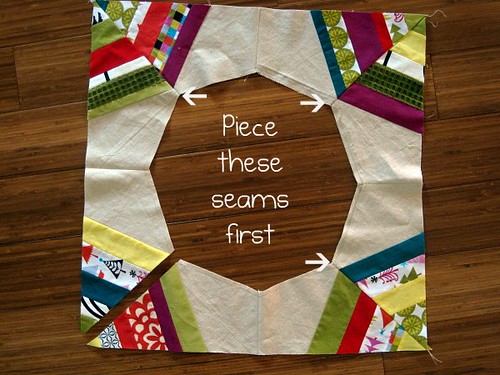
To finish piecing the yoke, sew your pairs to one another along the very short plain star sides with right sides together. Leave one gap in your yoke through a spiderweb section. The gap allows you to wrap the skirt around the tree, so we're going to keep it up as we go.
Step 2: Add 4 Half-Blocks
You have 48 remaining, fully pieced triangles. Use 8 of these to make a total of 4 half-blocks. Each half-block is made by sewing two triangles together with right sides together.

Add these half blocks around the yoke. I've left gaps where you will piece them together. This step completes the stars around the yoke.
Step 3: Add 4 Stars
In this step, you'll be piecing full, completed star blocks to the Christmas tree skirt. So, first, you need to make stars. A completed star block is made up of 4 triangle pieces. First you piece them in pairs to make 2 half-blocks (like we did in the last step). Then you piece the half-blocks together (right sides together) to make a full star like so.

Make 4 of these stars for this step.
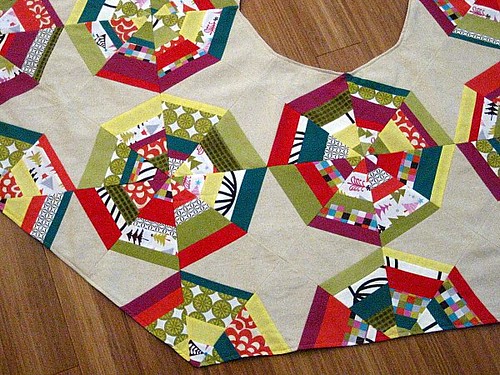
Locate the side of the yoke that has a gap. Sew 2 stars on that side, each one joining up with a yoke star. Match the seams of the stars carefully, when you piece. Here is what this side of the yoke will look like when you're done.

On the opposite side of your yoke, add two more stars. Since there is no gap on this side, sew the stars together before joining them to the yoke.

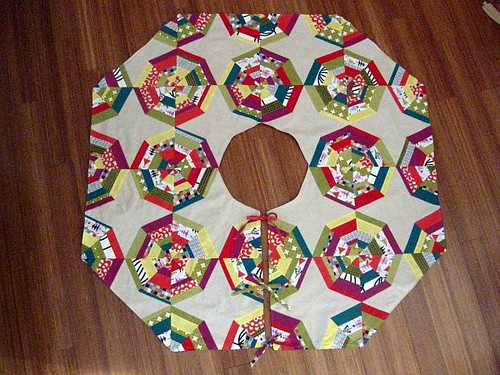
Now you have a long, narrow work-in-progress.
Step 4: Add Side Strips
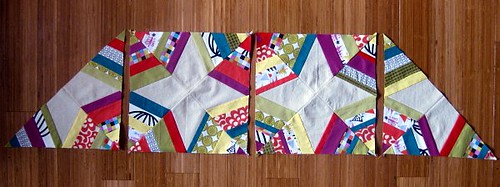
A side strip includes: 1 half-block, 2 complete stars and another half block. Piece them together, being careful to match star points. Make 2 side strips that mirror each other, rather than being exactly the same. Change the orientation of the half-blocks when you attach them, to create a mirrored side strip (see examples below).

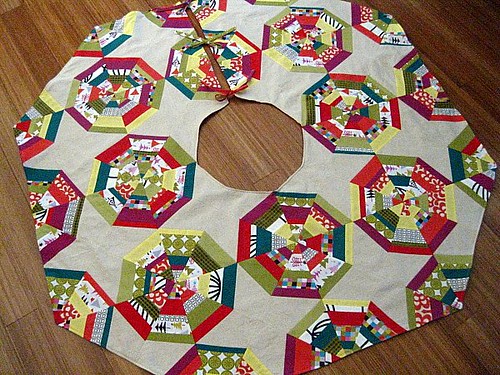
Attach the side strips to your work-in-progress to create a circular skirt shape. Isn't this exciting!?! (Sewing geek, I know).
Step 5: Create Ties
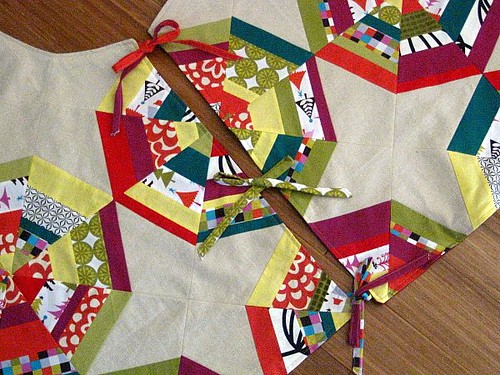
There are many possible methods for creating a closure along the slit of the skirt, such as hooks/eyes, buttons and ties. You could even skip the closure, if it doesn't seem necessary. I opted to make 6 fabric ties, each about 12" long. If you like mine, cut strips of fabric from your scraps that are 2" wide. As if you were making binding, press them in half longways and then press them in half longways again. This process will fully enclose the raw edges, creating a double-fold binding. Sew the binding shut with a 1/8" edgestitch. Knot the ties at one end. The other end will be sewn into the skirt.
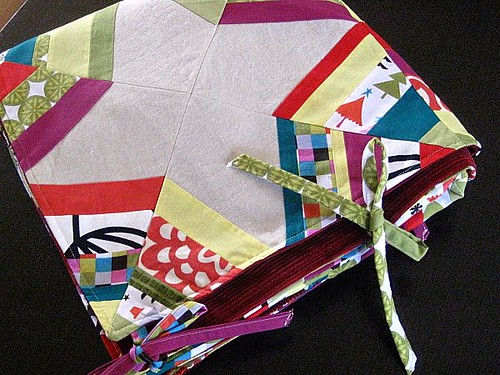
Step 6: Create Backing
The backside of a Christmas Tree Skirt is unlikely to be seen. I chose to use a dark red corduroy fabric scrap languishing in my closet. It required quite a bit of piecing, but eventually, I attained the right shape! A heavy fabric like corduroy or home decorator's weight cotton is a great idea since it gives the skirt some oomph that helps it lay flat.
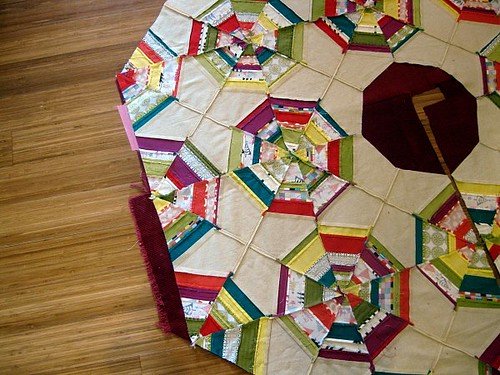
Piece together your fabrics until they are as wide as the tree skirt in every direction. Then, lay the backing out on the floor with the right side up. Tape the edges of the backing to the floor with masking tape here and there. Carefully lay the tree skirt top on the backing with the wrong side up, spreading everything out nice and flat. Pin along all edges, including the yoke. Remove masking tape as you pin.
Slide a cutting mat under both pieces and cut around the outside edge with a rotary cutter, using the tree skirt top as a cutting template. Cut along the slit from the outside towards the yoke. Then, cut out the center yoke, again, using the tree skirt top as a cutting template.
Step 7: Finish!
Since the backing and skirt top are already pinned right sides together, you can guess that your next step is to sew them together. But, before you do, slide the ties in along the slit of the tree skirt. There are 3 sets of ties. Place each tie inside the quilt sandwich, with just the unfinished/unknotted edge sticking out into the slit area. Pin ties in place.
Piece the skirt top and backing together by sewing all the way around the tree skirt, through the slit, around the yoke and out the slit again all in one go! Leave about a 10" opening along the outer edge of the skirt unstitched. Use the opening to turn the tree skirt right side out.
Press the skirt, taking care to fold in the seam allowance along the unstitched opening. Lastly, close the opening and give the skirt a finished look with a 1/4" edgestitch all the way around!
Finished!