Starbright Stars: Sewing Blocks

Here comes week two of our sew-along. Let’s start sewing!
This fall I am hosting one of my most-requested sew-alongs ever. Starbright Stars quilt is easier to sew than you would think. Make something special with your fabric scraps or sew that fabric stack that has been waiting into a sparkly wonder.
To find out how to join the Starbright Stars sew-along, click over to the master sew-along post. It’s a digital pattern, so you can grab it in a flash and sew right along.
Week 2: Sewing Blocks
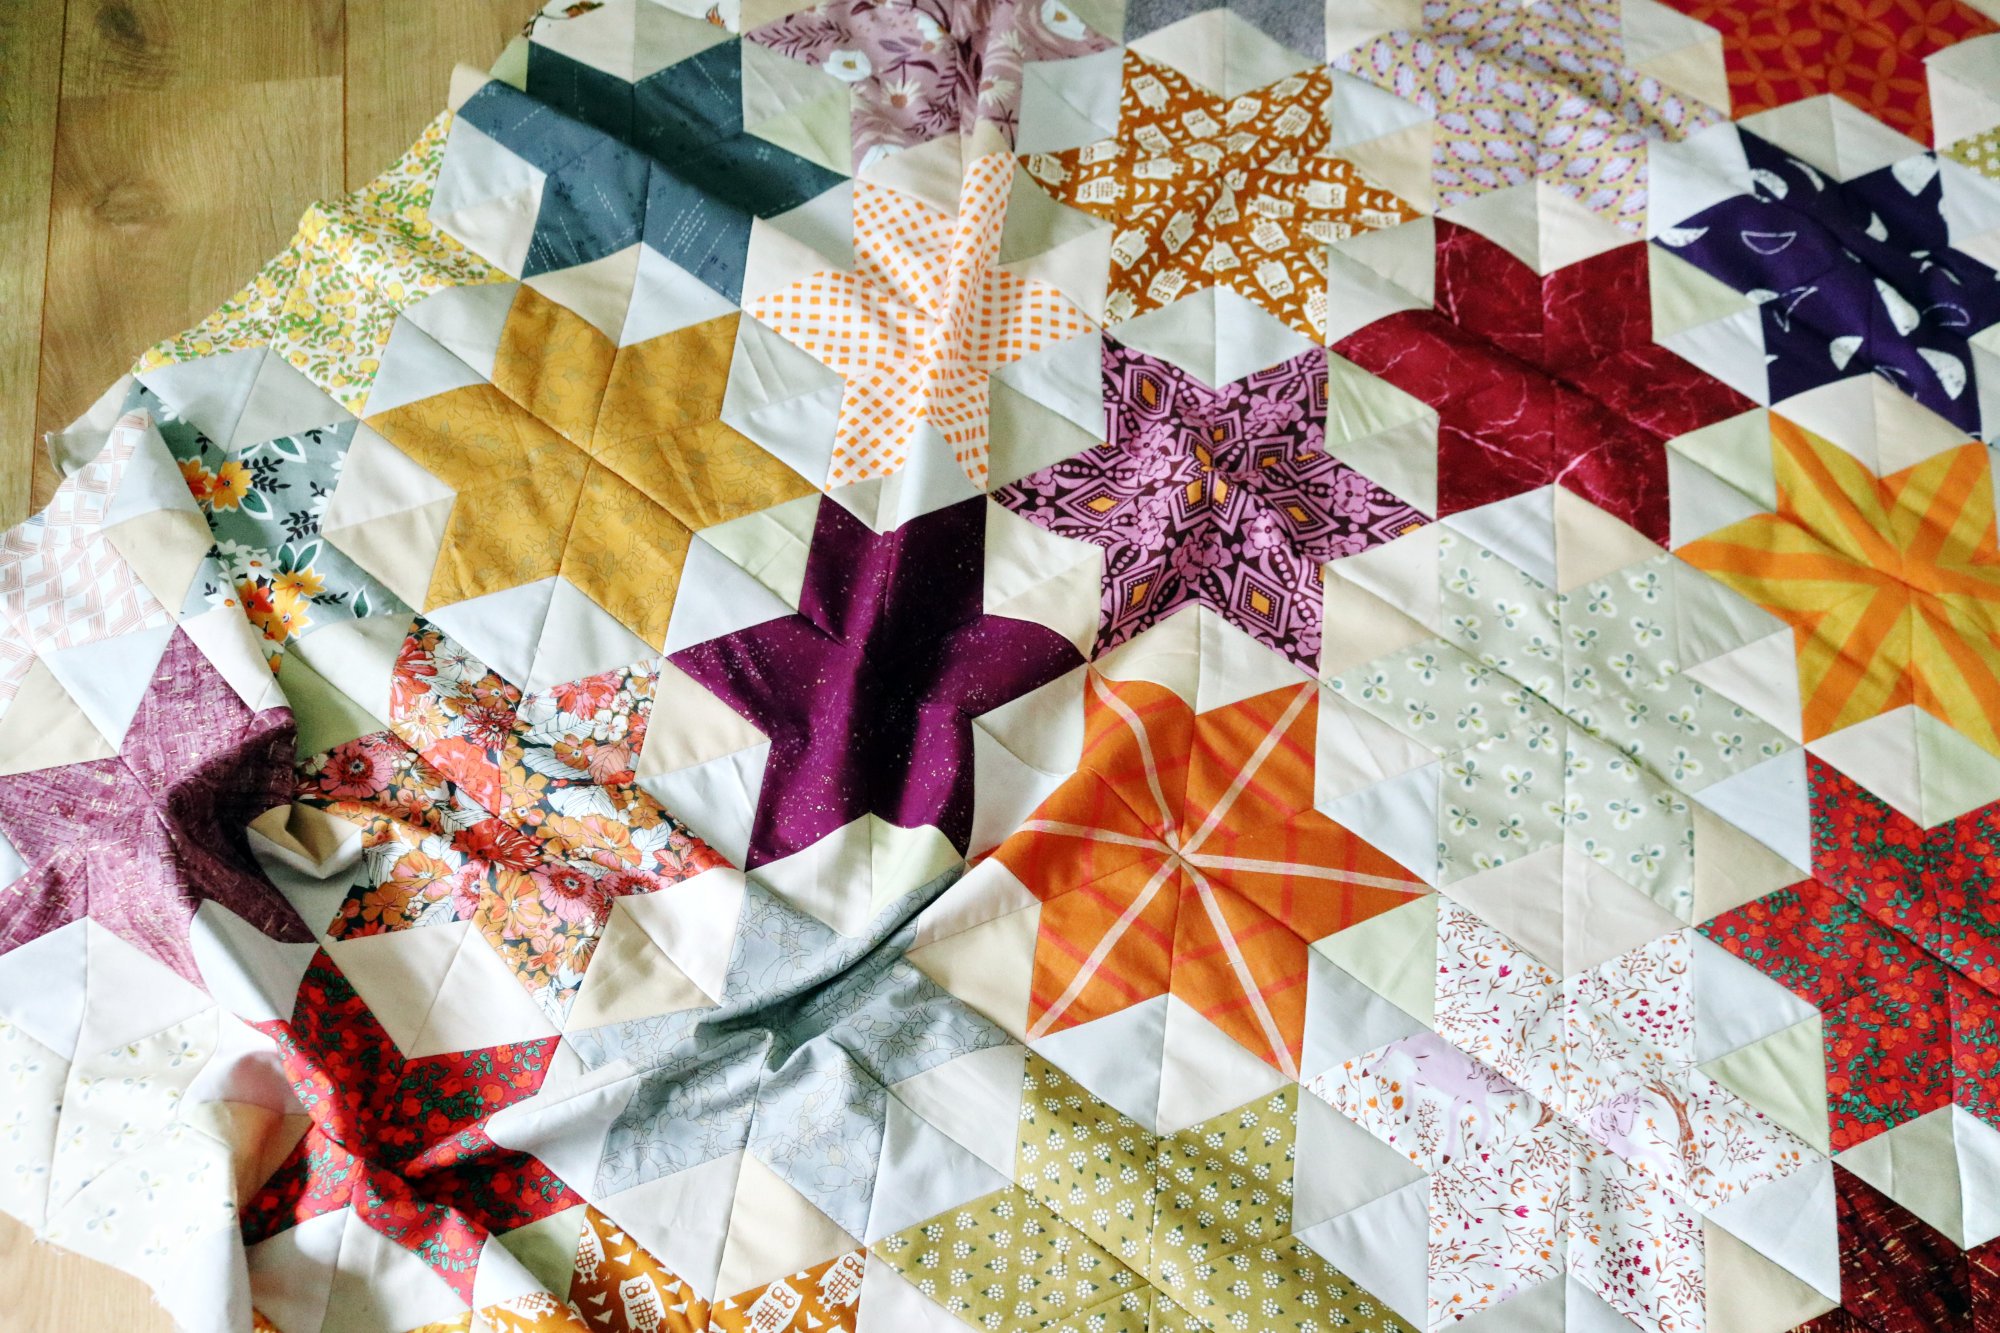
Okay, are you ready? By now you have probably cut a lot of diamonds and triangles. It is time to transform these unwieldy creatures into triangle-shaped Starbright Stars blocks. The pattern lays this clearly out with lots of pictures. Go for it and let me know if you have any questions.
Making a smaller quilt
I have made a number of Starbright Stars quilts, but in various sizes and star layouts. This quilt is based on a triangle-shaped bock. Just as with square blocks, you can make the quilt smaller or larger by making more or less blocks per row and changing the number of rows. The quilt layout presented in the pattern yields a generous throw-sized, rectangular quilt.
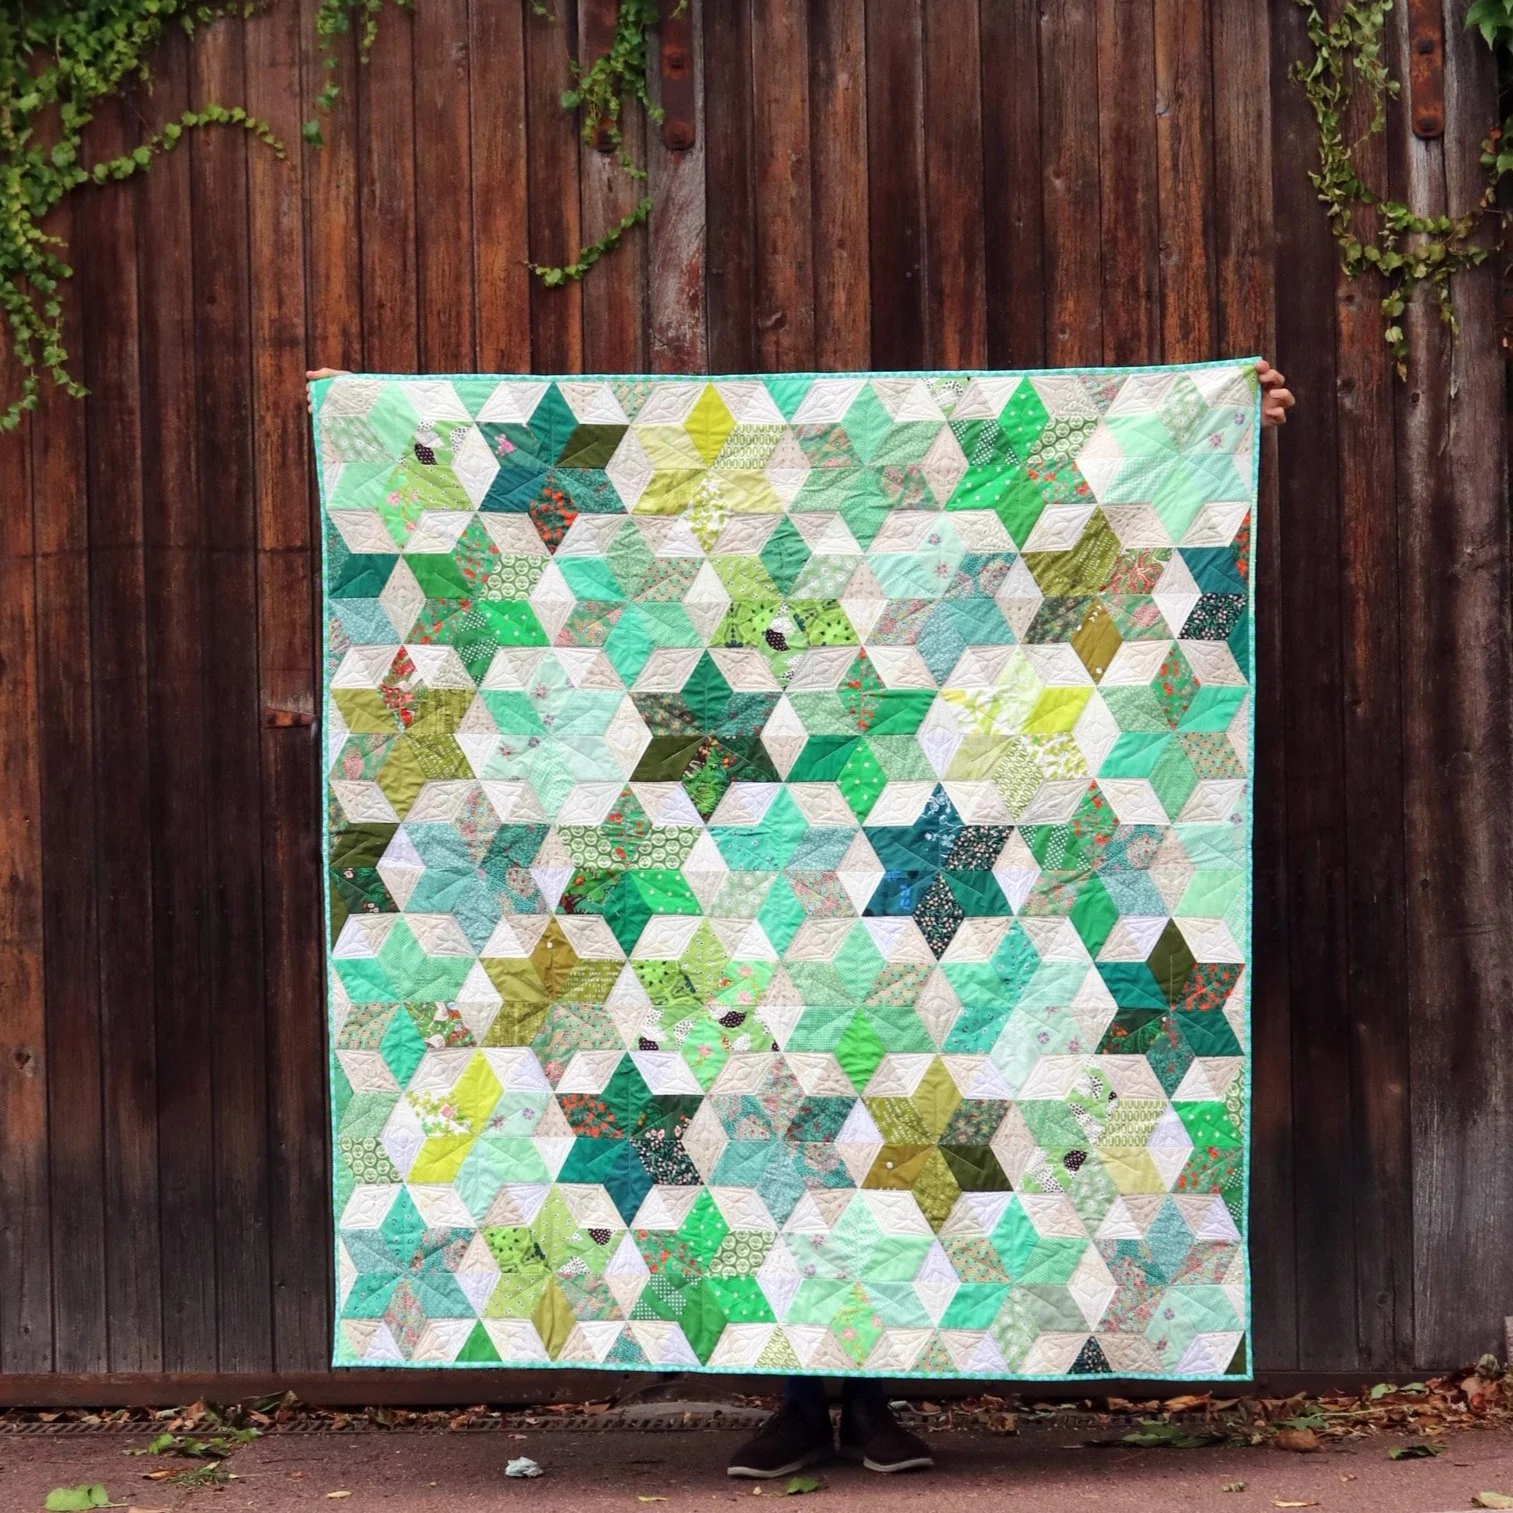
On the pattern cover is a smaller, more square-ish throw quilt. I received an enquiry about how to layout the rows to match that cover quilt, and figured there may be more who would like to hear about that. So, here we go! Let’s look at a photo of the cover quilt, with the rows delineated by blue lines.

Now you can see that the first and last row of the cover quilt are shorter-than-normal rows. The first block on the shorter row is a normal partial block, as are every-other-block in that row. Interspersed between the normal blocks is a tiny block that contains just one diamond and two triangles. Once joined together, the normal blocks are cut down to match the height of the tiny blocks. Why a shorter row? Only because I liked the way that the complete stars at the top and bottom of the quilt then touch the quilt edge. It’s not a necessary adjustment, just an aesthetic one.
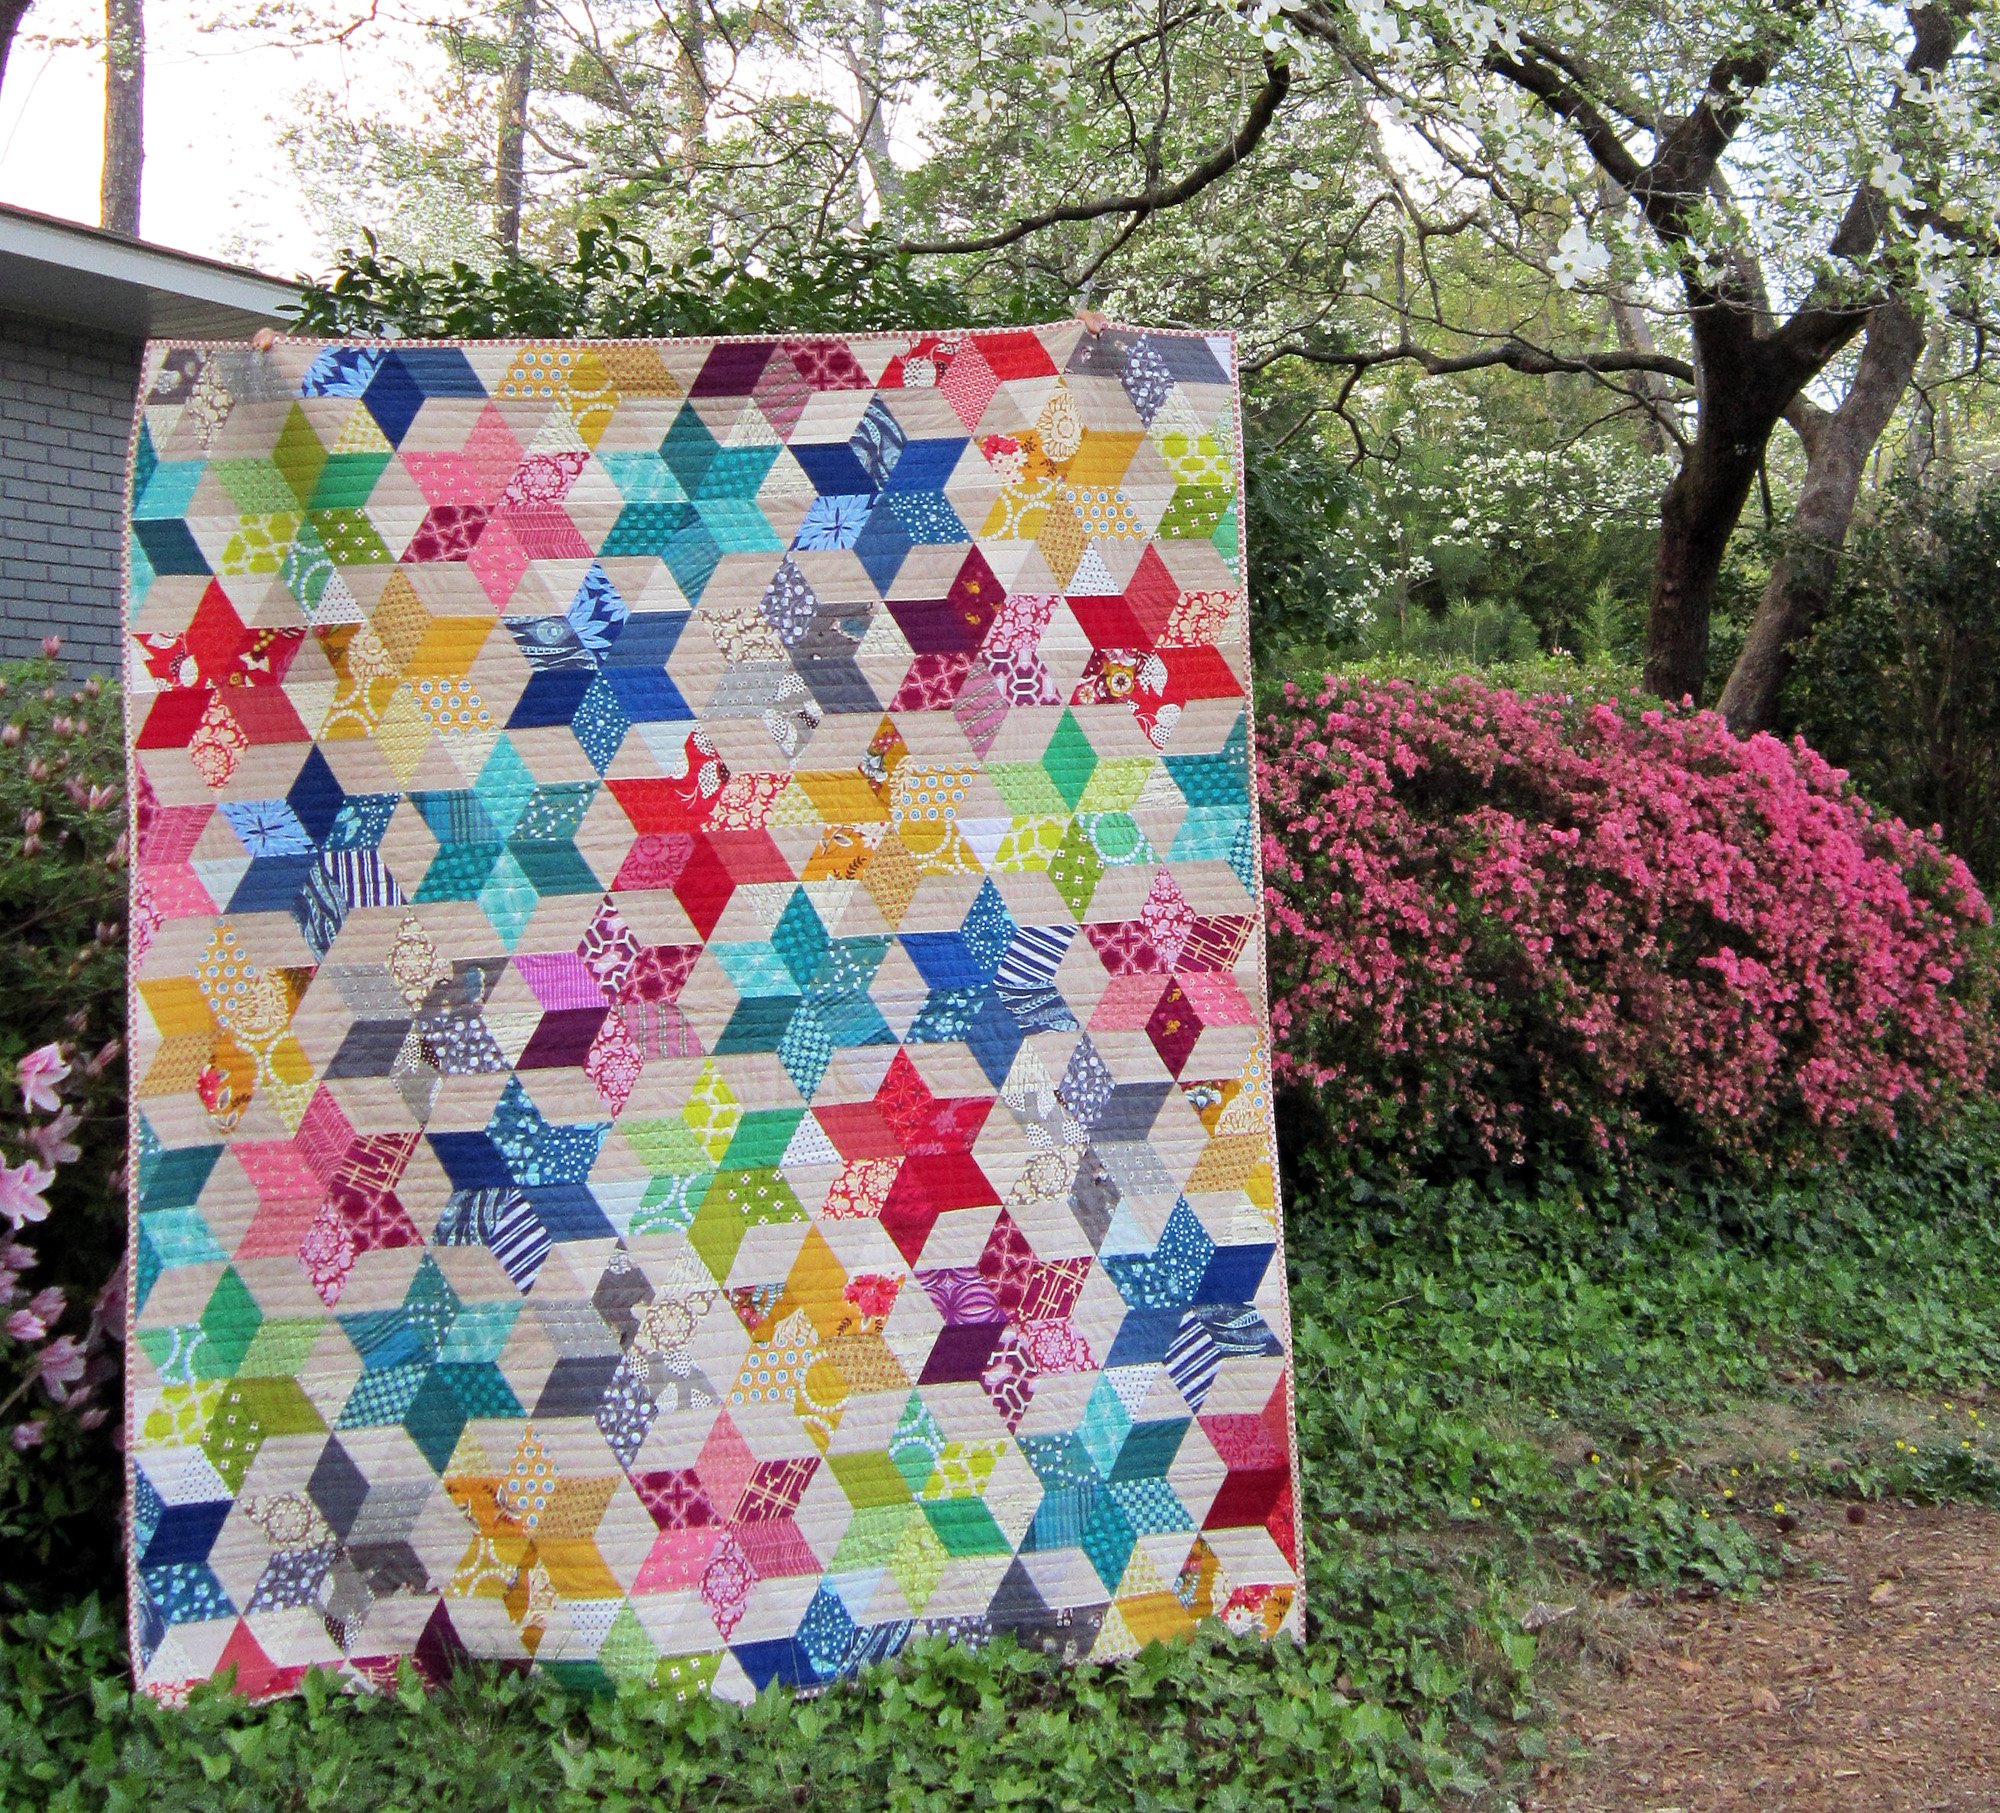
In contrast, the quilt layout from the pattern yields a quilt as above. Here we have half-stars forming at the top and bottom edge of the quilt. Also, here the first row of complete stars has 5 complete stars and 2 half stars at the edge. In contrast, my green cover quilt has 6 complete stars in the first and last rows. These changes are made simply by arranging the triangle blocks in different ways. Experiment and see what you like best for your quilt!

For my sew-along rendition of Starbright Stars, I am following the quilt layout presented in the pattern. Thus, my quilt will have half stars at the top and bottom edges.

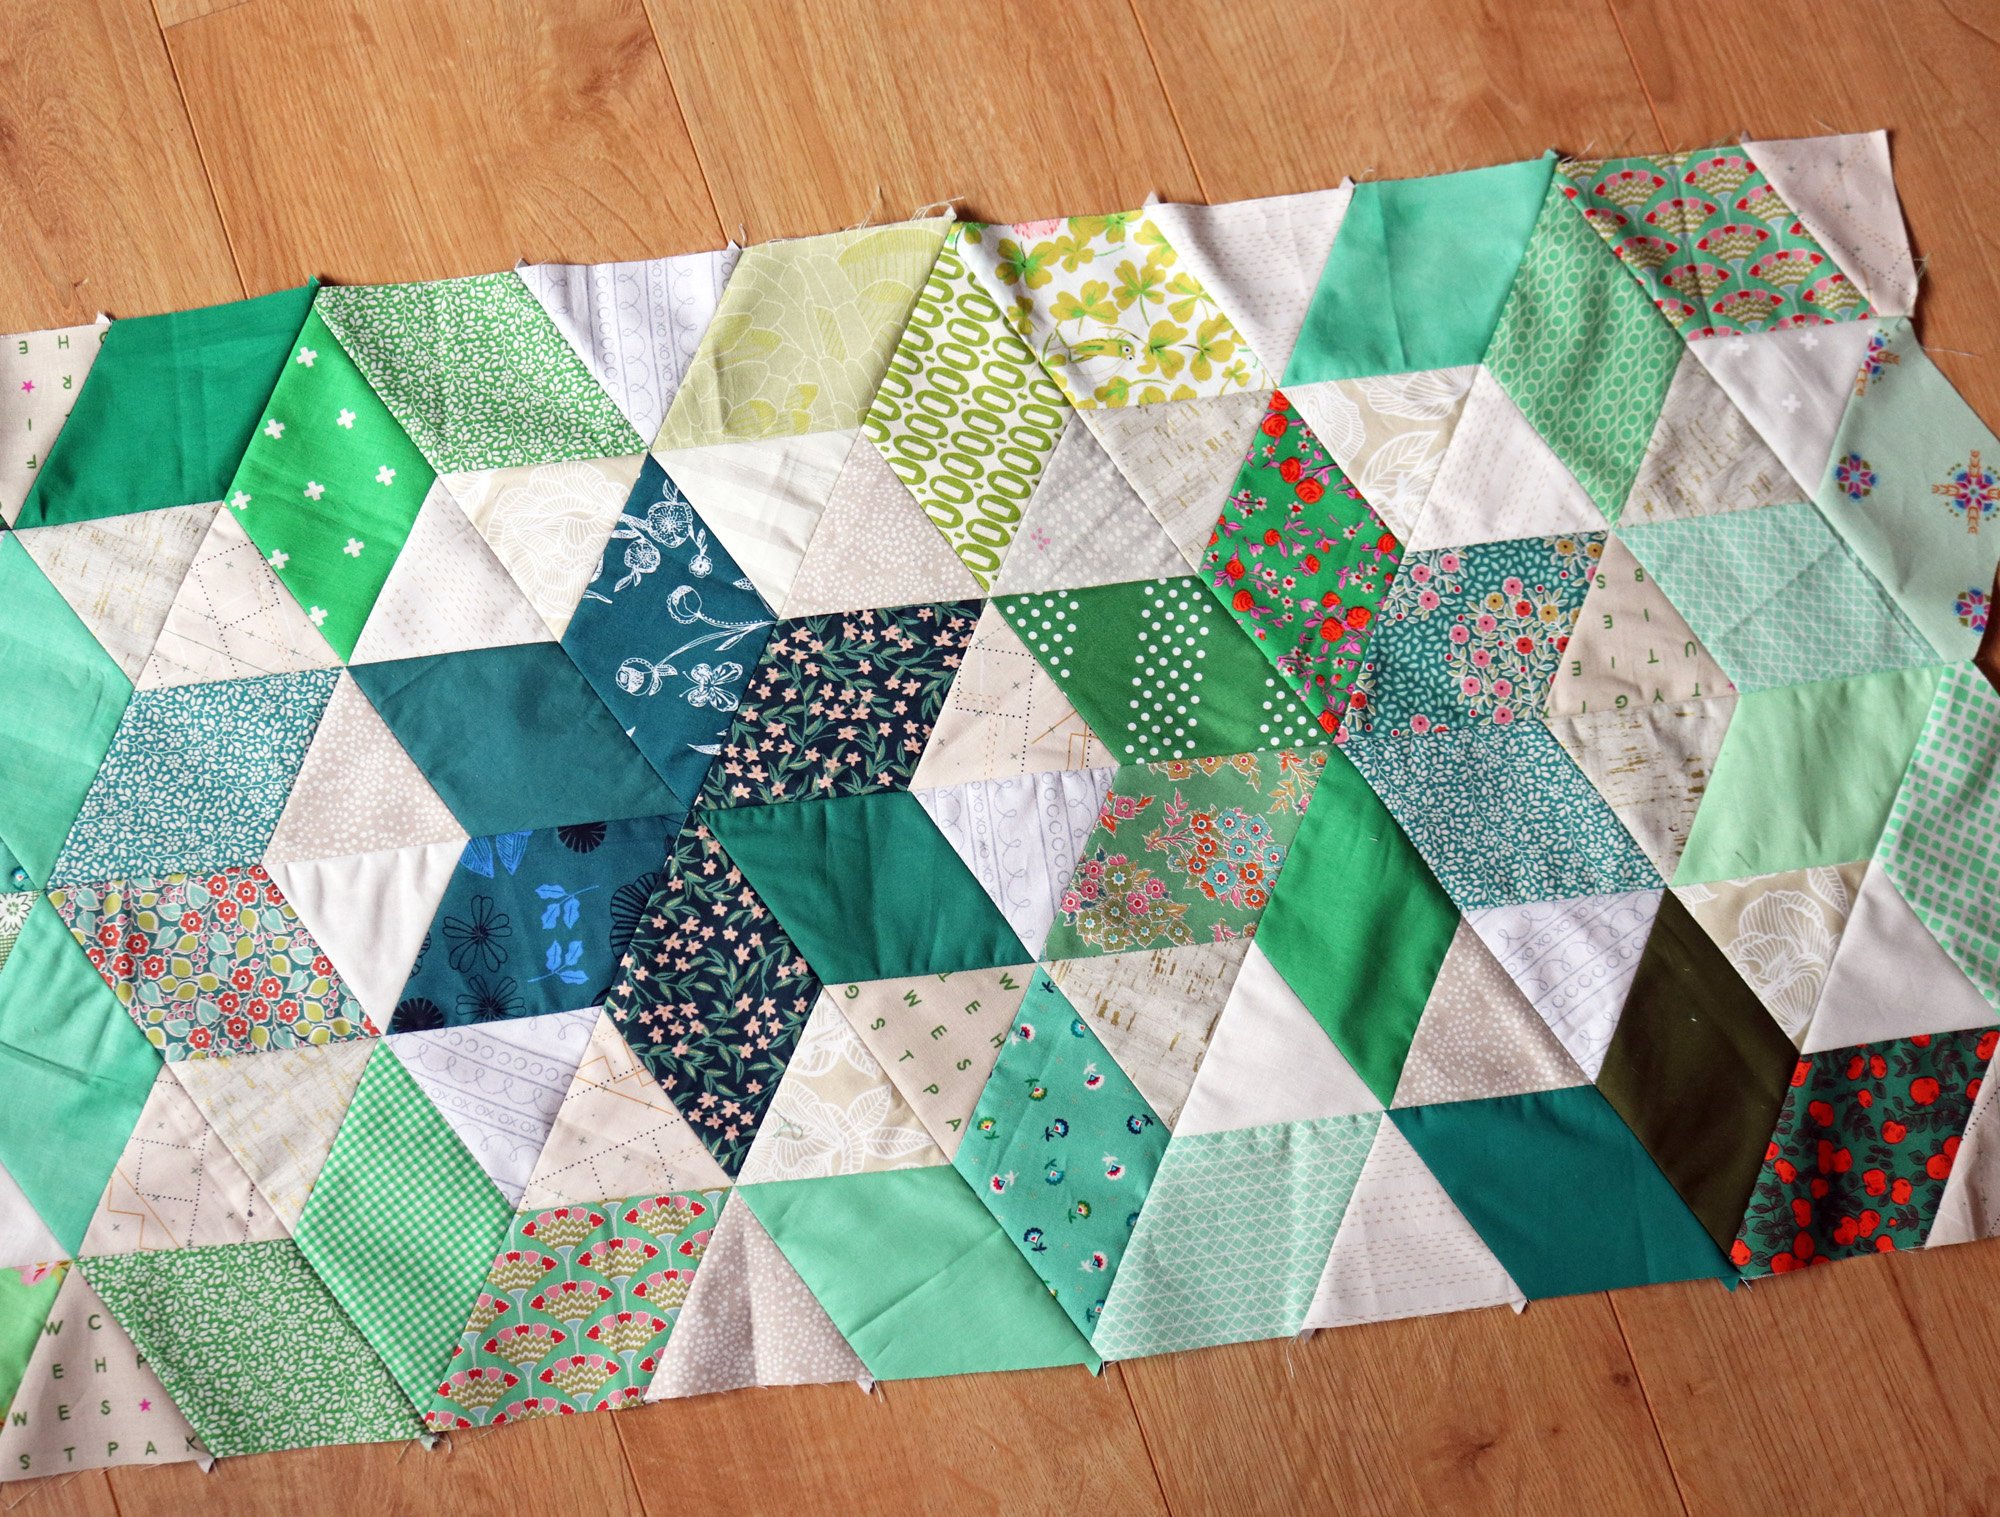
I have cut lots of background triangles in various shades of light brown, but I won’t take the time to arrange them on the design wall. Instead, I will keep stacks of my triangles by the sewing machine and add them randomly to the blocks as I go.

Arranging the stars on my design wall is my favorite part. Fabric is such fun, isn’t it?
Week 2 Sew-Along Goal: Sew 35 Blocks
Are you sewing the layout from the pattern? Sew 35 triangle blocks in order to finish 1/3 of your blocks this week. Partial blocks (the ones for the edge) also count toward that tally!
Share to win!
This week share a photo of some of your diamonds arranged as stars with hashtag #StarbightStarsQuilt.
Your photo enters you into a giveaway for the Trimmings Pattern Pack. This is a three-pattern bundle of my best holiday sewing projects: a very cool tree skirt, patchwork stockings and a festive pillow.
Winner will be announced next week and giveaway is open worldwide.
Congratulations to Heather Bassett, lucky winner of last week’s giveaway.


good luck, friends!