a Patchwork Coat is Brewing
Last fall I caught the patchwork coat bug and posted a round up of Quilted Coats inspiration. I also began to research possible coat patterns for my own someday-project. One very helpful resource was the comprehensive overview by Patchwork and Poodles of quilted coat patterns. She discusses several different pattern possibilities and her own experiences.
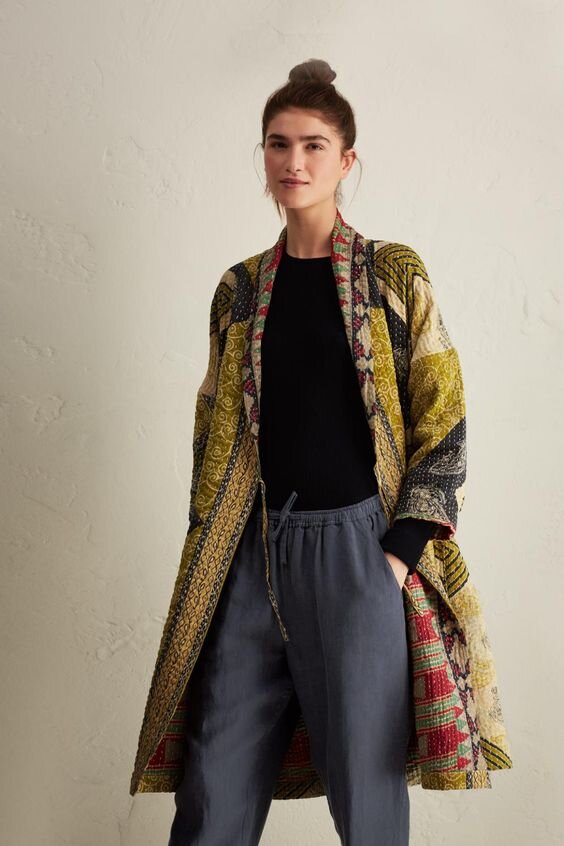
Looking at all the possibilities she shared helped me to think through what style I would like for my own project. Eventually I settled on the Lichen Duster by Sew Liberated.

photo and illustrations, by Sew Liberated

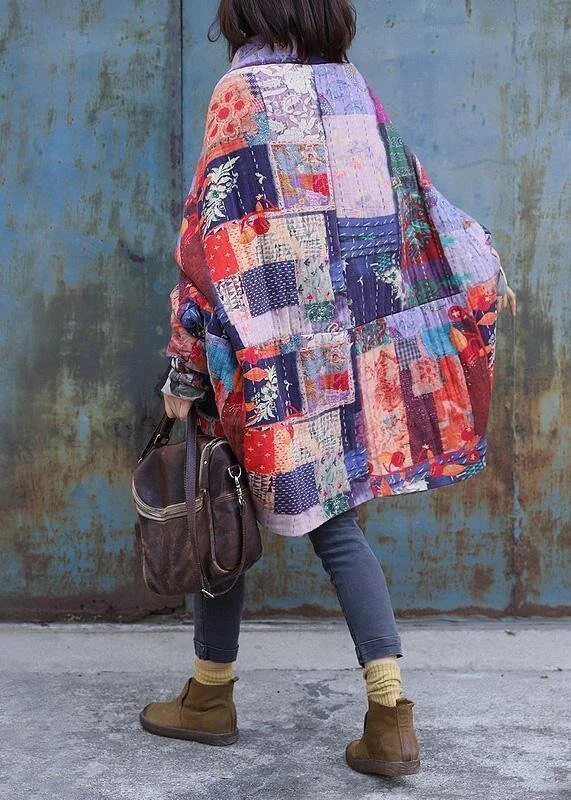
The Lichen Duster is a loose jacket, to be worn casually open. It can also be closed with a fabric belt, to be worn as a dress. I love the casual, loose vibe. It reminds me of the below patchwork jacket from my inspiration round up, which was my very favorite.
Anne Murphy fashion article from The Times
The Lichen is an unlined garment, but a patchwork coat is usually lined in order to protect and hide the patchwork seams. Luckily, a pair of blog posts at The Shapes of Fabric explain how she made a lined Lichen Duster. I have hope that I could do the same, or possibly come up with some other plan to make a patchwork style Lichen.
But first, a regular Lichen! I’m no garment-sewing expert, thus it’s wise to start by sewing a straightforward version of this pattern from yardage. During the process I can consider how to modify it for patchwork.
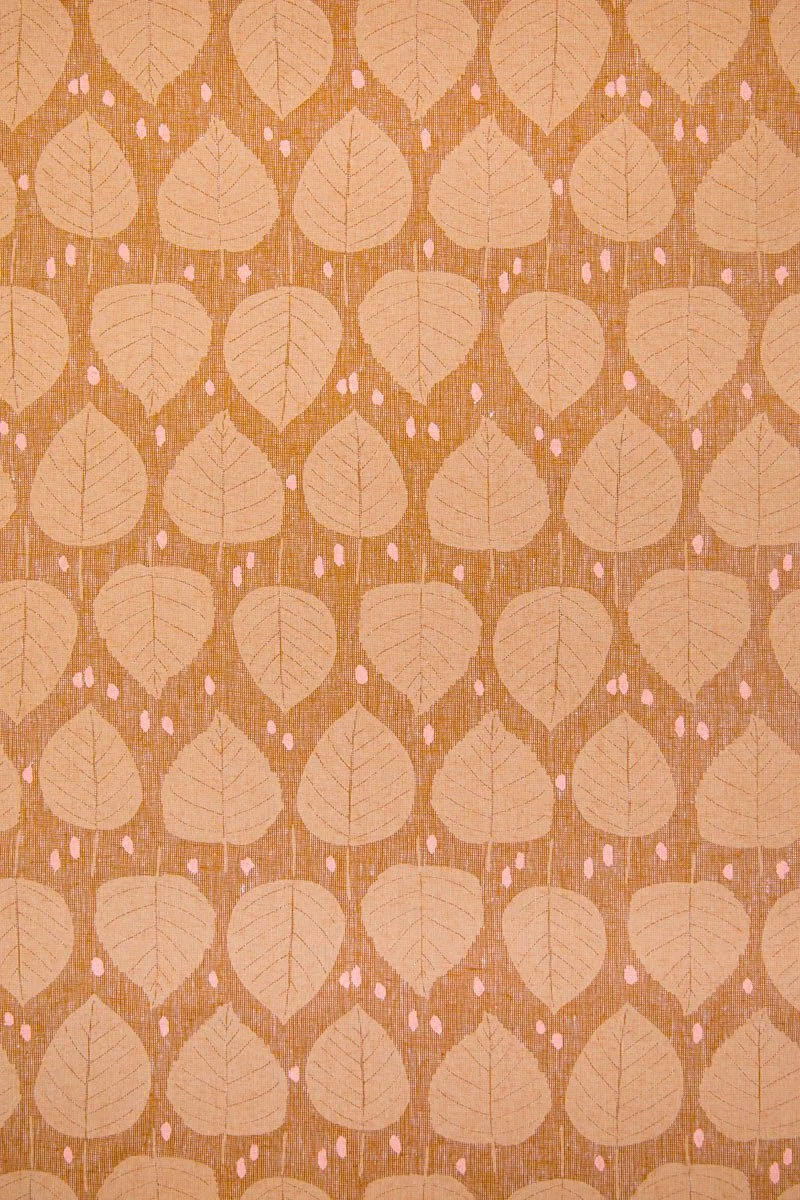
photos by The Confident Stitch
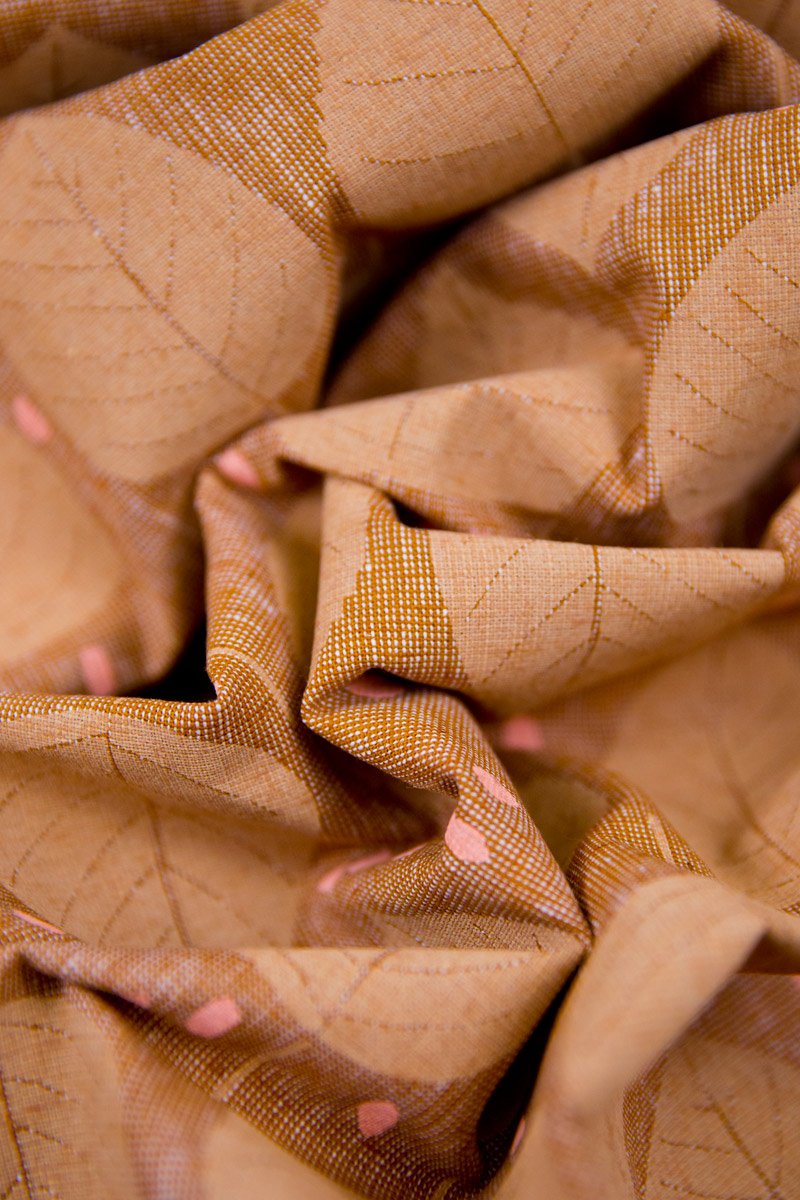
I’ve chosen this gorgeous linen-cotton blend from The Confident Stitch for my first Lichen. The fabric is RK Birch Leaves in Roasted Pecan. Meg of Sew Liberated often sews with linen, so choosing this substrate feels like a sure success. It should have a similar drape as the sample garments.

I’m using a digital version of the Lichen Duster pattern, which you can purchase from Sew Liberated. If you prefer a printed version, order that from The Confident Stitch.
With this pattern, a physical version has clear advantages! The print-at-home digital version of the garment pattern pieces is 66 pages! It took hours to print that out on my home printer, including several paper reloads. Then there was the task of cutting and taping all 66 pages to come up with the pattern pieces themselves. The resulting paper rectangle is longer than a bed! I couldn’t capture it all in a photo, but this gives you an idea.
If you’re sewing from the digital pattern, I strongly recommend having the pattern pieces professionally printed. I’ve never done that before, as it feels like a luxury, but in this case it would be totally worth it.

In the past few days I’ve cut all the pattern pieces from fabric. My longarm table makes a nice spot for storing the many and often long pattern pieces. It’s easy to get overwhelmed when looking at all the pieces!
Now I’ve begun following the directions to sew the garment, and it’s going easier than I anticipated. As per usual, Meg’s instructions are so well written. There is even an extensive section of seam finish options with everything clearly explained. I appreciate that Meg doesn’t assume you know the different options or what words like “French seam” or “Welt seam” mean. Having it all laid out is so handy.

Look at the back skirt piece! It’s made up of five pieces in order to create a lovely shape. I followed Meg’s recommendation for flat felled seams, and wow are they fantastic! They look so nice front and back, which is satisfying and practical on this unlined garment.

I look forward to continuing on with assembly!