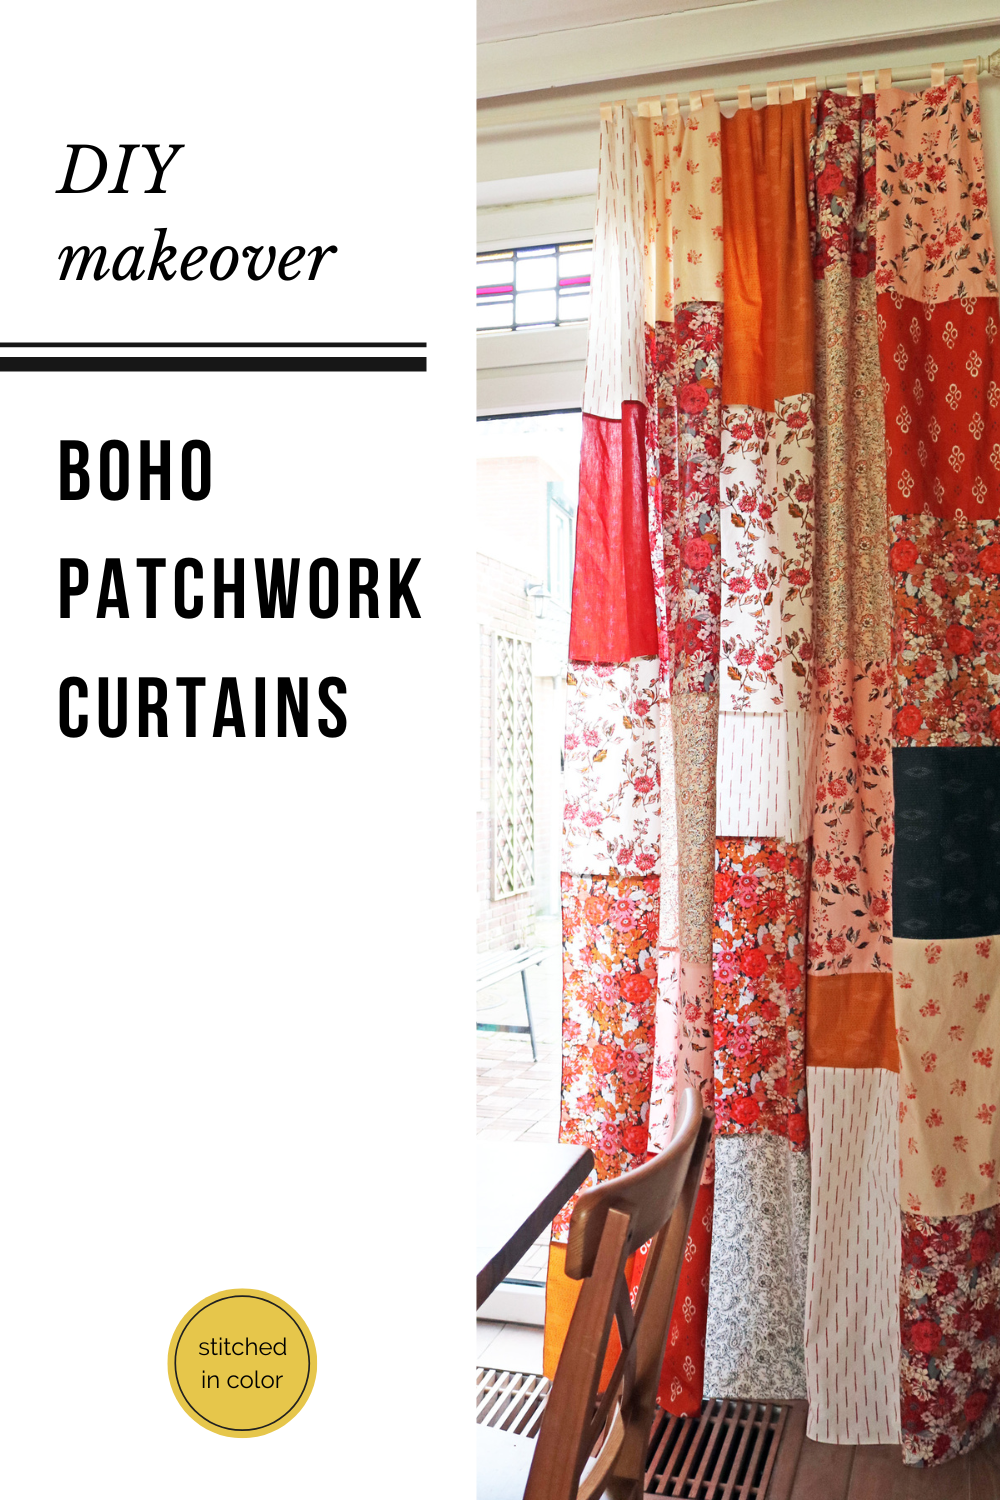
how to sew Patchwork Curtains
Patchwork curtains are a fantastic way to enjoy your favorite fabrics every day. They add so much personality to your space!

This tutorial is designed to help you make curtains in whatever size will suit your needs.
Patchwork Curtains tutorial
Yields: unlined curtains (finished one both sides) with hanging tabs
Method: French seams, rolled hems
Level: intermediate
Supplies: Lightweight cotton fabric, ribbon, matching thread.
Tools: rotary cutting set up, rolled hem foot
Step 1: Take Measurements
When possible, the curtain rod should be installed first. Then you can take measurements from the curtain rod itself to determine ideal curtain length. If this is not possible, estimate where the curtain rod will be mounted.
Measure the desired area that you’d like the curtains to cover. In my case, my French door area measures 103” from the curtain rod to the floor and 70” wide, measuring just outside the French door itself.
Step 2: Calculate Curtain Size
Now determine the desired finished dimensions of the curtain fabric rectangle(s).
Length
The curtain tabs add approximately 2” to the overall height of the curtain. If you wish for the curtains to hover just above the floor, your desired finished height is the measured height minus 2” in order to account for the hanging tabs. In my case, 103” - 2” = 101”.


Finished Size
2 fabric curtain panels, each 79” wide x 101” tall.
Each curtain panel: (2) 20” columns, (3) 13” columns
Width
I suggest a curtain width that is at least twice as wide as your measured width. In my case that’s 70” x 2 = 140”. I will be making two curtains to cover my French door opening, so each one must be at least 70” wide.
Our patchwork curtains will be made from multiple columns finishing either 20” wide or 13” wide. Decide how many columns you will use of each size in order to exceed your minimum desired width.
Example A: (2) 20” columns and (3) 13” columns = 79”. This is a good size for my 70” minimum width curtains.
Example B: (1) 20” column and (2) 13” column = 46”.
Example C: (2) 20” columns and (2) 13” columns = 66”.
Play around with the possibilities until you decide the right combination of 20” and 13” wide columns to fit your needs.
Step 3: Gather Materials
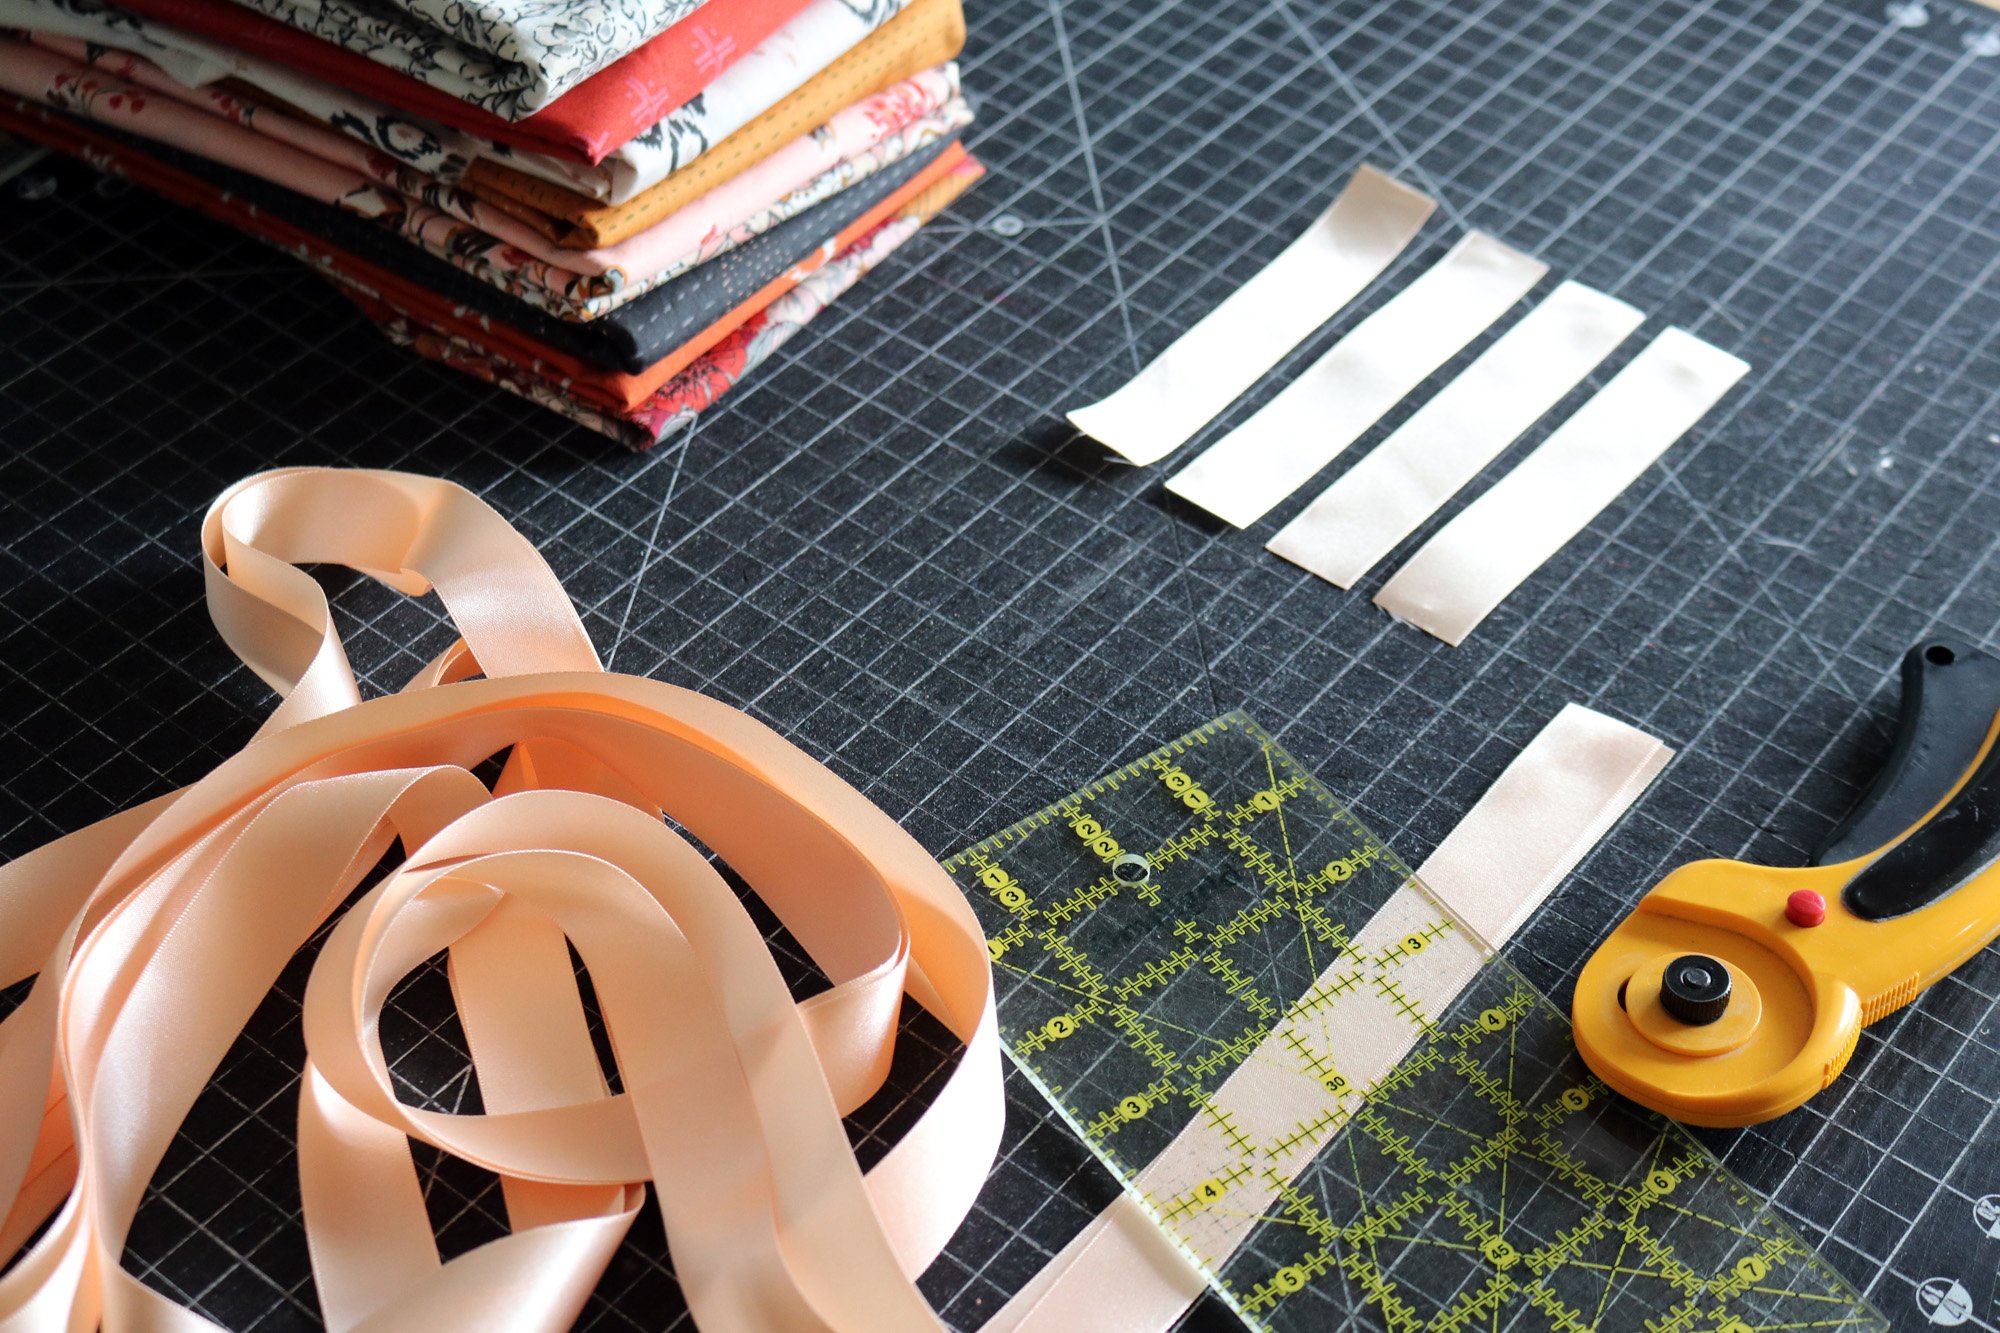
Ribbon
Our curtain tabs are created with 1” wide ribbon. Avoid thinner ribbons as they will not move well on the curtain rod. Ribbons will be placed approximately every 4 1/2”. Divide finished curtain width by 4.5 to determine how many tabs are needed. In my case, 79 ÷ 4.5 = 17.555. I’ll round that to 17 tabs on each curtain, 34 tabs in total.
Each ribbon will be cut 5 1/2” long. Multiple tab count x 5.5 for total length needed. Ribbon is sold in yards, so divide that number by 36 in order to determine yardage (because 36” = 1 yard). In my case, 34 tabs x 5.5 = 187. 187 ÷ 36 shows that I need just over 5 yards of ribbon.
Cut the necessary amount of 5 1/2” ribbon tabs from your ribbon yardage.
Fabrics
I suggest thin, high-quality cottons with high thread counts for patchwork curtains. Voile, lawn and Art Gallery Fabric quilting cotton are all good options. These fabrics are semi-sheer, which looks like stained glass in the window.
Let’s estimate how much yardage you need. First multiple your curtain finished size (width x length) in order to find the total square inches of your project. If you’re making two identical curtains, multiple that number times 2. In my case my finished size is 79” x 101” = 7979 square inches. Times 2 = 15,958 square inches.
Then divide that number by 1296 to convert it to square yards. I have 15,958 square inches. Dividing that number by 1296 = 12.3 square yards.
Buy fabric in 1.5 yard cuts. Purchase a number of cuts approximately equal to your square yards. Thus, I need approximately (12) 1.5 yard cuts of fabric! That’s 18 yards of fabric total. You will likely have extra fabric, but that is better than not enough! You can make table runners, throw pillows, dining chair covers, etc. with the leftovers.
Prewash and machine dry your fabric in the same manner which you wish to care for the finished curtains. Press fabrics before cutting.
Step 4: Cut Fabrics
Your ideal cuts will depend up your finished curtain size. Recall how many 20” wide columns you will make and how many 13” wide columns. Cut a variety of lengths in each column width to give your patchwork a lively style. You have cut enough fabrics when the total length of each column exceeds your desired finished length.

Possible Cuts for Wide Column (20” finished in width)
21” x 31”
21” x 25”
21” x 21”
21” x 18”
21” x 15”
Possible Cuts for Narrow Column (13” finished in width)
14” x 31”
14” x 25”
14” x 21”
14” x 18”
14” x 15”

How to efficiently cut your fabrics? If you are working with 1.5 yard cuts, as suggested, this is what I recommend:
Cut a 31” width of fabric strip from your yardage.
Segment as (2) 21” wide patches OR into (3) 14” wide patches.
Randomly edit the height of the patches so that they are 31”, 25” or 21”.
Cut a 18” width of fabric strip from your yardage.
Segment as (2) 21” wide patches OR into (3) 14” wide patches.
Randomly edit the height of the patches so that they are 18” or 15”.
When cut in this efficient manner, a 1.5 yard cut can yield (6) patches for the narrow columns OR (4) patches for the wide columns.
How many patches do you need in each column? That depends entirely on your desired curtain length. For my very long curtains, I need about 5 patches per column.
Step 5: Sew Curtain Panels
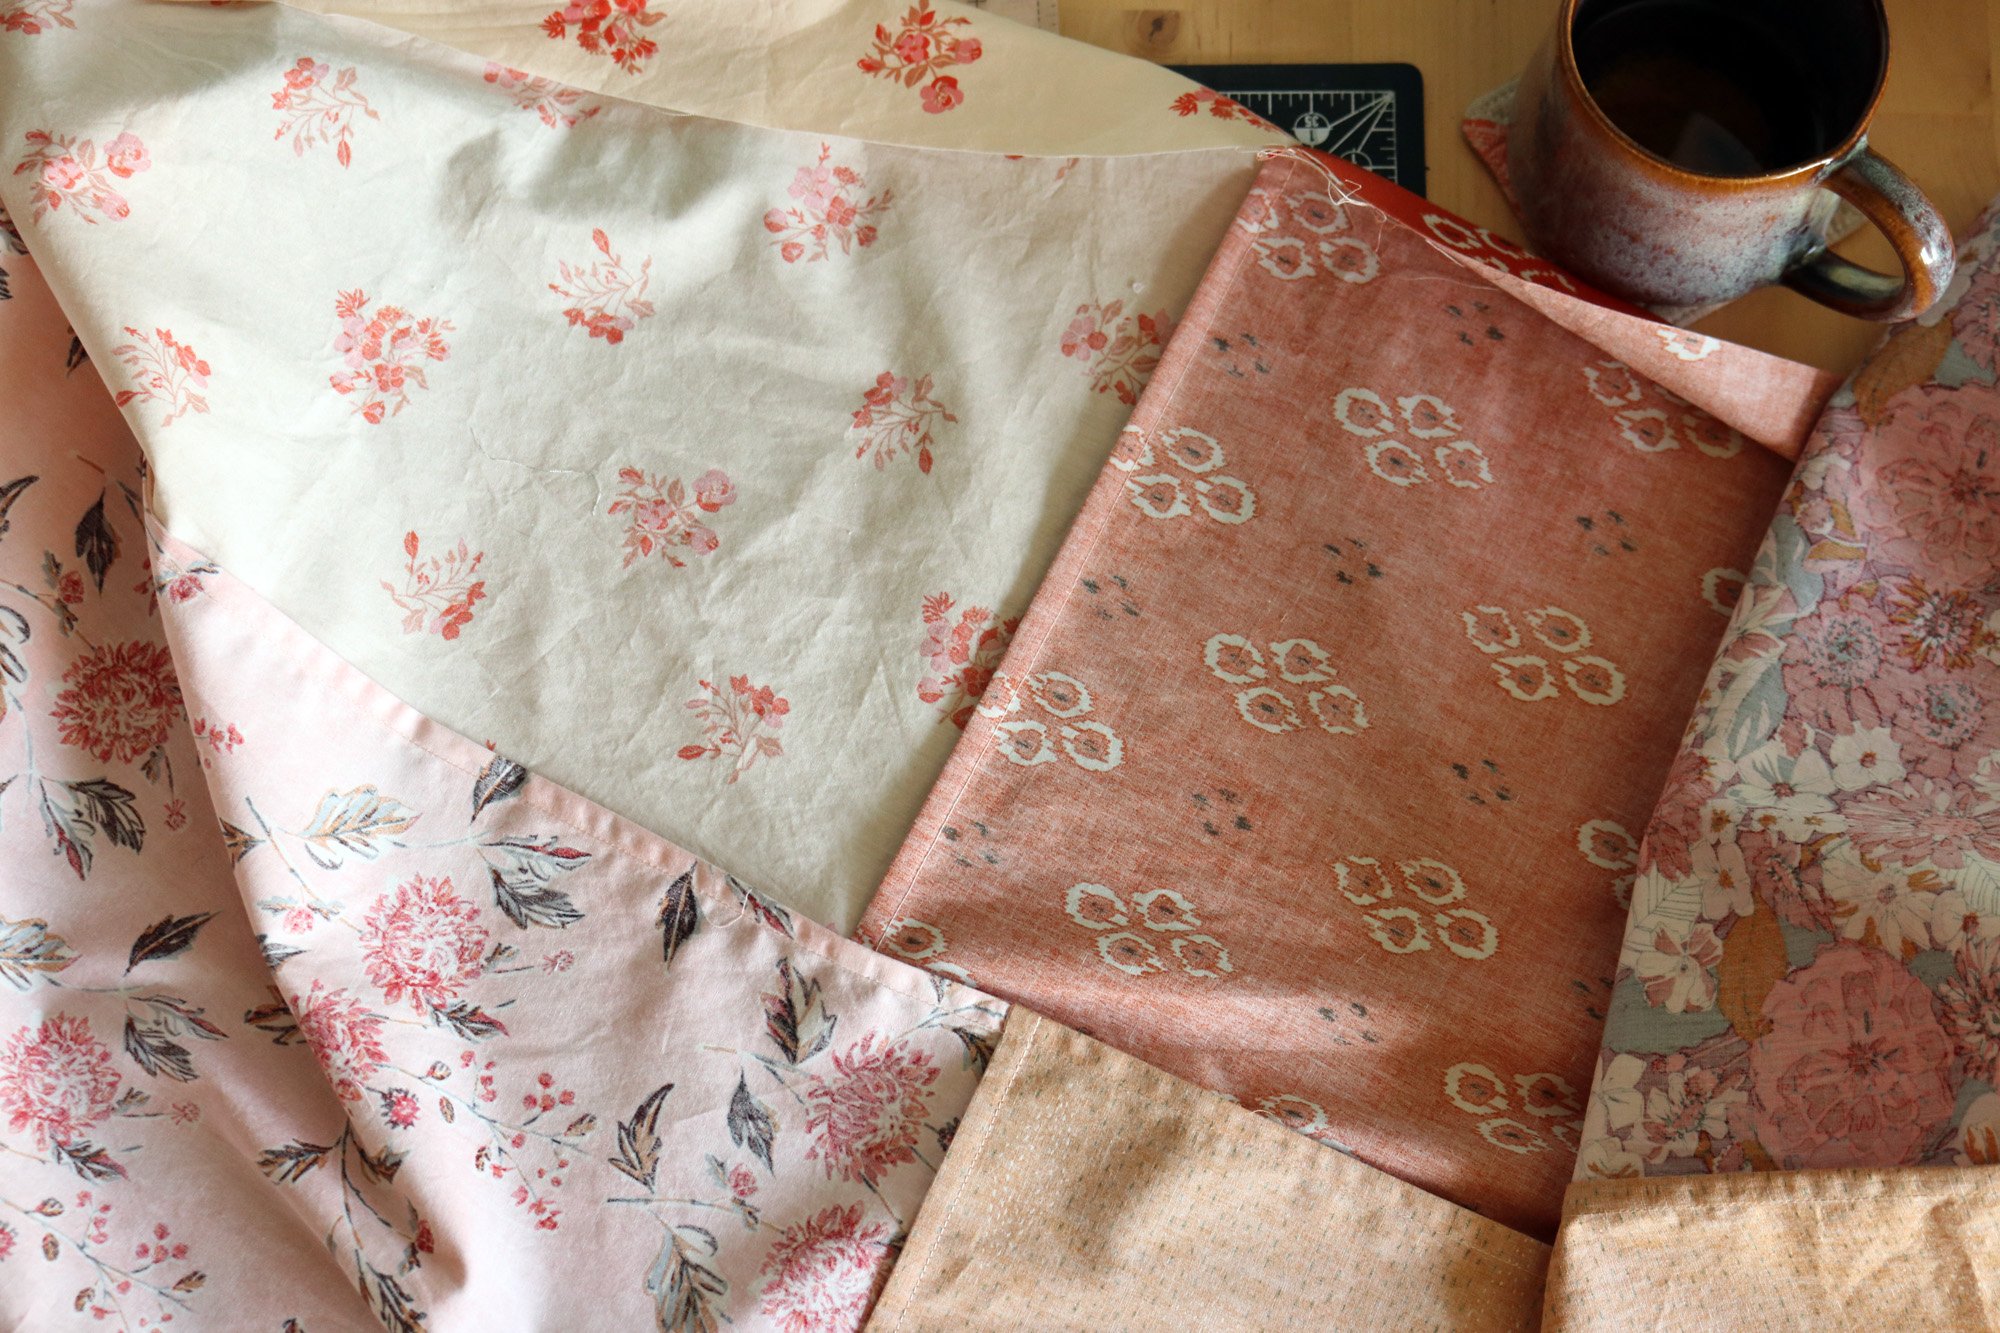
Join all the patches as columns with French seams. Sew the first seam, wrong sides together with 1/4” seam allowances. Press seam open, then fold seam again to place fabrics right sides together. Now sew the seam a second time, this time with a 3/8” seam allowance. You are enclosing the first seam allowance within the second seam. That’s a French seam! Press seam to one side.

In the same manner, join columns to complete curtain patchwork. The wrong side of the curtain will have finished French seams.
When all columns are joined, your curtain panel is complete. Lastly, trim the total length of each curtain to the desired length + 1” for hemming. (The bottom rolled hem will use approximately 1/2” of fabric. The top hem also requires 1/2” of fabric.) My desired finished length is 101”, so I trim my curtain panels 102” long.
Step 6: Hem + Attached Tabs
Hem the sides and bottom edges of the curtain panels with rolled hems. This makes a very tiny hem that’s barely noticeable. I use a rolled hem foot, but it apparently can be done without that special sewing foot as well. If you’re unfamiliar with this technique, I suggest you search for a video. It’s really easy, once you get the hang of it, and definitely faster than pressing and turning a hem.
Do not hem the top edge of the curtain with a rolled hem. Instead, press and turn that hem by hand so that you can simultaneously attach the ribbon tabs.
First sew a 1/4” stitch line. Use this to neatly turn the top edge of the curtain panel 1/4” under and press. Turn it again 1/4” to the wrong side and press.
Fold ribbon pieces in half and slide the raw ribbon edge ends into the pressed-under seam. The ribbons will be pointing down toward the body of the curtain at this point. Place and pin the ribbons tabs approximately every 4.5”.
Secure the top hem with a scant 1/4” top stitch, removing the pins and catching the ribbons in the seam as you sew.
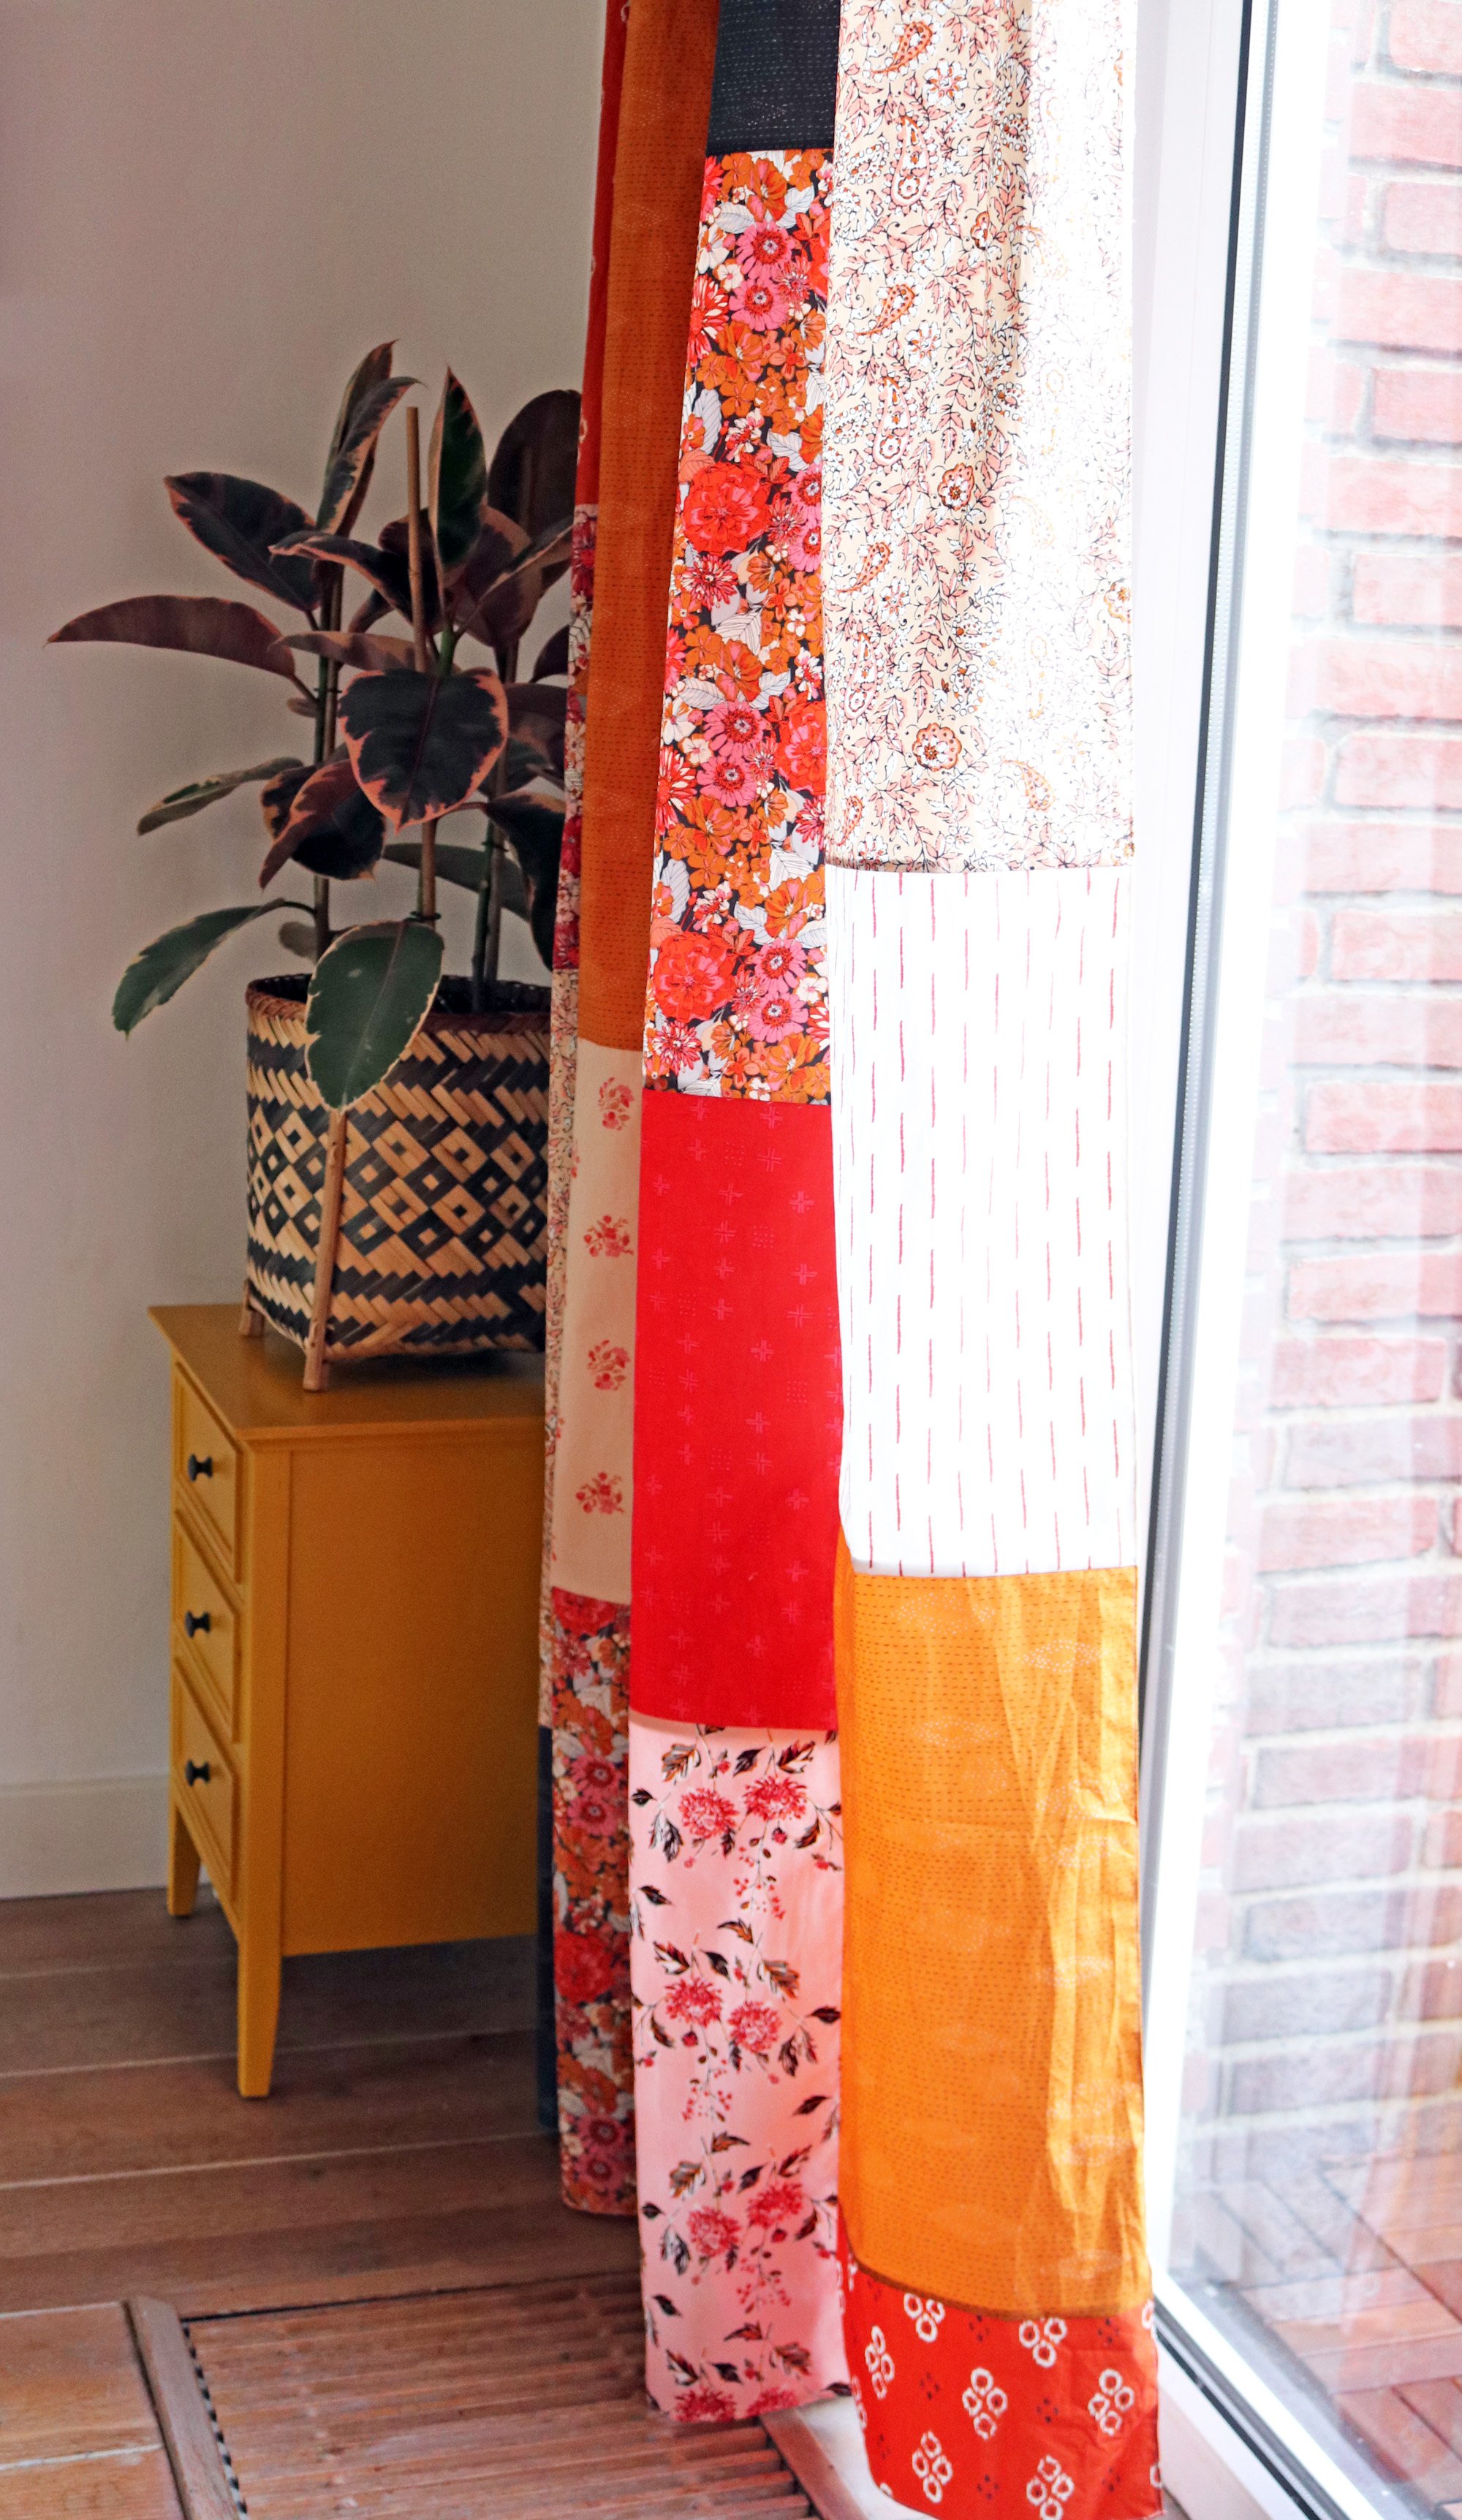
Last of all, fold the ribbons upwards so that they protrude from the top of the curtain panel. One by one, top stitch to secure ribbon tabs in proper, upward pointing position. And, you’re done.
Hang and enjoy your boho patchwork curtains!
If you make curtains in this style, I would love to see how they look in your space! Please tag your photos on Instagram with #stitchedincolor.
Happy decorating!


