Penny Patch: Prewash
This post is part of a series {Penny Patch} a Beginner’s Quilt-Along. You can join in anytime, even if you’re not a beginner!
Please see this page for links to all posts, and join us on Flickr to share your questions and work-in-progress!
To prewash or not to prewash? There are pros and cons, with the pros mostly involving a sense of security and the cons mostly involving wasting time and losing that crisp, new-fabric feel. For the beginner who wants to "do it by the book" I think prewashing is the way to go. If you prefer to skip this step, that's ok too!
Prewashing refers to washing and drying your fabric prior to sewing with it. Generally we do this with yardage or fat quarters, not smaller precuts like charm squares or jelly rolls (if you don't know what those are, just move on!).
Why prewash?
Machine washing and drying causes natural fabrics like quilting cottons to shrink. Shrinkage is triggered by the combination of heat, moisture and agitation, which is why you really should machine dry if pre-shrinking is your goal. Preshrinking is mandatory for apparel sewing and optional when sewing quilts. Many folks like the look of crinkly plushness created when a quilt is not washed until after its completed.
That said, if your quilt will combine different types of fabrics (flannel, quilting cotton, voile, linen, etc.), prewashing is highly recommended. Different substrates of fabrics shrink at different rates, which will put stress on your finished work. (FYI, for practical reasons I am not a fan of mixing fabric types in a quilt. I believe your work will be more long-lasting if you don't mix types.)
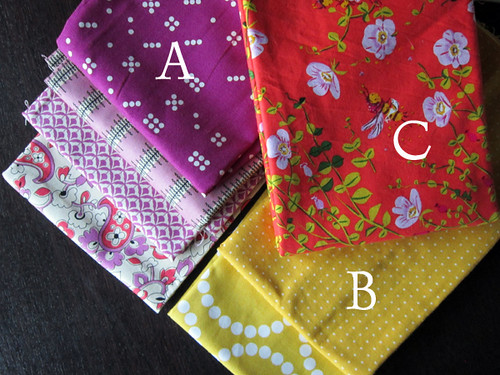
Prewashing also gives fabrics a chance to bleed. Most designer quilting cottons are very colorfast, but you never know when excess color might come off in the wash. Bleeding fabrics often stain other fabrics. Better for this to happen in the early stages! Reds, purples and dark oranges are likely bleeding culprits. Wash in cold water and inspect fabrics before machine drying. If you notice any bleed stains, try to remove them before machine drying, since that can set stains. Those that don't prewash often use Shout color catchers or other products to block bleed stains when first washing finished quilts.

Lastly, prewashing removes fabric finishes. Fabrics are treated with chemicals that help them maintain a crisp, smooth appearance on the bolt. When you prewash, use a bit of laundry soap to wash the bulk of these chemicals away. The up-side is your health. The down-side is that fabrics can be easier to cut and sew with chemical stabilizer finishes intact. If you don't prewash, maybe don't eat while you sew!
How to Prewash
Unfold & Sort. If washing lots of fabrics, consider doing more than one wash, keeping the potential bleeders away from your low-volumes.
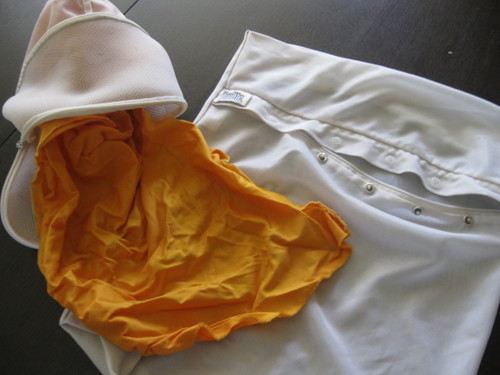
Protect. Fabrics will unravel at the raw edge, which can create pandemonium in the machines. To greatly reduce unraveling, prewash in separate delicate bags. The bags prevent the fabrics from tangling with each other when the edges start to unravel in the wash. If you just throw 5 cuts of fabric in the machine together with no prep, you'll spend quite a while cutting all the threads and then longer mourning the loss of so much fabric edge. Sometimes I have to double up, placing 2 cuts in 1 delicate bag. Doubling up is OK, but any more than that causes madness.
Another alternative is to pink the edges of your fabrics before washing. Sounds time-consuming!
Wash. A little detergent and a "light" wash in the washing machine.
Dry. Machine dry, but don't dry all the way. This is important - if you dry all the way the wrinkles will be heat set and very hard to remove. Stop the drier when fabrics are still slightly damp, then iron right away. If you're using delicate bags and you're super on top of things, you can also remove fabrics from the bags for the last 15 minutes or so in the drier. This will help them shake out some wrinkles with minimal tangling. But, that's totally extra credit, and you'll still want to remove damp and press.
Fold. Fold, arrange, admire. Now you're ready to start!
To prewash or not to prewash? There are pros and cons, with the pros mostly involving a sense of security and the cons mostly involving wasting time and losing that crisp, new-fabric feel. For the beginner who wants to "do it by the book" I think prewashing is the way to go. If you prefer to skip this step, that's ok too!
Prewashing refers to washing and drying your fabric prior to sewing with it. Generally we do this with yardage or fat quarters, not smaller precuts like charm squares or jelly rolls (if you don't know what those are, just move on!).
Why prewash?
Machine washing and drying causes natural fabrics like quilting cottons to shrink. Shrinkage is triggered by the combination of heat, moisture and agitation, which is why you really should machine dry if pre-shrinking is your goal. Preshrinking is mandatory for apparel sewing and optional when sewing quilts. Many folks like the look of crinkly plushness created when a quilt is not washed until after its completed.
That said, if your quilt will combine different types of fabrics (flannel, quilting cotton, voile, linen, etc.), prewashing is highly recommended. Different substrates of fabrics shrink at different rates, which will put stress on your finished work. (FYI, for practical reasons I am not a fan of mixing fabric types in a quilt. I believe your work will be more long-lasting if you don't mix types.)
Prewashing also gives fabrics a chance to bleed. Most designer quilting cottons are very colorfast, but you never know when excess color might come off in the wash. Bleeding fabrics often stain other fabrics. Better for this to happen in the early stages! Reds, purples and dark oranges are likely bleeding culprits. Wash in cold water and inspect fabrics before machine drying. If you notice any bleed stains, try to remove them before machine drying, since that can set stains. Those that don't prewash often use Shout color catchers or other products to block bleed stains when first washing finished quilts.
Lastly, prewashing removes fabric finishes. Fabrics are treated with chemicals that help them maintain a crisp, smooth appearance on the bolt. When you prewash, use a bit of laundry soap to wash the bulk of these chemicals away. The up-side is your health. The down-side is that fabrics can be easier to cut and sew with chemical stabilizer finishes intact. If you don't prewash, maybe don't eat while you sew!
How to Prewash
Unfold & Sort. If washing lots of fabrics, consider doing more than one wash, keeping the potential bleeders away from your low-volumes.
Protect. Fabrics will unravel at the raw edge, which can create pandemonium in the machines. To greatly reduce unraveling, prewash in separate delicate bags. The bags prevent the fabrics from tangling with each other when the edges start to unravel in the wash. If you just throw 5 cuts of fabric in the machine together with no prep, you'll spend quite a while cutting all the threads and then longer mourning the loss of so much fabric edge. Sometimes I have to double up, placing 2 cuts in 1 delicate bag. Doubling up is OK, but any more than that causes madness.
Another alternative is to pink the edges of your fabrics before washing. Sounds time-consuming!
Wash. A little detergent and a "light" wash in the washing machine.
Dry. Machine dry, but don't dry all the way. This is important - if you dry all the way the wrinkles will be heat set and very hard to remove. Stop the drier when fabrics are still slightly damp, then iron right away. If you're using delicate bags and you're super on top of things, you can also remove fabrics from the bags for the last 15 minutes or so in the drier. This will help them shake out some wrinkles with minimal tangling. But, that's totally extra credit, and you'll still want to remove damp and press.
Fold. Fold, arrange, admire. Now you're ready to start!