Star-weaving
You all, I am so touched by your sweet remarks about our work on our home. It's a blessing to get to share that here and feel how our journey connects with many of yours and see how you care. Thanks from my heart!
So, do you remember this color story, created by miss Emma Lamb?

I asked the Love circle quilting bee of do. Good Stitches to make hand-pieced star blocks for our October quilt, with Emma's mosaic as our color guide. I knew it was a rather loose color scheme, but figured "scrappy" might be the happy result.
So, what do you think? Sometimes I like it. Sometimes I think "meh, the colors are too somber." It might be that I'm not channeling "fall" at this point. It feels more like winter today! Well, fall or winter, I'm going to finish this quilt and do my bestest to make it shine. It's to be donated to a child through Wrap Them in Love. Maybe the colors will be just the thing for some sweet boy.
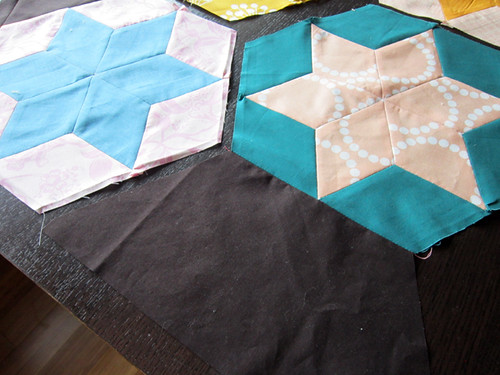
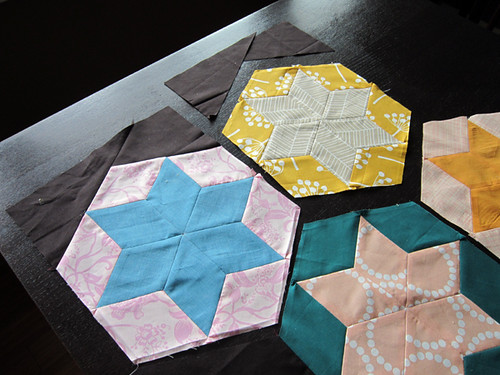
The blocks were individually English paper pieced by hand by my awesome bee mates. My plan was to join the blocks by machine. Not that I'd never done that before, but what better way to make myself learn? Necessity is the mother of...
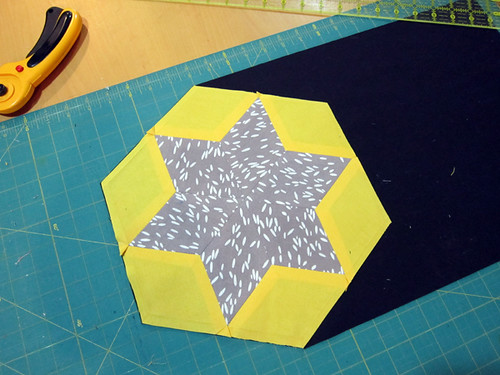
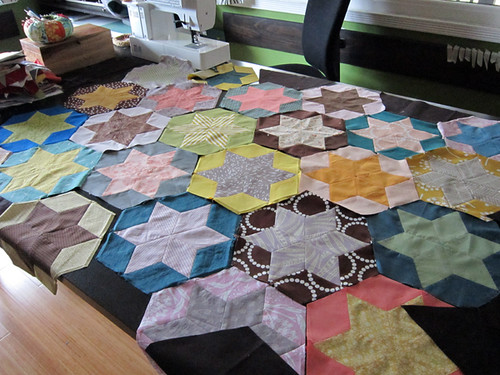
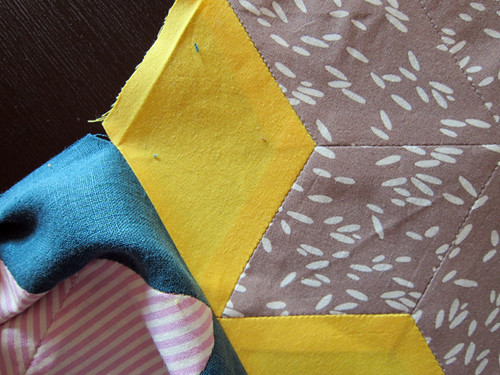
So this is where I've been the past few mornings. First off, I trimmed all the blocks to one standard size. Then, I used a trimmed block as a guide to cut some filler pieces out of my border fabric, Kona Espresso.
See that dark brown shape at the end of the first row? It's filling the row out so that I don't have to cut any star blocks.
I also filled out the edges to create straight sides.
Next I pieced the star hexagons together into rows with simple straight machine seams. Using this video tutorial by Lady Harvatine, I made sure to leave the edges of all seams unsewn with a 1/4" gap. This gap leaves the 1/4" seam allowance free so it's possible to sew the zig-zagging rows together.
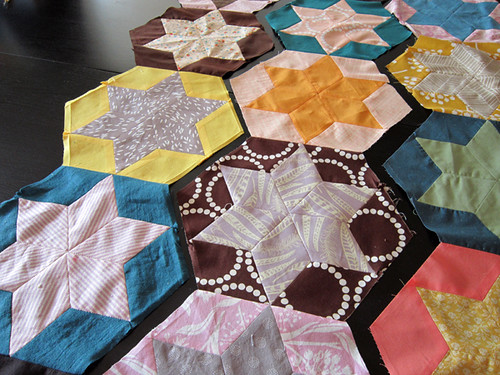
Piecing actually turned out to be easier than I thought. Slow, but easy. Each edge of each hexagon is sewn individually, matching up sides and pinning carefully. Always you leave a 1/4" gap at the beginning and end of each line. After sewing one edge of the hexagon rows, you just rotate the fabrics to match up the next edge and sew another straight line with 1/4" gaps. All that starting and stopping is slow, but not slower than hand piecing! And, I'm happy to report that the joins came out nice and flat.
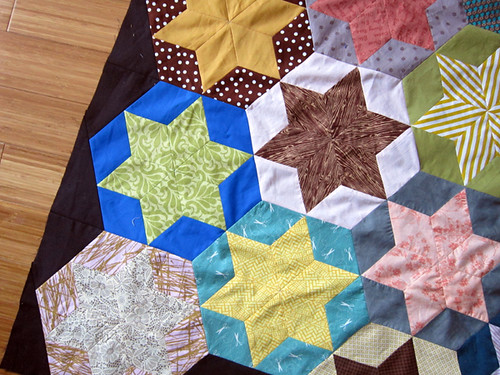
Last night Brandon came by and said, "I thought you couldn't do that?" He meant the joins. I said, "Oh, yeah, those are y-seams, aren't they. Cool, I learned how!". Hadn't realized they were y-seams. I was just "machine-piecing hexagons". Haha. Well, there you go! Next time I want to sew a y-seam, I'm going to do this 1/4" gap method. It was much neater for me than other methods I've tried.
And, in case you're wondering, I would totally do this kind of quilt with a bee again. I think everyone enjoyed making a few hand-pieced stars (we even had a guest stitcher). And, since the stars were so big, it did work up into a nice-sized quilt top. Now I'm off to add some more Espresso at the edges. Catch you later!
So, do you remember this color story, created by miss Emma Lamb?
I asked the Love circle quilting bee of do. Good Stitches to make hand-pieced star blocks for our October quilt, with Emma's mosaic as our color guide. I knew it was a rather loose color scheme, but figured "scrappy" might be the happy result.
So, what do you think? Sometimes I like it. Sometimes I think "meh, the colors are too somber." It might be that I'm not channeling "fall" at this point. It feels more like winter today! Well, fall or winter, I'm going to finish this quilt and do my bestest to make it shine. It's to be donated to a child through Wrap Them in Love. Maybe the colors will be just the thing for some sweet boy.
The blocks were individually English paper pieced by hand by my awesome bee mates. My plan was to join the blocks by machine. Not that I'd never done that before, but what better way to make myself learn? Necessity is the mother of...
So this is where I've been the past few mornings. First off, I trimmed all the blocks to one standard size. Then, I used a trimmed block as a guide to cut some filler pieces out of my border fabric, Kona Espresso.
See that dark brown shape at the end of the first row? It's filling the row out so that I don't have to cut any star blocks.
I also filled out the edges to create straight sides.
Next I pieced the star hexagons together into rows with simple straight machine seams. Using this video tutorial by Lady Harvatine, I made sure to leave the edges of all seams unsewn with a 1/4" gap. This gap leaves the 1/4" seam allowance free so it's possible to sew the zig-zagging rows together.
Piecing actually turned out to be easier than I thought. Slow, but easy. Each edge of each hexagon is sewn individually, matching up sides and pinning carefully. Always you leave a 1/4" gap at the beginning and end of each line. After sewing one edge of the hexagon rows, you just rotate the fabrics to match up the next edge and sew another straight line with 1/4" gaps. All that starting and stopping is slow, but not slower than hand piecing! And, I'm happy to report that the joins came out nice and flat.
Last night Brandon came by and said, "I thought you couldn't do that?" He meant the joins. I said, "Oh, yeah, those are y-seams, aren't they. Cool, I learned how!". Hadn't realized they were y-seams. I was just "machine-piecing hexagons". Haha. Well, there you go! Next time I want to sew a y-seam, I'm going to do this 1/4" gap method. It was much neater for me than other methods I've tried.
And, in case you're wondering, I would totally do this kind of quilt with a bee again. I think everyone enjoyed making a few hand-pieced stars (we even had a guest stitcher). And, since the stars were so big, it did work up into a nice-sized quilt top. Now I'm off to add some more Espresso at the edges. Catch you later!