Quilt-as-you-go Clamshells tutorial

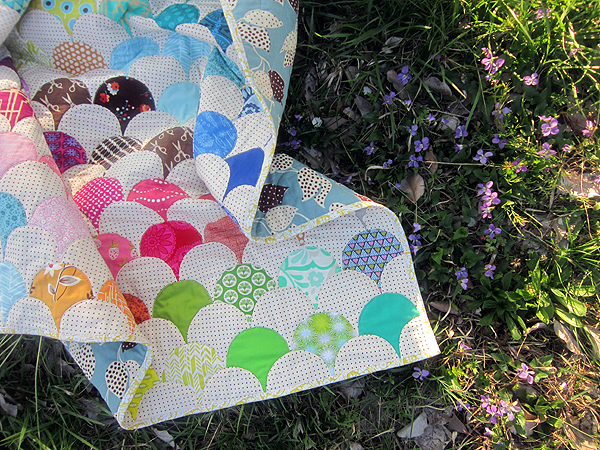
I'm making my clamshell throw quilt with a quilt-as-you-go (QAYG) technique. When I machine applique my clamshells row by row, I'll also be stitching through batting and backing, quilting as I go. It's a great way to save time and to work with small clams without going crazy. Let me show you what I mean! Today I'm sharing an overview of my QAYG technique so you can decide if it's right for you.
Step 1: Baste Backing + Batting
Create a backing for your quilt that's about 4" larger than desired quilt size in both width and length. My throw quilt is to finish 52" x 68", so I cut a 55" wide fabric to 72" long, creating a 55" x 72" backing.
Cut a batting to the same size or slightly smaller than your backing. Be sure you can see the side edges of your backing after basting so that you can be sure to keep the QAYG work from drifting off the edges of the backing.
Baste batting to your backing as desired. If you use basting pins, you'll need to remove them as you applique each row. I used my trusty 505 basting spray which will be so easy for QAYG - nothing to remove as I work.
First I taped my backing to the floor, right side down.
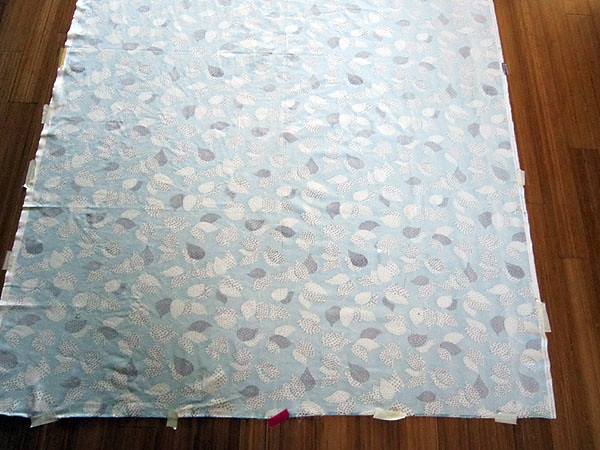
Then I spread the batting out across the backing. To baste, I folded one side of the batting back at a time, sprayed basting spray on the revealed backing and then smoothed batting back in place.

Ta da, basted batting/backing ready to go!
Step 2: Prepare Applique Surface
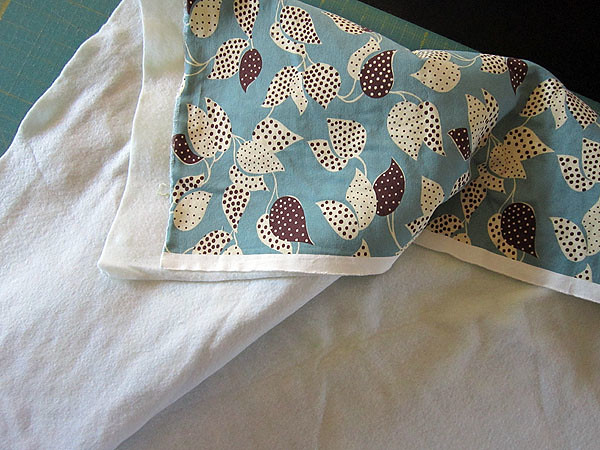
Trim the top edge of your quilt for a straight edge, cutting through both batting and backing as necessary to ensure that both are even and flush at the straight edge. I folded my work carefully and used a ruler placed perpendicular to the fold in order to cut a straight edge.
Referencing the newly trimmed, top edge of your quilt, draw a perpendicular line on the left edge of the work. This line will become the left edge of your finished quilt top. Extend the line all the way down the left side of the work, keeping it straight!
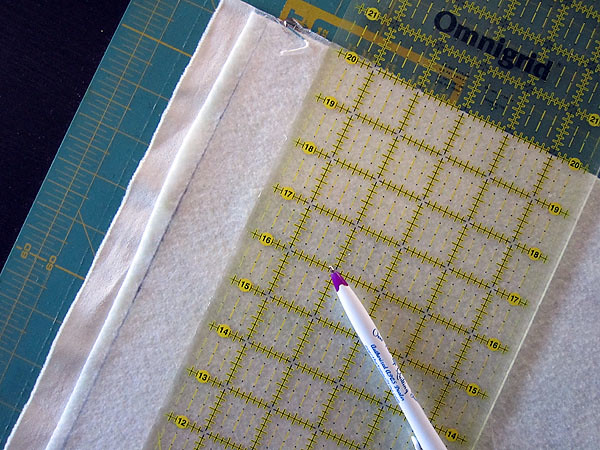
I matched a horizontal line of my ruler to the trimmed top edge of my quilt and then drew a line as far left as possible, while still remaining on the batting. You can use a regular ball point pen to draw this line on the batting since it will be covered by fabric later on.
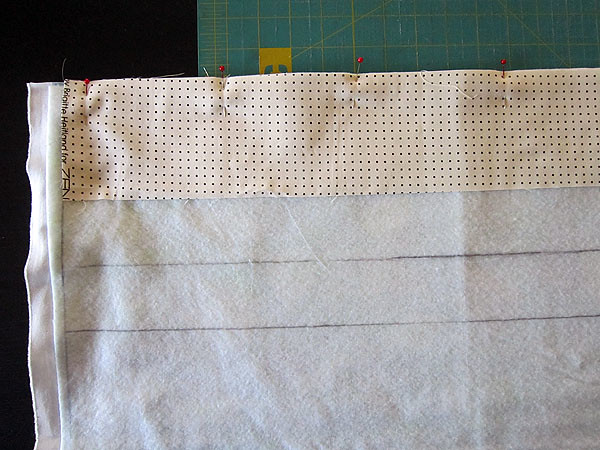
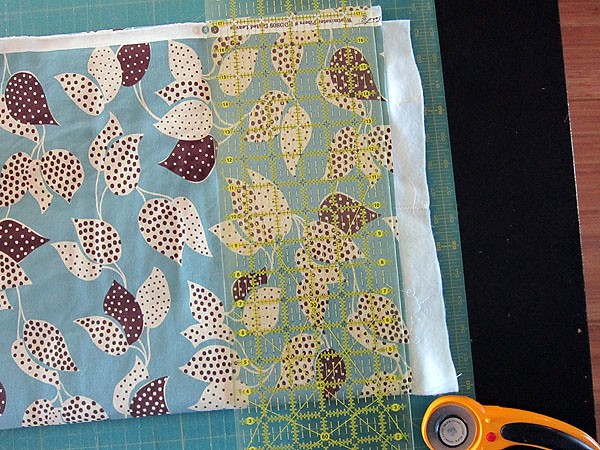
Prepare a fabric strip to cover the top edge of the quilt, from one side all the way across to the other side. Since I am working with 4" finished clams, a 3.5" wide fabric strip is appropriate. If you are working with large 8" clams, try a 7.5" strip. You can always trim off excess top edge fabric strip later, to suit your tastes. Align one long edge of the strip with the top edge of the quilt top. Pin to secure.
Note: The first row of clams will overlap partially with this top edge fabric strip, allowing some of the fabric strip to show all the way across the quilt. If you don't like the look of one fabric across the top, you can place your first row of clams so that it hangs over the top quilt edge by quite a bit. After placing and appliqueing row 2, you would then trim off the overhanging clamshell fabrics at the top quilt edge. That's slightly more tricky, but doable!
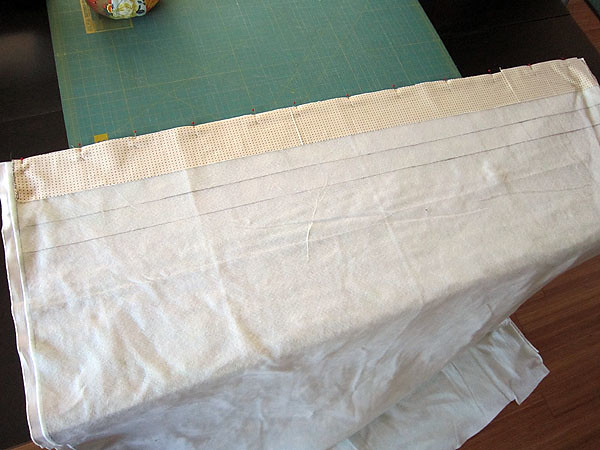
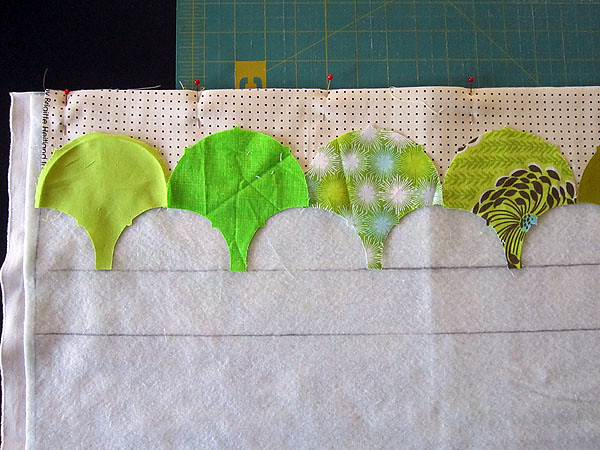
Now, mark lines across the width of the quilt. These will serve as guidelines for each clamshell row, keeping shapes straight and tidy. Measure and mark lines at intervals equal to 1/2 of your finished clam size. Since I am working with 4" finished clams, my lines are marked at 2" intervals.
Continue to mark lines all the way down your quilt, as many lines as clamshell rows desired.
Step 3: Machine Applique/QAYG
I'll be sewing with cream thread and will keep my feed dogs engaged with regular straight stitch settings. If you have trouble with bunching or puckering, use a walking foot for this step. Work through then entire applique/QAYG process one row of clams at a time.
First press the top curved edge of each clam under by a generous 1/4". To make pressing easier, create a card stock pressing template. Trace the raw edged clam shape onto card stock and cut it out. Next, measure and remove a generous 1/4" from the top curved edge only.
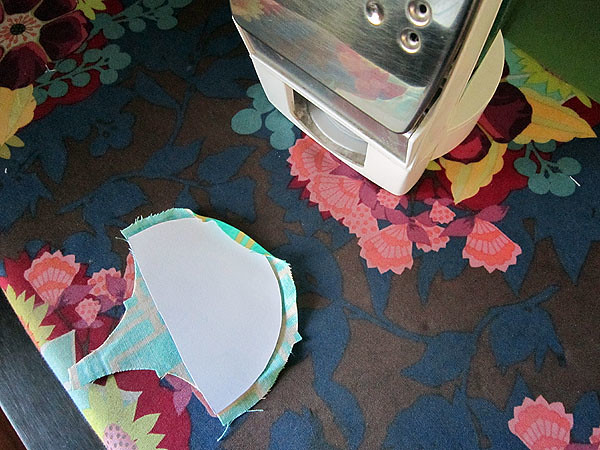
Preparing only one row of clams at a time, wrap the raw edge around the template and press. If your fabric won't hold the shape well, try adding some starch just to that top edge. To place starch with precision, dip a tiny paintbrush into the starch and paint it right where you want it.
In this tutorial I have not pressed under the raw edges as I am not actually ready to sew the clams down just yet. Please imagine that the edges are pressed under!
Place your first row of clams on the batting background with the bottom point of each clam resting on a marked line. The turned-under left edge of the first clam should touch your left edge quilt guideline. Place the clams so that the turned under top curves touch neatly, but do not overlap. Either pin or glue baste to secure. I will be using Roxanne's glue baste, so that I do not have to remove pins as I sew.
Working from one side of the row all the way across in one continuous stitch path, sew along the top edge of the clams only. You are sewing through clams, batting and backing, quilting as you go! I will show photos of my stitched clamshell rows in the coming weeks, as soon as I have them.
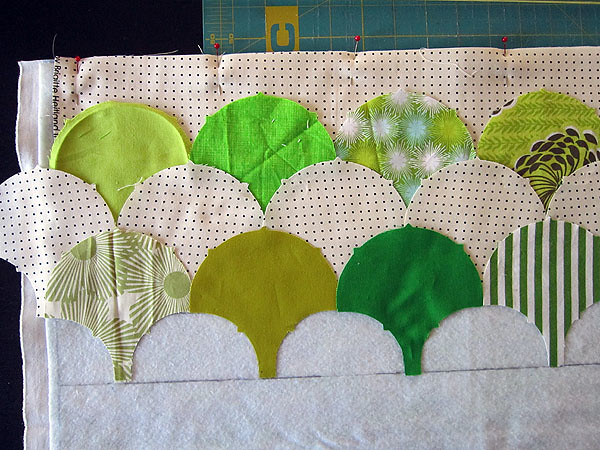
After sewing down row 1, prepare clamshell row 2. First press all edges under, then place and secure clams as shown. Again, the bottom point of each clam will rest on a marked line. Notice that the left-most clam must extend past the left edge quilt line. Any fabric that extends past the left edge quilt line will be trimmed off when the work is finished. Machine applique/QAYG as before, again sewing in one continuous line from edge to edge of the work.
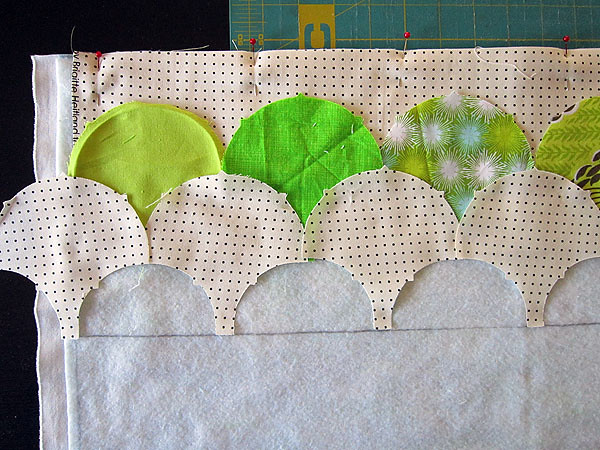
Continue adding row upon row. Each row will overlap the previous row just enough so as to cover the stitch line where it crosses from one clam to another!
Step 4: Finish
I don't have any photos of the finishing process yet, since my quilt is just starting, but it's not hard to imagine. When all your rows are appliqued, you will trim the quilt so that no batting/backing shows. You will trim along the left edge quilt line and also along the right edge of the quilt, cutting off excess clamshell fabric to create a straight edge. Finally, you will trim at the bottom of the quilt, cutting off much of the last row of clams, but leaving their top curves.
Since your quilt is already quilted, all that remains is binding! We're doing most of the work during Step 3 for sure!
Again, I will share more detailed process photos throughout the quilt-along to help walk you through my QAYG method. I hope that today's tutorial overview gives the info you need to confidently decide which method is best for you. To consider other methods, see Clambake Technique Buffet.
If you'll be doing the QAYG method, remember you must have your backing and batting on hand to start sewing! Also, you may like to use basting spray and a product like Roxanne's glue baste to ease the whole process.
Alright, let's go forth and cut clams!