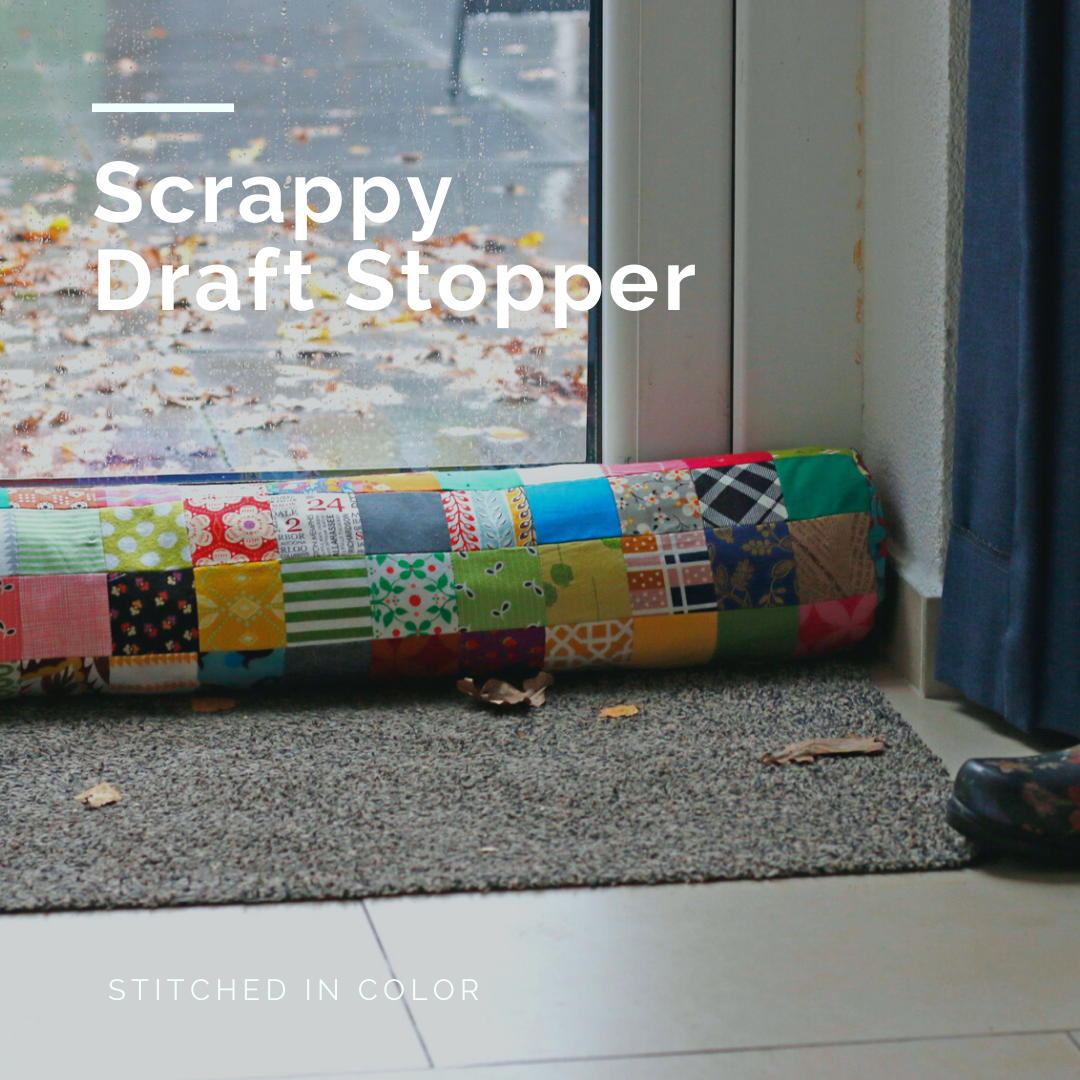
Draft Stopper pillow tutorial
When the weather turned quite chilly, I noticed our back door has a bit of a draft. What a good excuse for some patchwork! Nothing makes a living room more cozy, right?
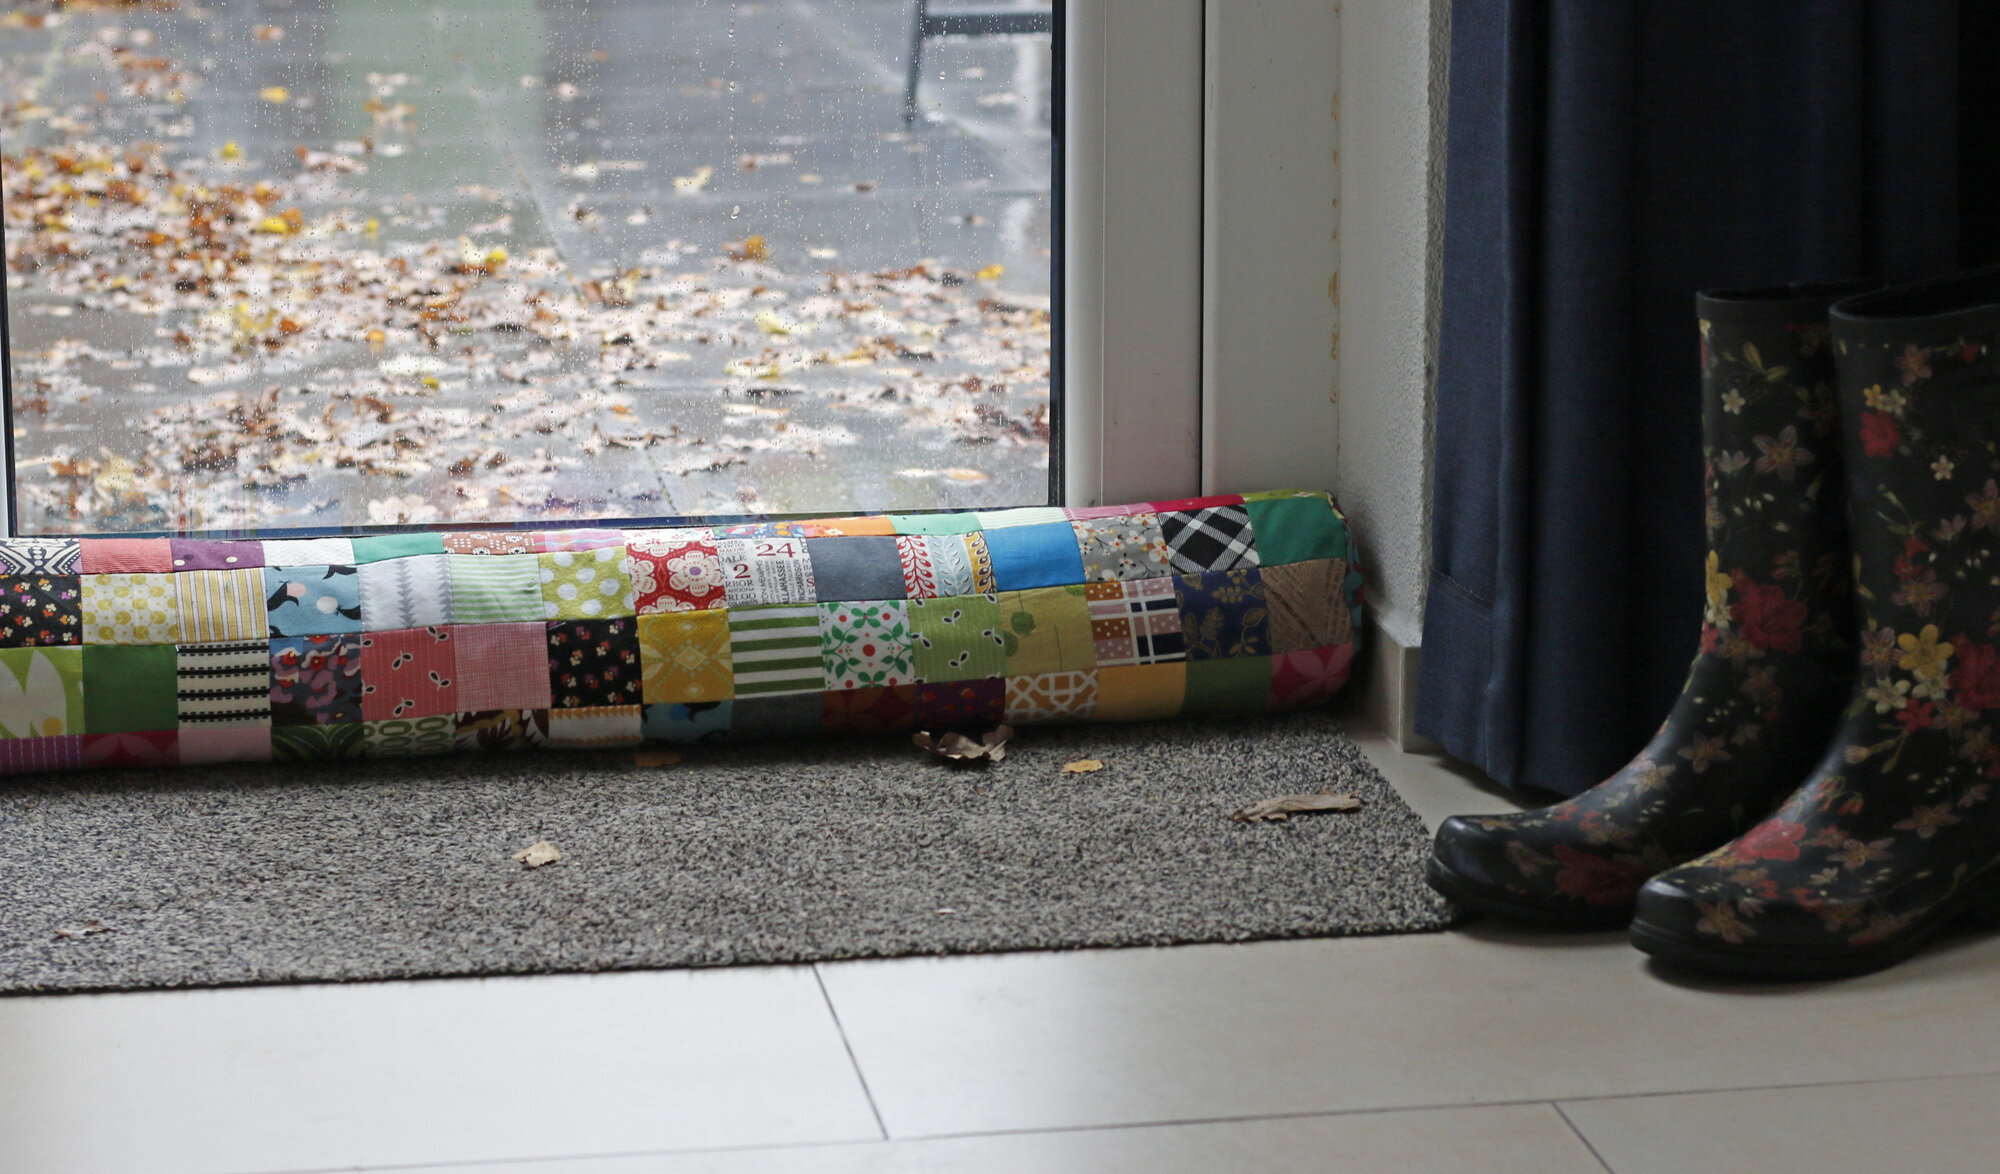
This simple tutorial creates a long, cylindrical pillow (34”) that sits along the bottom of the door to stop drafts. You could also use one for a drafty windowsill. Adjust to suit the length of your home.
Supplies
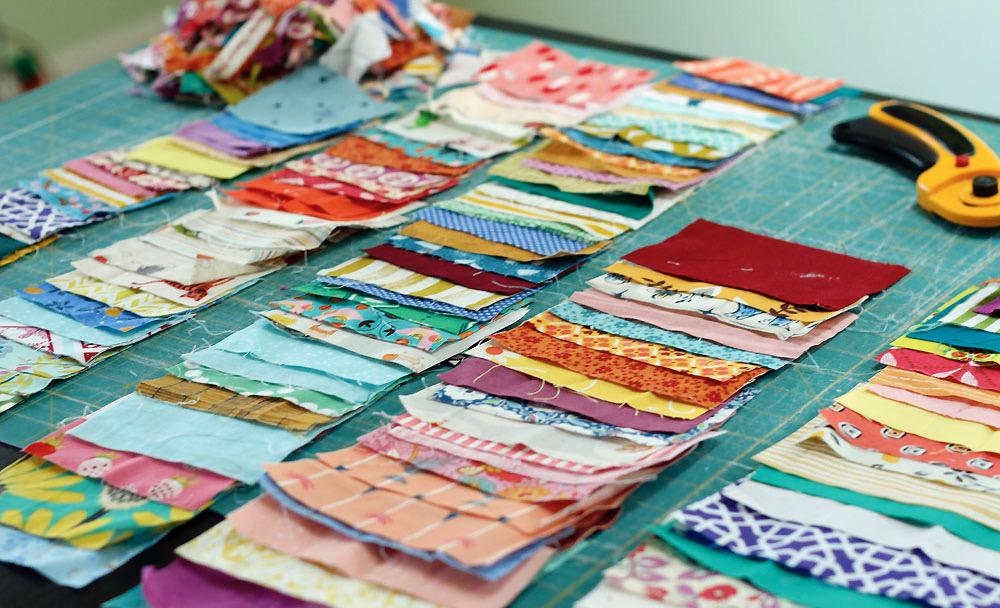
Fabric scraps to cut (136) 2.5” squares
(2) 6” squares for pillow ends
Batting scraps or fill fiber
Hand sewing needle and thread
Cut
1. For a pillow like mine, cut 136 squares, each 2.5”. I already had a batch of such squares cut and partially joined, leftover from another project. This is a good chance to use your small scraps!

2. Using the free circle template made by Sew 4 Home, print and cut out a 5.5” circle. This shape is for the ends of the pillow. It should measure 5.5” in diameter (straight across the circle). Cut (2) fabric circles.
Sew Patchwork
3. For speed, start by randomly piecing pairs of 2.5” squares. Sew with a 1/4” seam allowance. Join about 80% of your squares in this way, leaving some singles. Press pairs open.
4. Arrange the squares in rows of 13 squares. Make 8 rows total. Join the rows, creating a rectangle of patchwork in a 13 x 8 grid. Press all seams.
5. Stay stitch along the outer raw edges of the patchwork to prevent seams from popping open. Stitch around the work at 1/8” from the raw edge.

Go 3-Dimensional
6. Match the long raw edges of the patchwork right sides together. Sew the patchwork closed to create a tube-shape, but not entirely closed. Leave a large opening approximately 1/3 of the entire length and centered. As before, continue using a 1/4” seam allowance.

6. Press the stitched seam open. Also press the un-stitched segment open so that 1/4” of fabric is folded back from the opening edges. This will make the opening easier to close later.
7. Pin a fabric circle to the end of the tube, right sides together. To help with placement, first fold the circle in half and finger press to make a visible crease. Match the crease lines with opposite patchwork seams. Spread the fabric evenly, using lots of pins. Sew slowly, with a 1/4” seam allowance.

Don’t worry if you sew a few tucks into this seam. It’s fully functional and won’t be noticed later on!
Repeat - sewing a circle onto the opposite end. Turn the work right side out and finger press along the circular seams to fully open.

Finish
8. Stuff your pillow with fiber fill or batting scraps. I have a lot of batting scraps from my longarm quilting business. I rolled them into a long tube. Hooray for using materials on hand! It’s not so easy to stuff such a long pillow, so expect to take time. You’ll have to get your hands all the way in there and push to the very edges to fill her nicely.

9. Hand sew the opening shut, using your favorite stitch. I opted for a simple whip stitch - easy and effective. Match up the seams of your patchwork as you sew.

It helps to pin or clip the seam together to hold things in place while you sew.
And then - ta da! Something useful for your home from bits of fabric and fiber you probably had lying around. Don’t you love that about sewing?

Over the years I’ve written a TON of free tutorials. Some are simple sewing projects like this one. Others are quilting skills like spray basting or sewing skills like adding an invisible zipper to your pillow. Of course, I’ve also shared a whole bunch of quilt blocks!
One of the best things about blogging is being able to share what I’ve learned with others, in a way that is easy-to-organize and access.
Visit my Tutorials page for loads of resources.
Happy sewing!