Foundation Paper Piecing Tips
Are you new to foundation paper piecing (also called machine paper piecing) and itching to sew the Confetti quilt? The pattern is not written for someone brand-new to this technique, but that needn’t stop you. You can totally learn to do this with a little extra leg work. And you’ll be glad you did! Foundation paper piecing is a really useful tool for sewing snazzy quilt blocks.
What is it?
With foundation paper piecing you sew on the lines of a printed pattern to create precise and detailed patchwork. After completing a block, you tear away the paper from the back of the work. Everyone finds this style of sewing quite odd and counterintuitive at first. But, once you get it, you’ll find it’s easy and precise. It can make a new quilter look like a seasoned pro.
Start Simple
It’s nice to learn paper piecing with a simple pattern. My After the Rain quilt pattern is written for those who have never before foundation paper pieced. It goes over all the basics step-by-step and is so simple you can’t get confused. You’ll also find free patterns for blocks online (see first YouTube tutorial below). If you’ve never foundation paper pieced before, I suggest you learn the technique via a simple pattern, before starting the Confetti quilt.
Watch Videos
You need to SEE foundation paper piecing in order to understand it. Fortunately there are lots of free YouTube videos on offer. The thing is, there are also a lot of different methods to this technique. Methods tend to match the style of quilt block being made and the style of sewing appreciated by the teacher. Some of us like more tools, more precision, more steps. Others like to keep things as simple as possible or focus on speed. As a beginner, that’s got to be confusing.
I spent some time watching videos and found two that mesh with my techniques:
Beginner Foundation Paper Piecing by Etive & Co. You can download the paper piecing pattern on which she is demonstrating for free. This one is 22 minutes long, so it really breaks down the process if you are starting from scratch.
Angela’s Paper Piecing Tips from The Midnight Quilt Show. This 7 minute video is a nice refresher if you’ve done this before, but it’s been awhile. She also covers a few trouble-shooting topics.
I also posted a short Instagram video today, showing my foundation paper piecing process for starting a Confetti quilt block. After you’ve learned how to paper piece, take a look at this video to understand how these techniques translate to the Confetti quilt.

My Foundation Paper Piecing Approach
There’s no one right way to do this, just the way that works for you. As a sewist I don’t tend to buy speciality tools, and I like to save time rather than prioritize perfection. Here’s how those preferences play out in foundation paper piecing for me.
I use Glue, rather than pins to hold the first fabric piece to the paper.
I use a Light Source to check placement of every single piece of fabric. The light from a window, lamp or even my sewing machine light all work. In the IG video above, I’m using my sewing machine light!
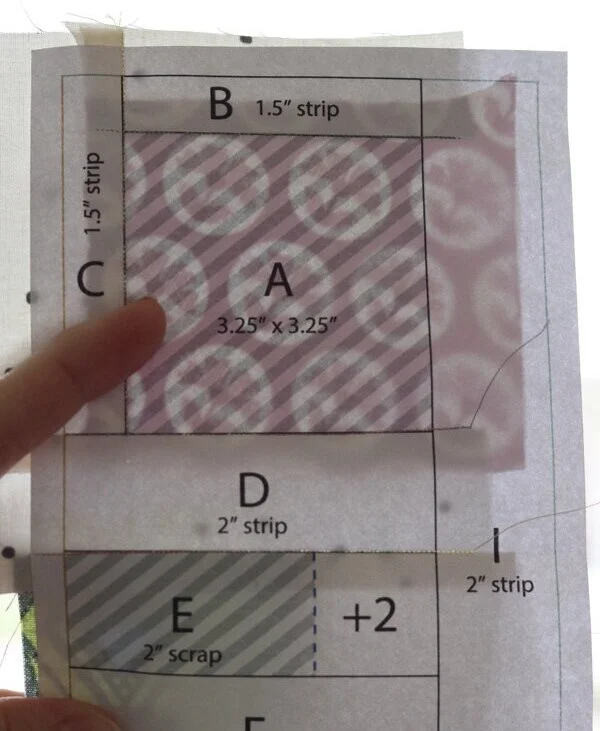
In this photo I’m holding the pattern up to the window, with the printed side of the pattern facing me. I can see the position of the fabrics on the other side as the light shines through the paper. This is how I check placement before sewing and check my seam allowances.
I sew with a 1.5 Stitch Length. In the video you can’t see that I’m sewing on the pattern lines, but I am! Just like so.

I start and stop my stitches Beyond the pattern lines, sewing about 1/4” into the seam allowances. No need to back stitch.
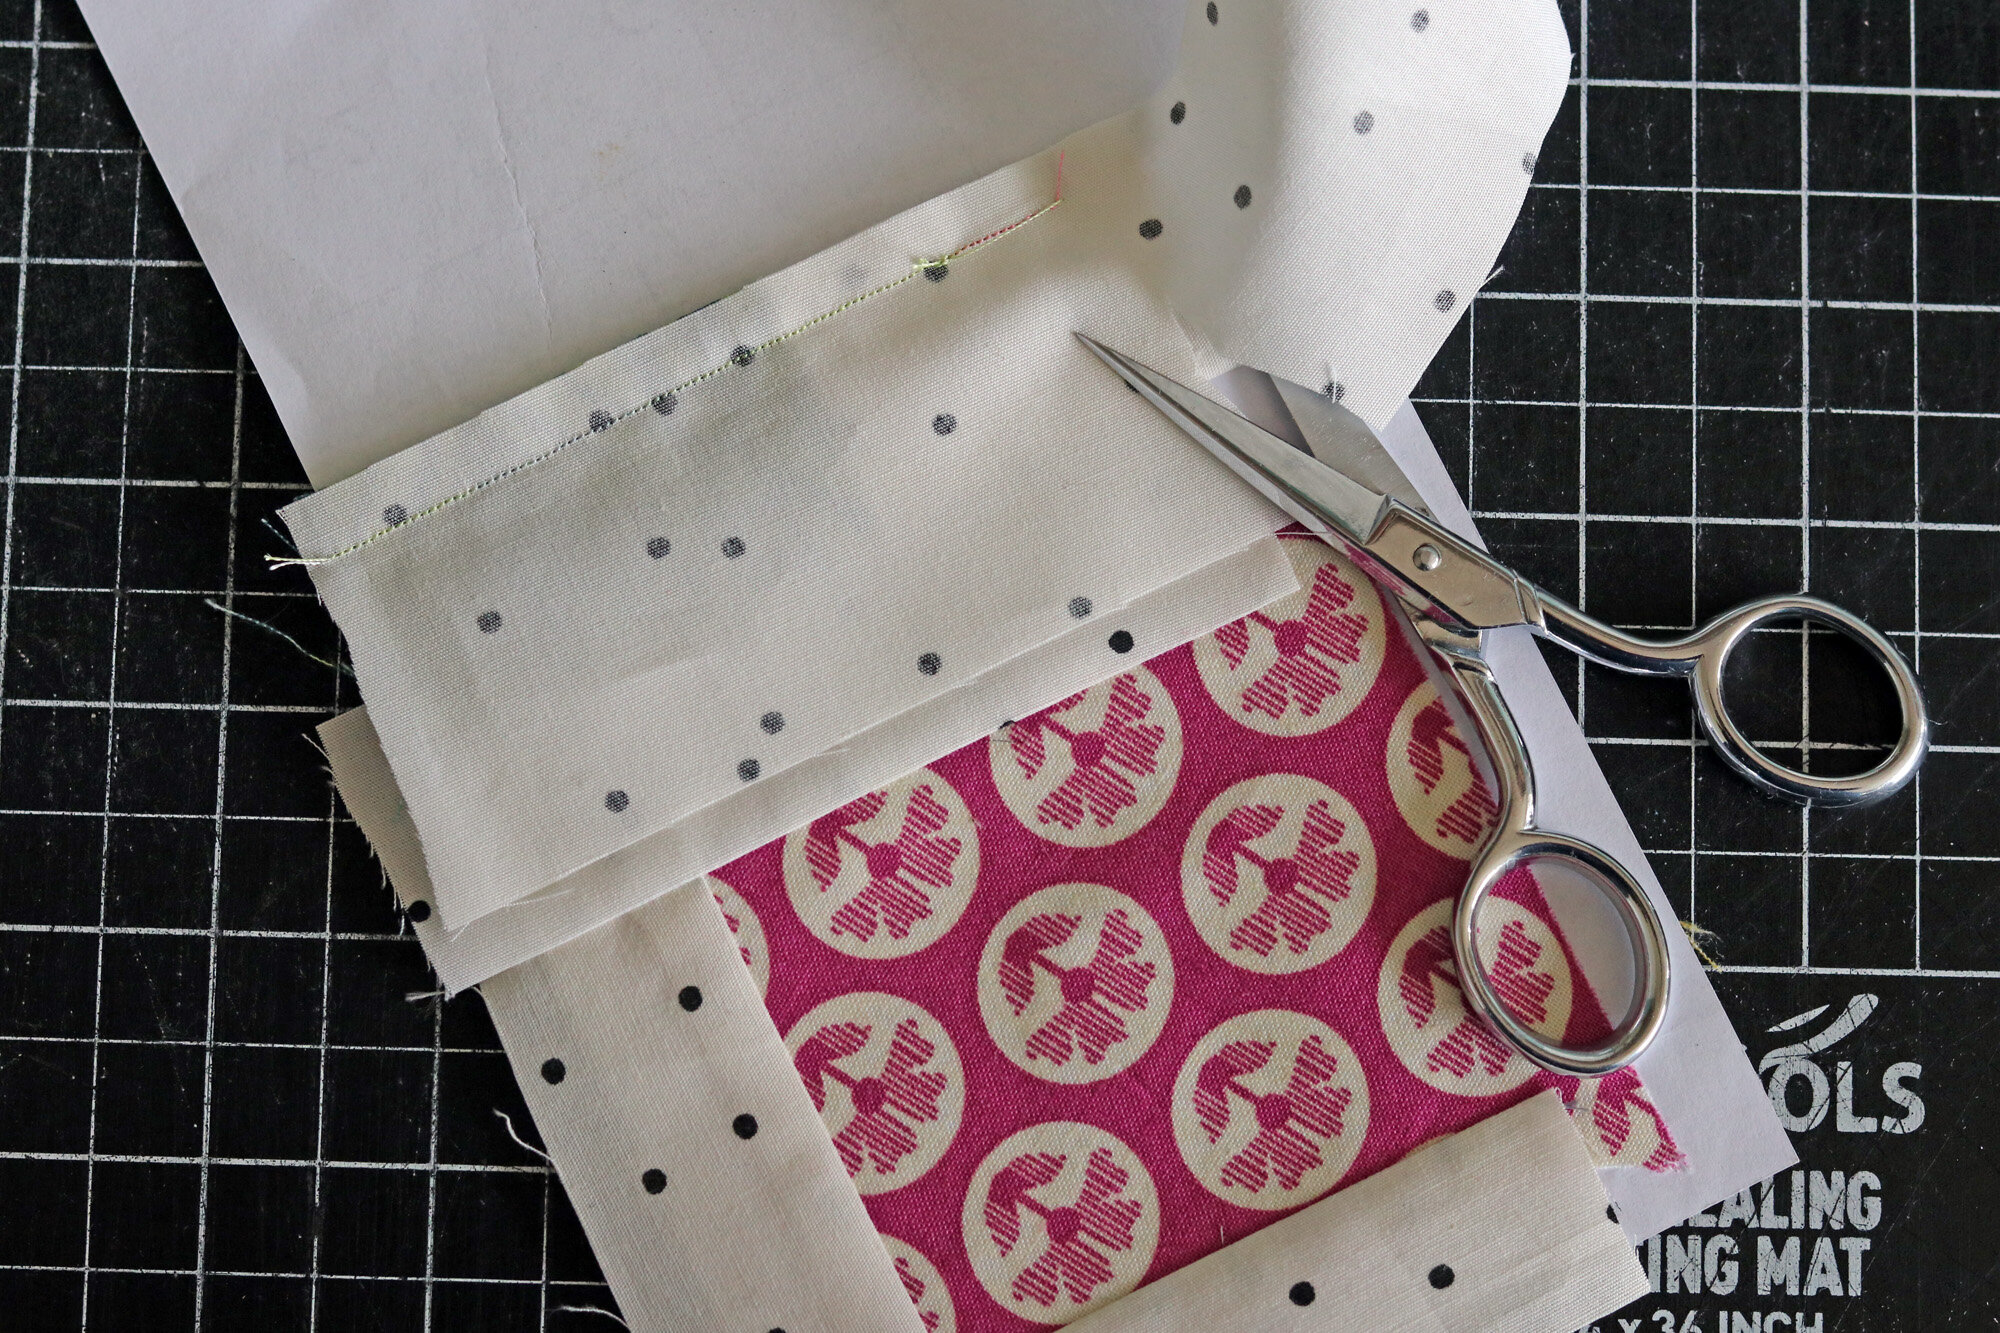
I trim seam allowances After Sewing. In the video I’m using small scissors for logistical reasons. In reality I trim seam allowances with a rotary cutter for speed. I have an “add a quarter” ruler, often suggested in videos, but don’t like use it.


First I fold the paper away from the seam allowance area. It folds easily along the just-made stitch line.
Then I trim a 1/4” seam allowance using a small ruler and my rotary cutter.
I press with an Iron. I’ve never tried a seam roller for pressing, but it could be nice.
When using fabric strips, I prefer to Trim After Sewing. Remember that I stop and start my sewing beyond the pattern lines? This means that when I trim fabric strips, I know I’ve provided enough fabric if I trim a bit past where my sewing stops.
My patterns don’t have an illustrated exterior seam allowance. When you finish sewing all the pieces, you trim around the exterior pattern lines (aqua and yellow lines) adding a 1/4” seam allowance.
If you prefer an illustrated seam allowance, you can make one when you cut out your paper foundation. Just cut the paper at 1/4” beyond the exterior pattern lines. Then, your seam allowance is illustrated and you can remember to place your fabric to cover that area! Easy peasy.
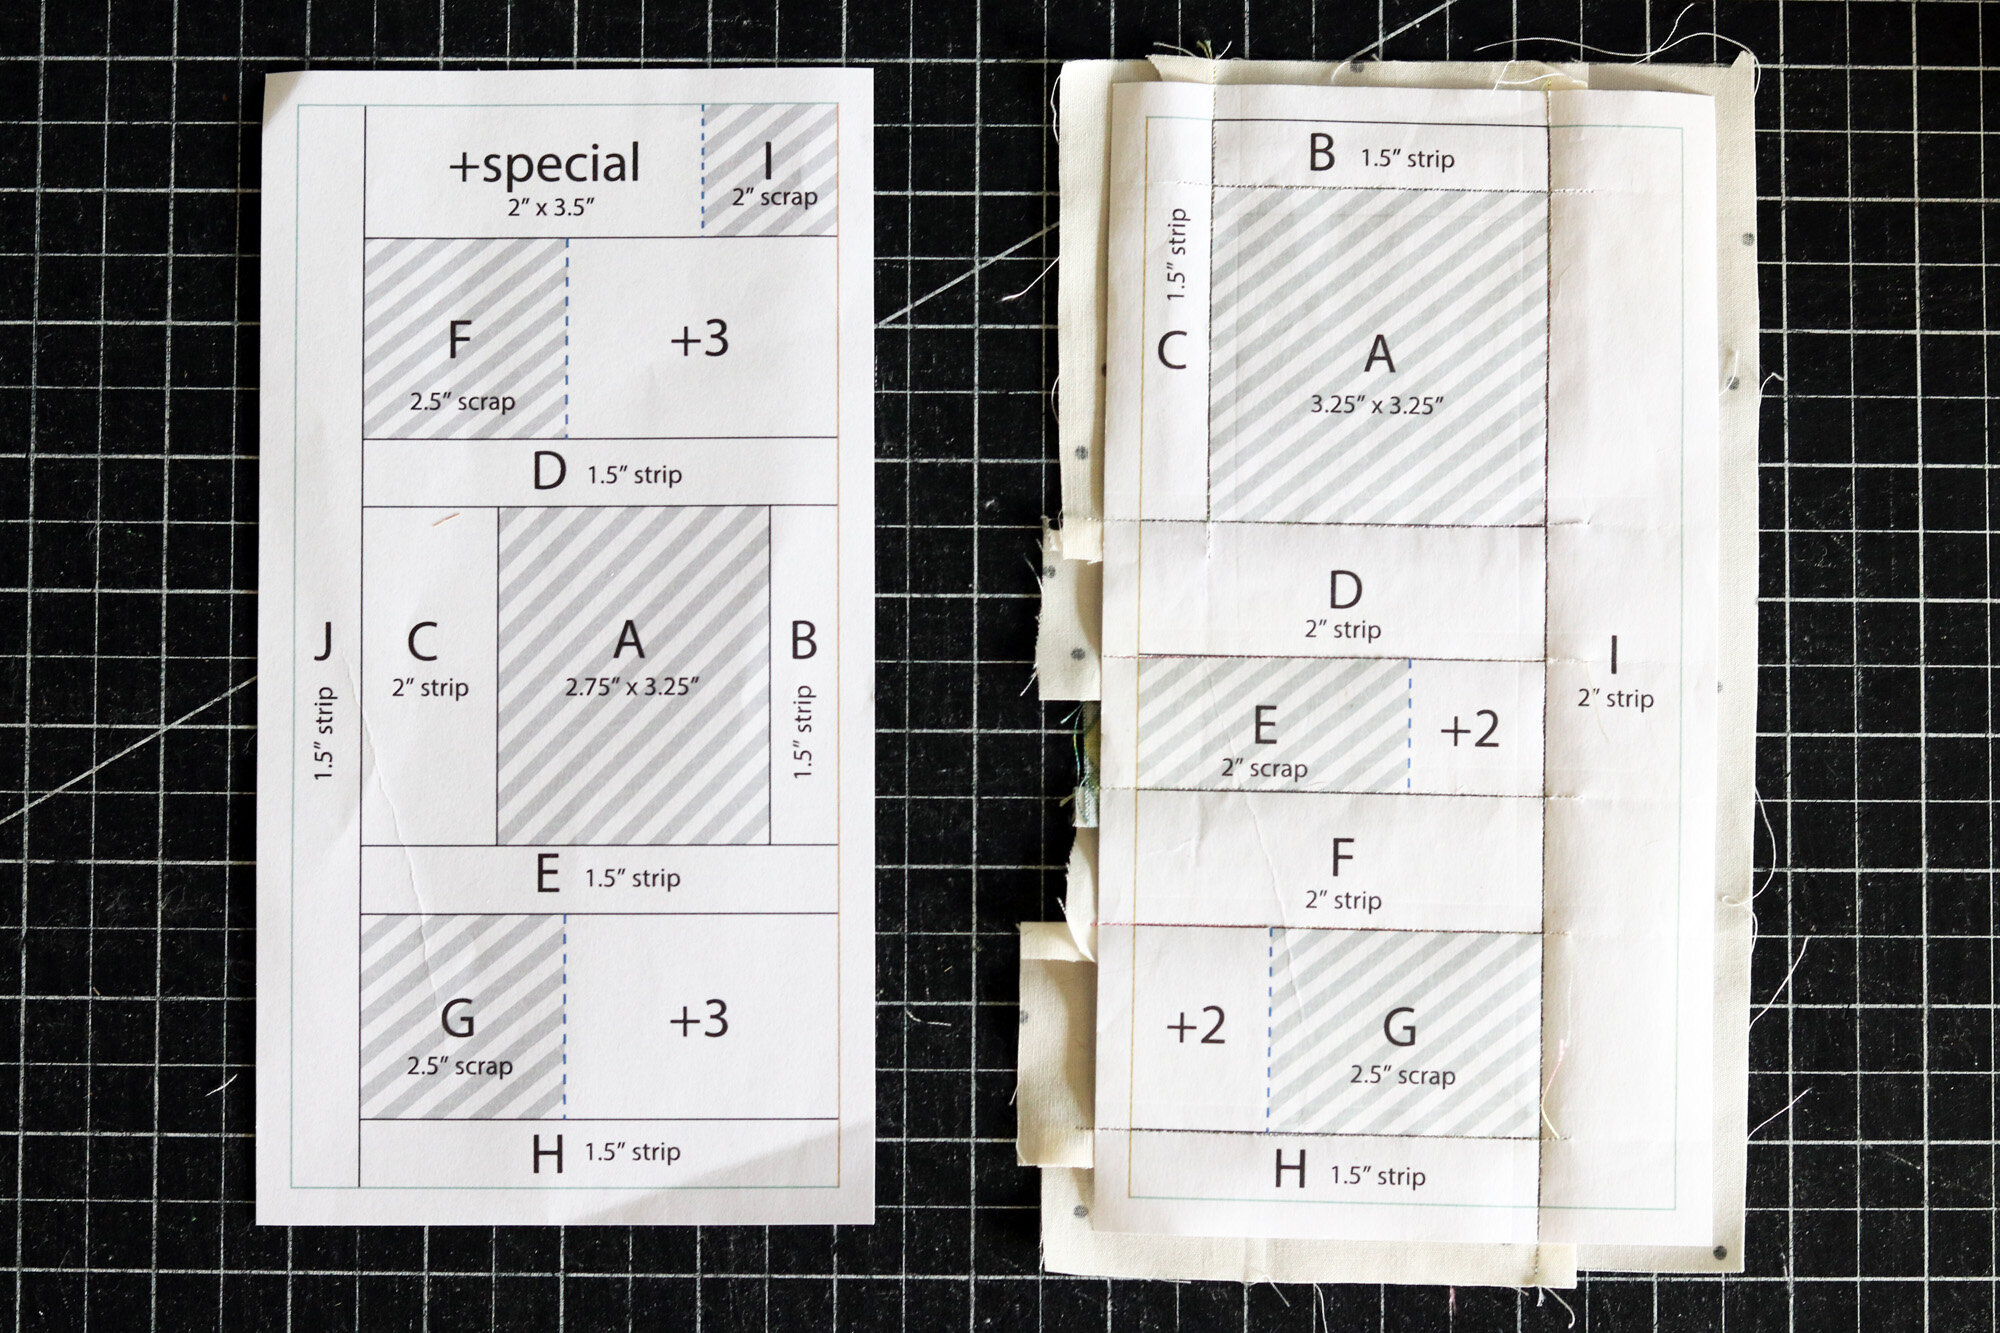
The block half on the right is all sewn, with plenty of fabric beyond the exterior pattern lines to provide seam allowances. I’ll trim it up and it’ll be ready to go!
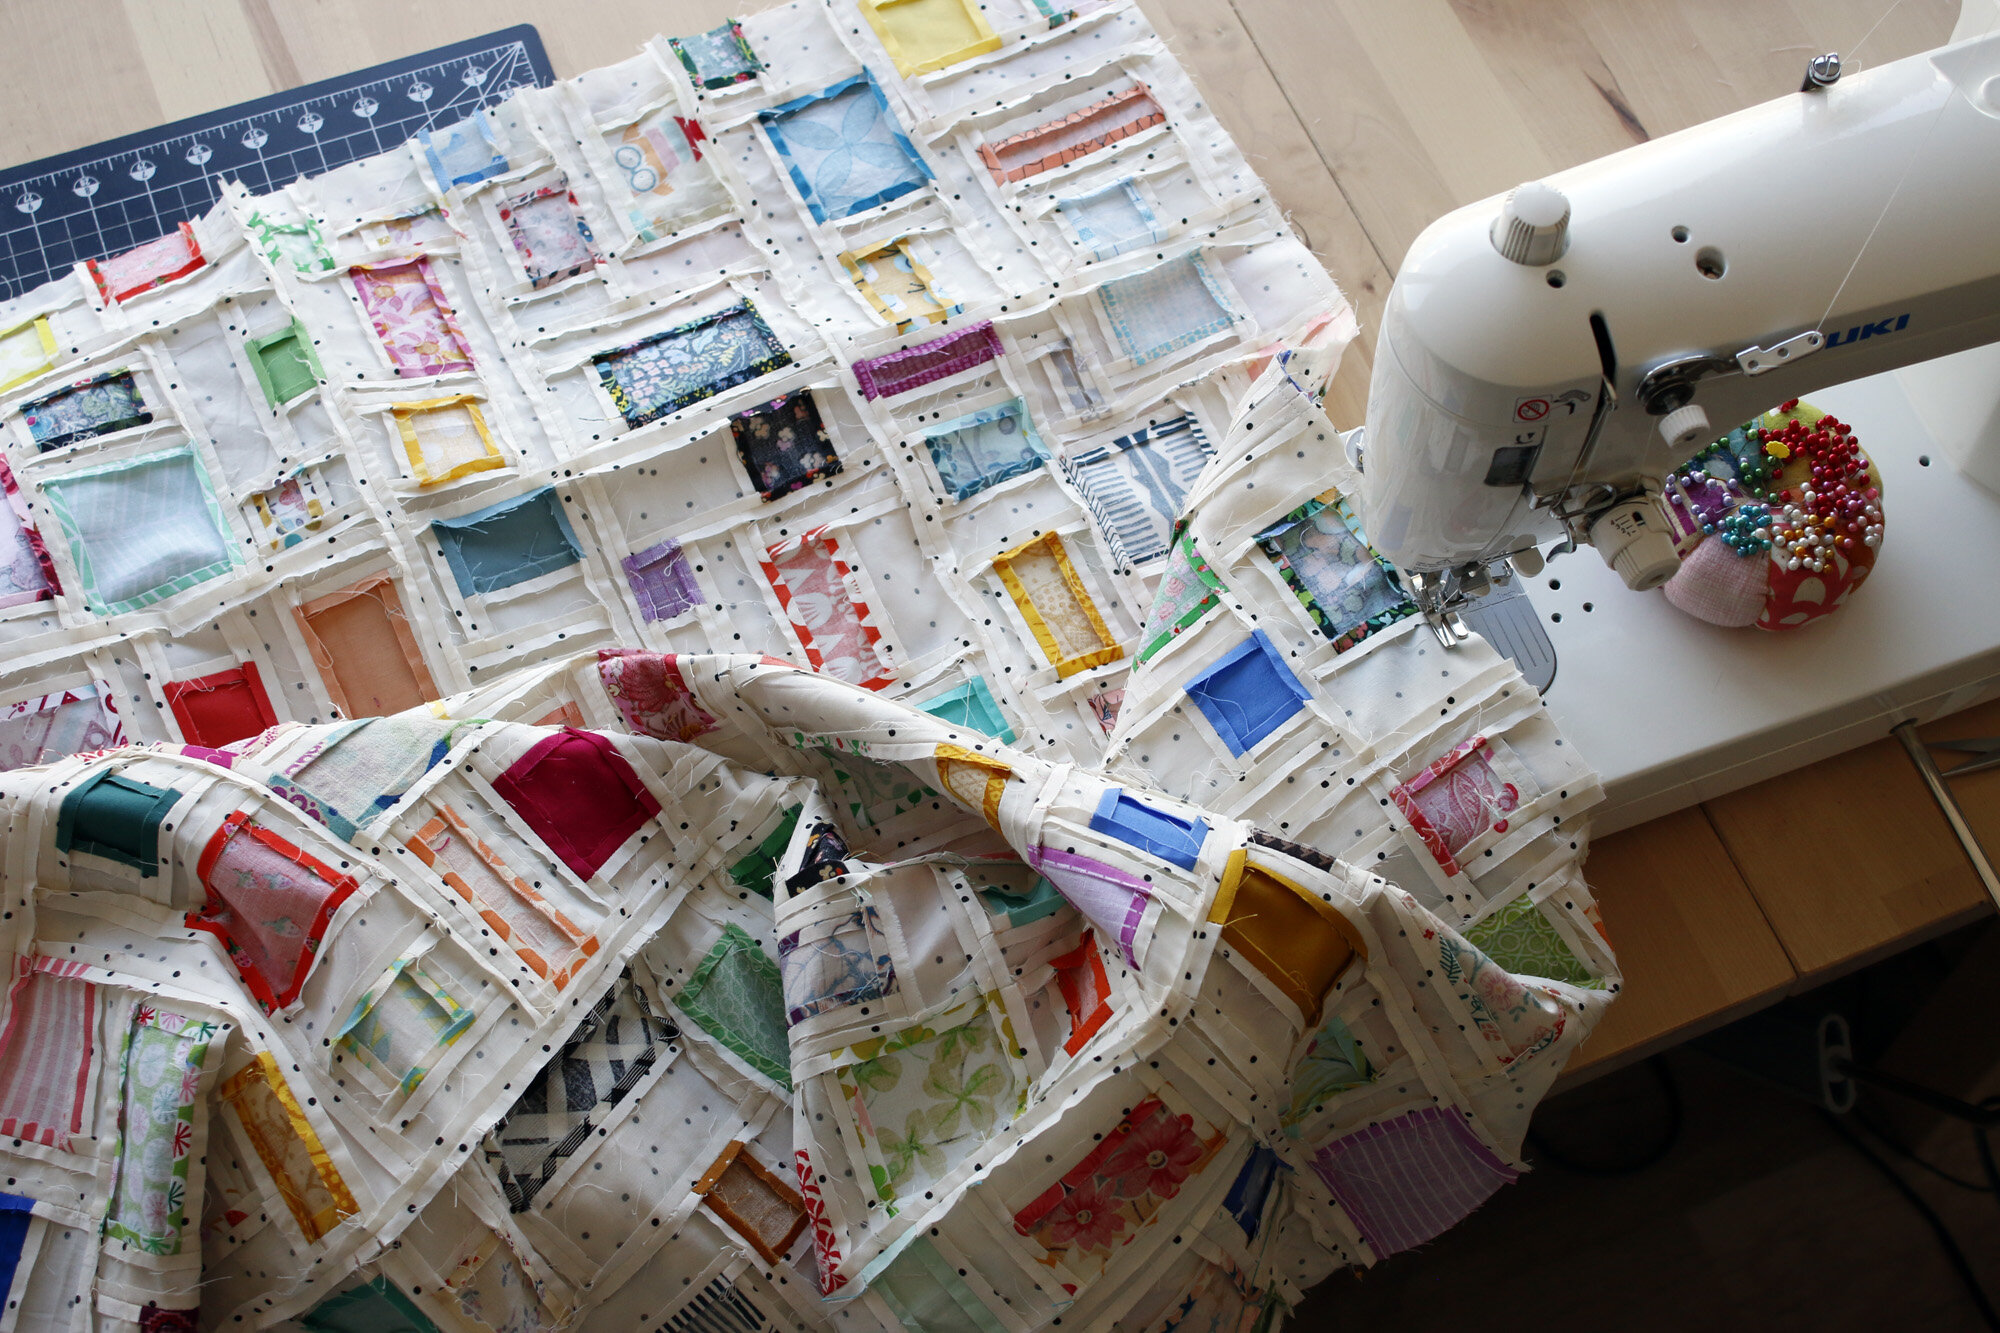
I remove foundation papers after blocks are complete, and before joining blocks together.
Foundation paper piecing (machine paper piecing) is not reserved for experts and doesn’t take months to master. What it does take is the will to learn and experiment. It will never make sense until you’re actually doing it, so print out that foundation pattern, sit down at your sewing machine with your computer nearby and discover a new way to sew, step-by-step.
Good luck!