Sewing: Rainbow Picnic Sew Along

Today I'll be sharing some pointers for sewing your rainbow patchwork and assembling a backing for your rainbow picnic blanket. This patchwork itself is really so easy that you probably don't need any help, but just so I don't look like a slacker, here goes...
Patchwork
Your rainbow squares should be arranged in a glorious 9 x 9 grid. There are a number of reasonable ways to sew them into one large patchwork top. I chose to create jumbo 9-patches, using the sections delineated by darker black lines in our Cutting + Layout post.

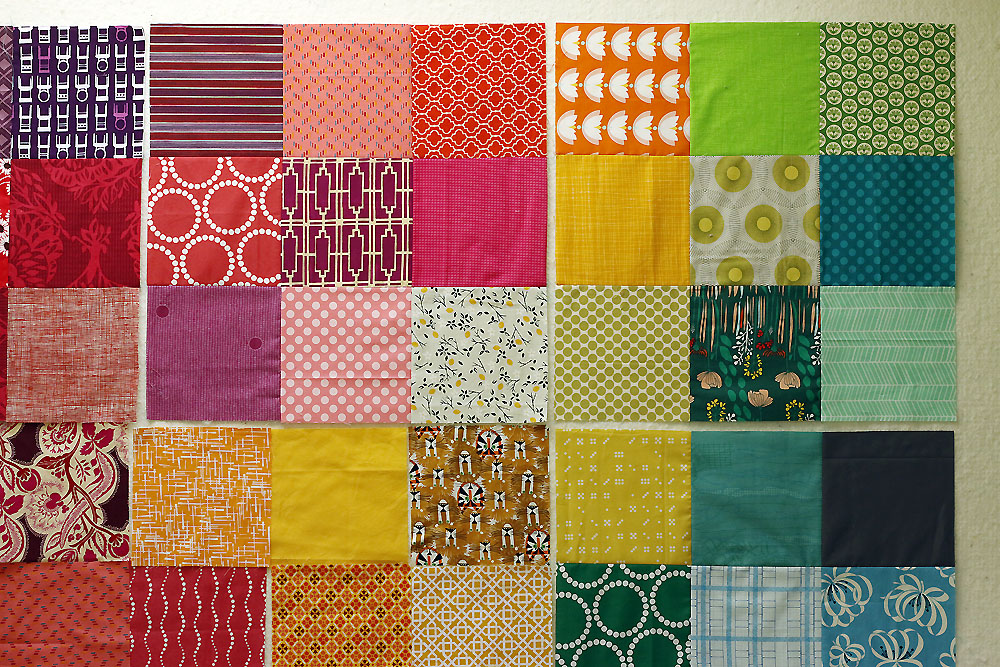
First join squares into rows. Then, using pins to match seams, join rows to create a jumbo 9-patch. After you've made 9 of these jumbo blocks, join them to complete the patchwork top!
Backing
Working with 3.5 yards of canvas to create a backing is probably the most difficult part of this beginner-friendly project. If you have trouble maneuvering such a long expanse of yardage, recruit another pair of hands for help moving it about!
First, prewash and machine dry your canvas. Canvas may shrink at a different rate than your quilting cottons, so we're preshrinking the canvas as a precaution. If you pull the canvas out of the drier promptly, it shouldn't need pressing.

Re-fold the canvas along the bolt fold line, matching selvedges together. It's important to make this fold evenly along the entire 3.5 yard cut, keeping selvedges aligned. This is where it's handy to have a helper! Keep fabric folded this way until otherwise noted.
Slide a cutting mat under the raw edge ends and trim edges nice and straight.
Now we'll make several cuts into the yardage in order to create backing sections A, B and C (see sketch). This backing plan is designed for directional yardage.
Measure and cut a 71" length of yardage. This is backing piece A. Trim to remove selvedges from piece A. Set aside.
Remaining yardage measures approximately 51" long. Trim to remove selvedges. Now unfold along the bolt fold line and refold matching the opposite raw edges. Yardage should be approximately 45" wide. Cut a 27" wide section, creating a 51" tall by 27" wide piece B.
Remaining yardage measures approximately 51" x 18". Cut in half, creating two section C pieces, each about 25" tall and 18" wide.

Sew "C" pieces side by side, creating a wider C shape. Join C shape below piece B. Join B/C alongside piece A, creating a large backing. Press all seams.
Note: The backing won't be square yet, but that's okay. We'll cut the backing to the precise desired size during our Finishing stage, posting Monday, July 17th.


