Supplies: Rainbow Picnic Sew-Along
There's no more perfect place for bright rainbow colors than spread on the lawn or the beach. I hope you'll enjoy mining your larger scraps and stash to make a joyful rainbow picnic blanket!
::Supplies::
This simple picnic blanket only requires: 8" cut fabric squares, backing fabric and thick thread for hand tying the finished blanket. Let's discuss each in detail.
(81) 8" Rainbow Squares
Select fabrics for each of these 20 color categories: purple, cerise, dark red, red, dark pink, pink, dark orange, orange, golden yellow, lemon yellow, low volume, lime, green, dark green, aqua, teal, light blue, blue, dark blue, gray. Each color category is illustrated below:
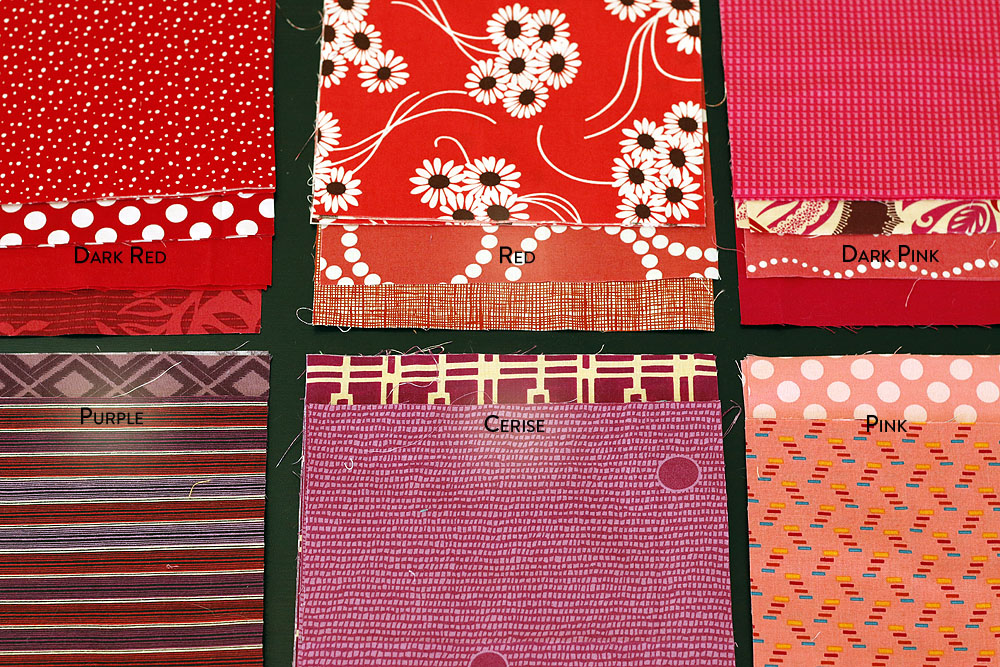
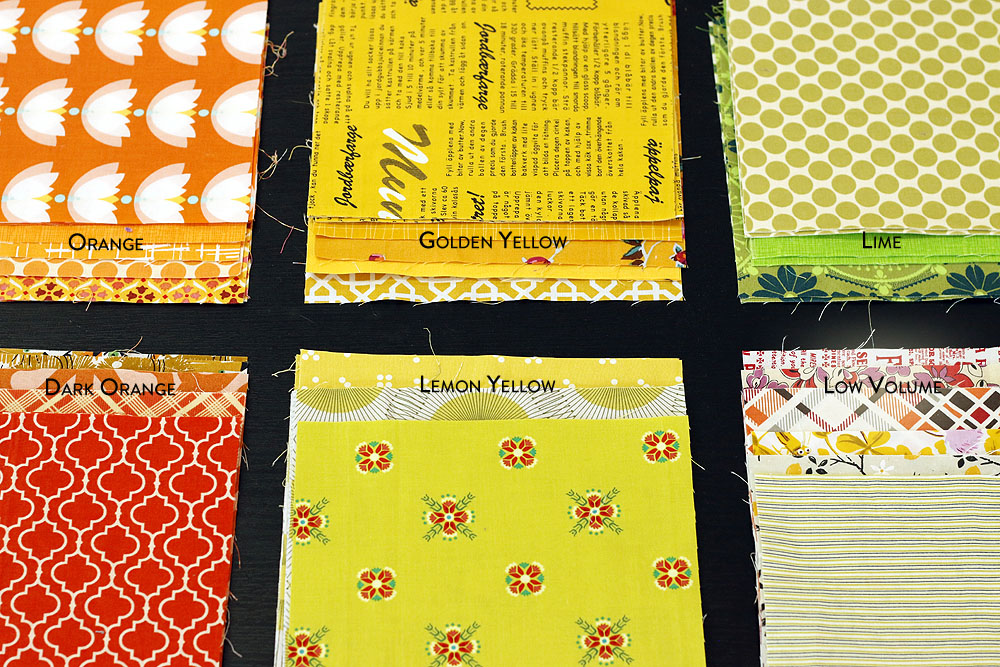
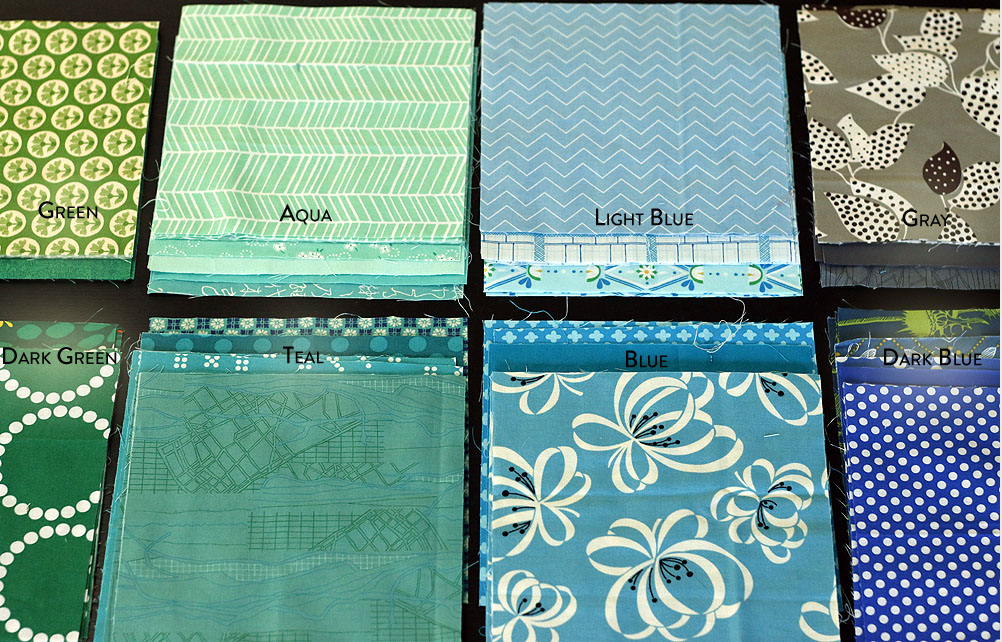
You'll want 4 squares from each color category, plus one extra square in the color of your choice or in Lemon Yellow, to follow my color layout plan.
You can cut 4 squares from a fat quarter or 5 squares from a thin quarter yard. For more variety, mix in scraps or supplement your selections with one of my Rainbow Picnic Squares sets (now sold out, sorry). I cut extra fabric as I cut squares for my own blanket so that I could offer a few hand-selected sets for sale!

6 Rainbow stacks available from my stash!


More cutting thoughts later. This is just to help you gather supplies!
3.5 yards Backing Fabric

I recommend durable canvas for your blanket backing. It's nicer over sand, rocks and sticks, without being bulky like batting.
Thread for Tying
Last of all, you'll want some thick thread or thin yarn for hand tying the finished blanket. Aurifil 12 wt thread, Coats & Clark button thread, Pearl Cotton size 8 thread and thin, strong yarns are all good candidates. While you're at it, make sure you have a hand sewing needle that will accept the thicker thread. A thimble or Thimble-it stick on pads (my preference) isn't necessary, but will make you more comfortable.
If you need to order fabrics, don't delay. You'll want your fabrics to arrive in time for the next stop on our sew-along. On July 7th I'll be back to show you how to cut your squares and arrange them in a rainbow blend layout. That's my favorite part!