Gypsy Wife: Quilt Assembly + How To Sew Partial Seams
This post is part of the 2019 Gypsy Wife Quilt-Along! See all posts.
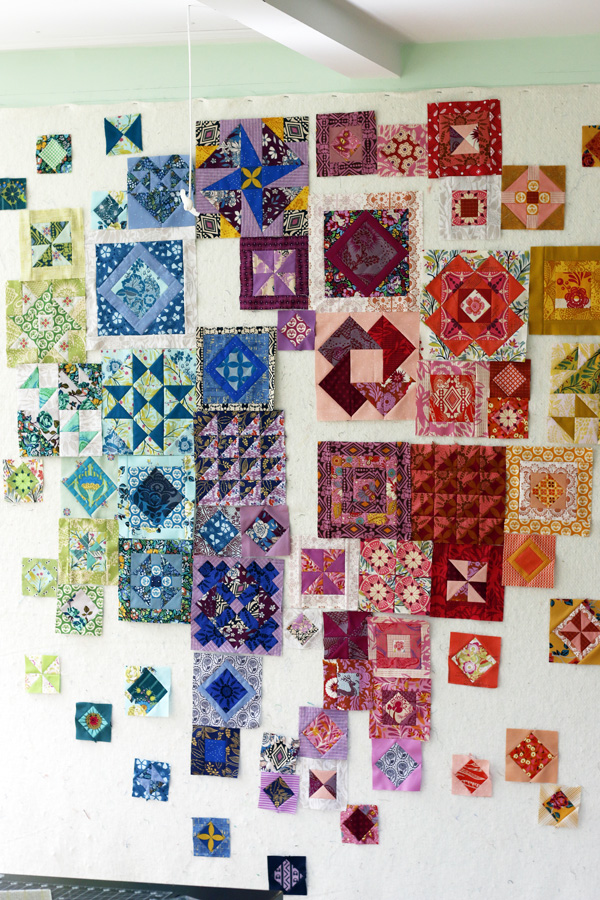
Are you wondering what happened to my Gypsy Wife quilt? You haven’t missed it! Since I finished sewing filler blocks, it’s been lounging on my design wall.
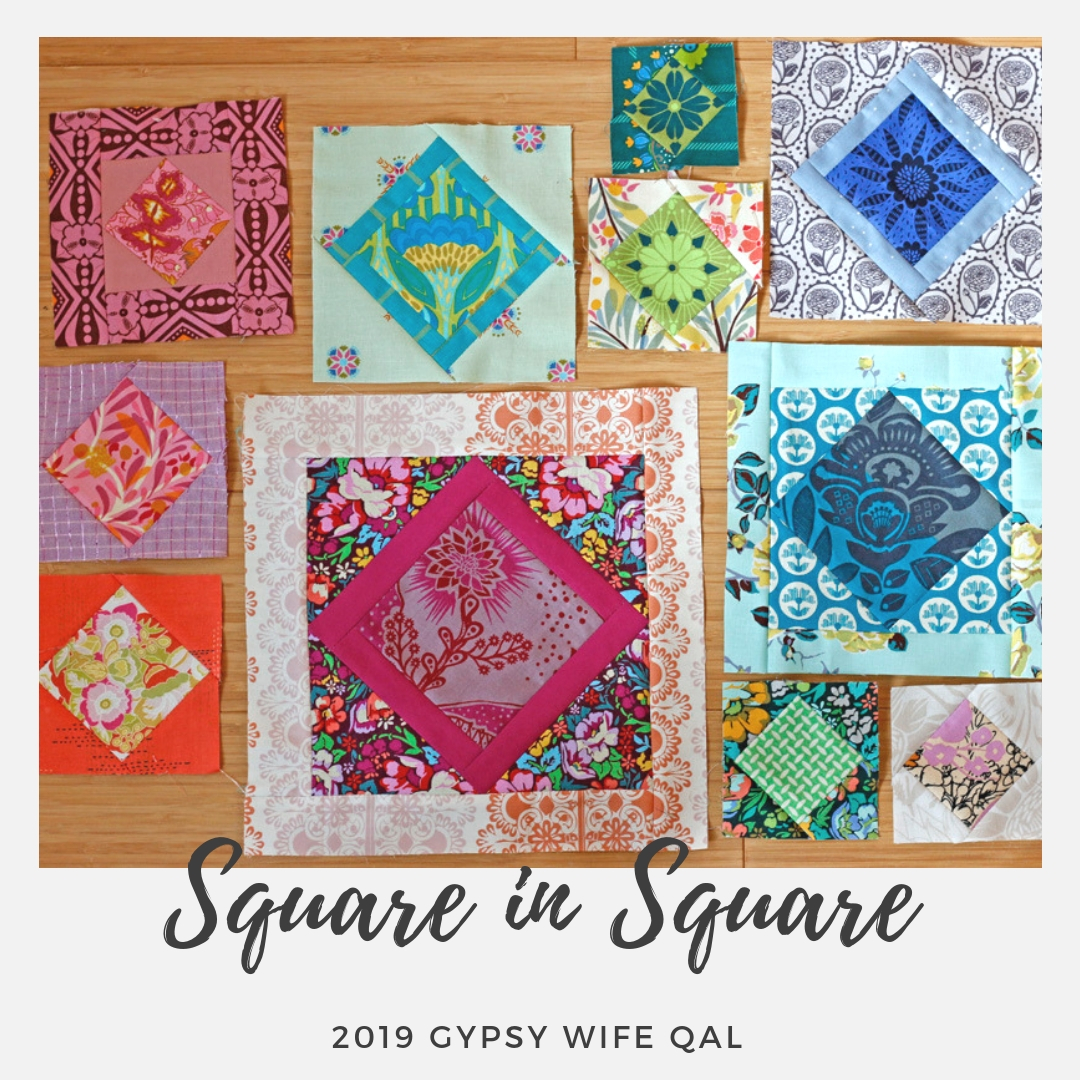
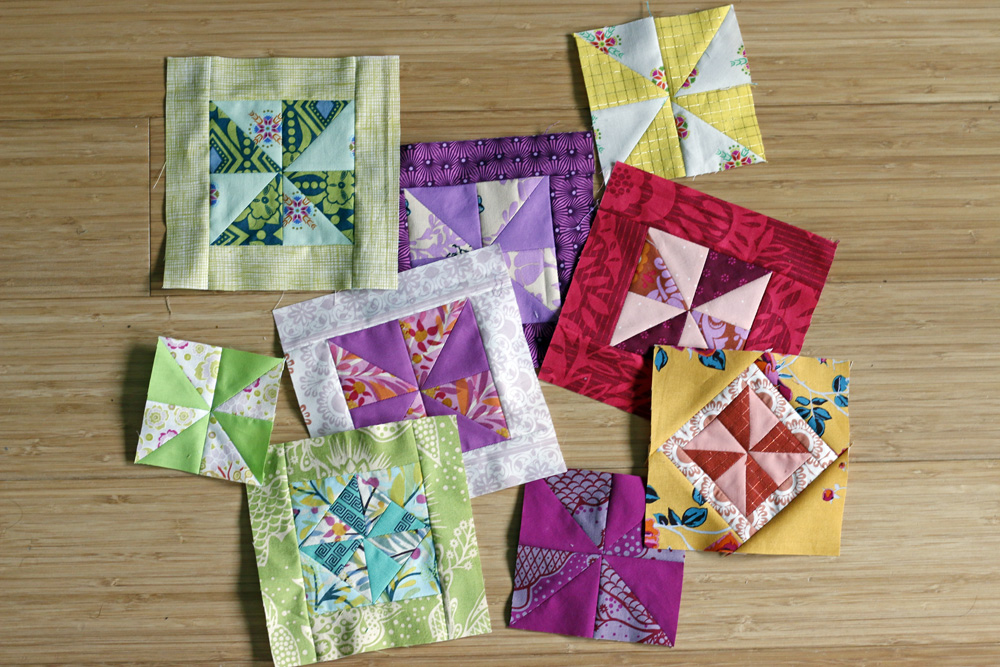
Here are some of my square in square blocks, which make up the bulk of this epic quilt’s scattered filler blocks. I really love the square in square block, so I didn’t mind making a bunch of them. Still, it’s satisfying to be done and have all those pretty blocks arranged just so, awaiting final assembly.
Gypsy Wife Assembly Tips
The Gypsy Wife quilt is a pattern written by Jen Kingwell that has been wildly popular. It’s a stunning design and a really fun sew, especially if you are an experienced patchworker who doesn’t need much guidance. At the assembly stage things can become especially challenging. It’s often challenging to sew together differently sized blocks. Add to that the pieced, striped background and very minimal instruction booklet and you can expect the process might get rocky. Here are some tips to help you on your way.
Check block sizes. Before sewing blocks together, check that they are the correct unfinished size. The pattern booklet notes finished sizes. The unfinished size will be 1/2” larger in both directions to accommodate seam allowances. Thus, a 6” finished block is 6.5” unfinished. An 8” finished block is 8.5” unfinished. If you haven’t already done so, trim blocks to correct size. This will make a huge difference!
Scant vs. True 1/4” seams. If all your pieces are the perfect size, a true 1/4” seam will result in smooth, fuss-free joining of quilt top elements. However, no on is perfect, and we tend to err in different ways. If as you join elements, you find that your sections are too big to join to the adjacent block, try slightly enlarging your seam allowances for better results next time. Conversely, if you find that your sections are often too small to join to the adjacent block, try slightly reducing your seam allowance.
Print Guides. Supplement your pattern with printed guides that will help you visualize the quilt and keep track of your pieces. Here are two I’m using: Gyspy Wife Quilt Mock Up provided by Pink Door Fabrics via Ali of Needle Down for Gnome Angle 2017 QAL and Background Strip Cutting Guide provided by Hydee Ann at Splish Splash Stash.
Work Visually. Arrange a section on your design wall or work surface with pieces arranged as shown in the section diagrams. You can find these starting on page 26 of the pattern booklet. As you join elements, keep returning them to their proper place on your work surface. This will help you stay organized and efficient.

Look for Same Size Elements. After arranging elements as per the section diagram, join anything that is the adjacent and same-sized.

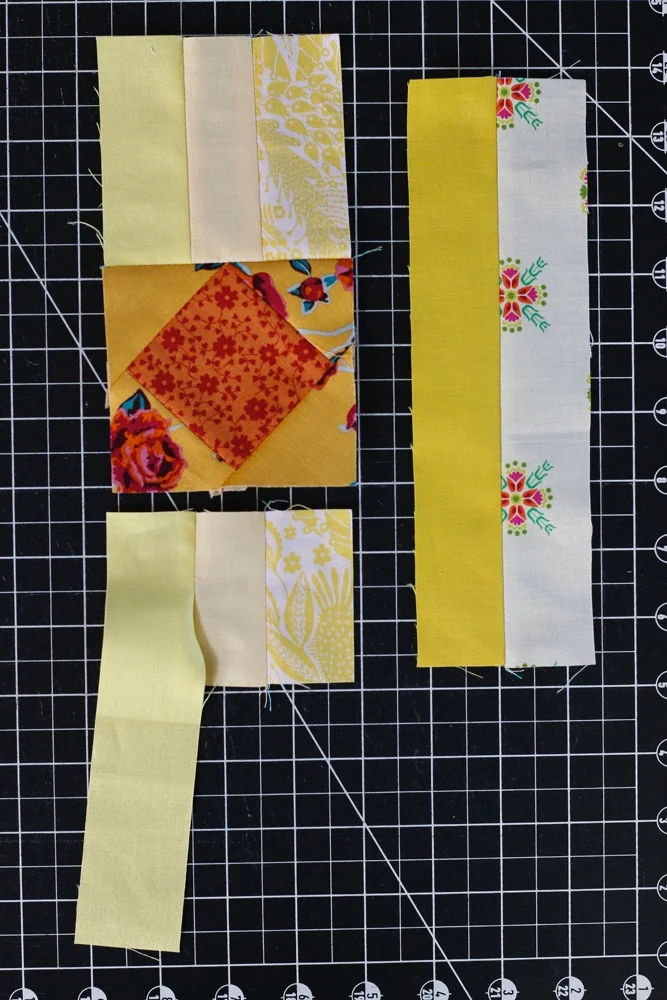
For example, here is section 2. I’ve started by joining the parallel, same-sized background strips to each other and then to their adjacent blocks. Next I’ll sew the small dark orange blocks together, which will make them the same size as the framed square in square block to their left. If it’s the same size, join it!
How to Sew Partial Seams
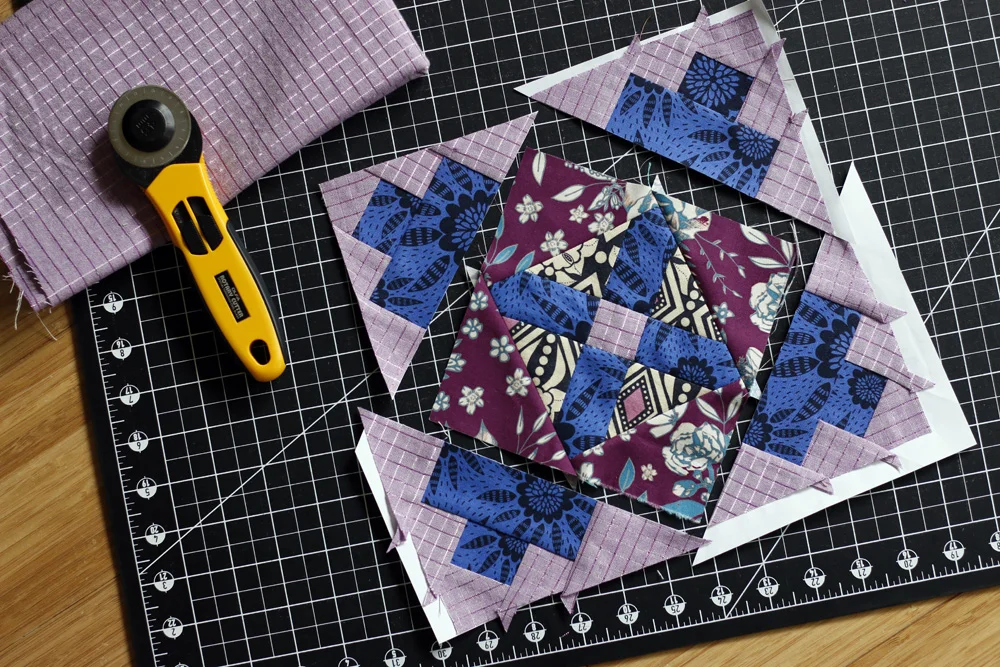
You’ll be sewing lots of partial seams as you assemble sections of your Gypsy Wife quilt. Partial seams are marked in the section diagrams with an asterisk and arrow. Sew in the direction of the arrow and stop approximately at the asterisk. Here is my progress sewing part of section 1, to illustrate the process.
First I arranged the elements on my design wall. Above and below the Puss in the Corner block is a long series of same-sized background strips. I joined those together right away, to make them easier to manage. Then I continue joining same-sized background strips.


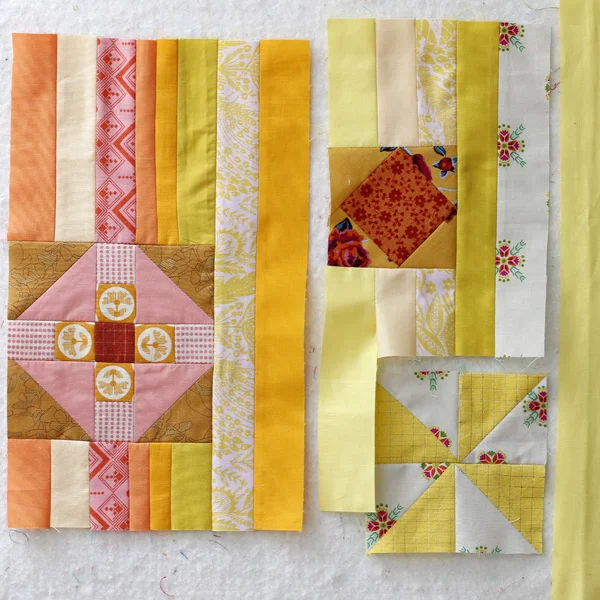
At this point I’ve joined all same-sized background strips. I’ve also joined the three-strip cluster to the top of the square in square block.
Next I’d like to join the three strips that go below the square in square block. I’ll need a partial seam here since one of those strips is much longer than the others. The fact that the strips are not same-sized alerts me that a partial seam is necessary.
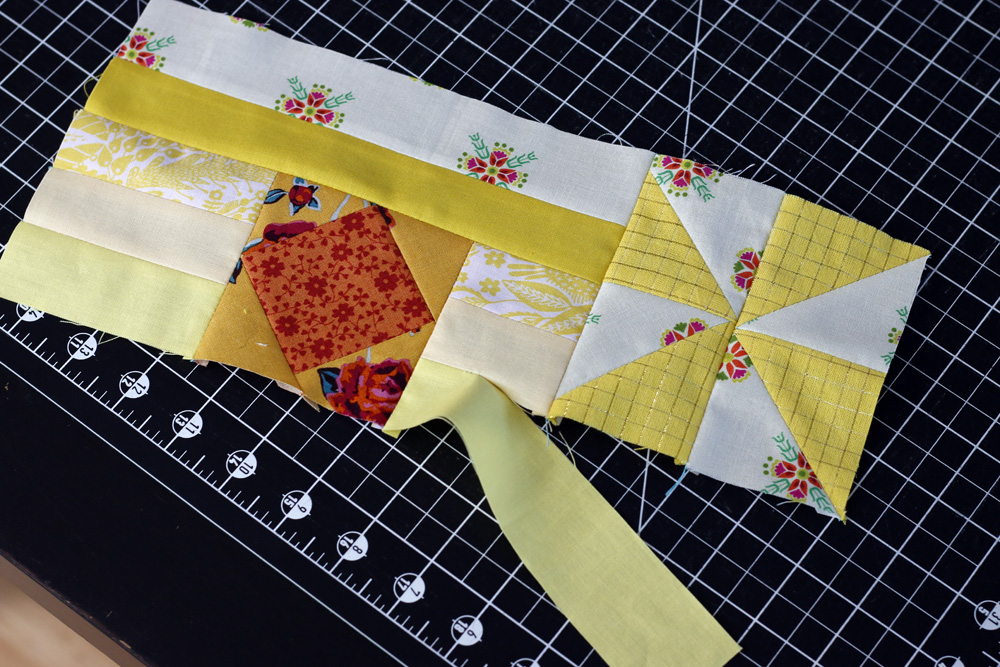
For this partial seam, I sew just the top of the three-strip cluster together. I stop partway down the length of the shorter background strip. I backstitch to secure my threads and allow the rest of the strip seam to remain unsewn.
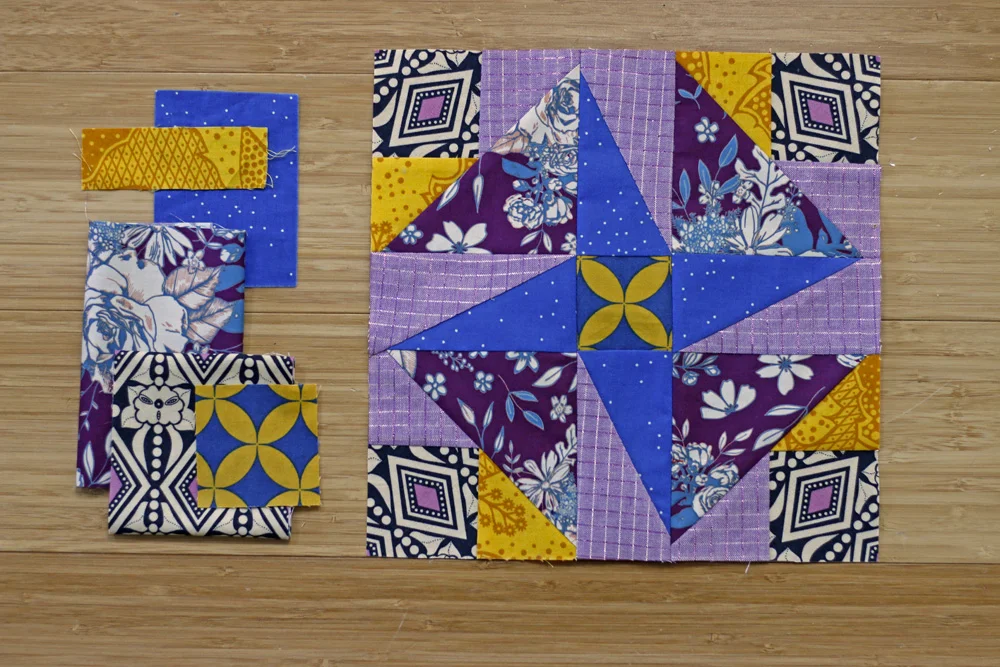
Now that the top of the three-strip cluster is sewn, I can join it to the square in square block. I return my elements to the design wall to stay organized.
Can you see what I should sew next? What is now same-sized? Yes, the pinwheel block can be joined to the background strips above!
Pull the long, loose background strip out of the way and align raw edges to join the pinwheel block. Sew and press seam. Now that the pinwheel has been joined, the loose background strip is the same length as our unit. Hooray! This partial seam can now be completed. Resume sewing where you had backstitched. Start with another backstitch and complete seam as usual.

When I return these elements to my design wall, I see a new seam that can be sewn! If they’re same-sized, join them. It’s usually that easy! When occasionally they’re not the same size, use a partial seam to hold you over until the same size moment arrives.

Good luck finishing your filler blocks and joining your quilt top, friends. I’m going to be working on mine on and off for the next week or so. Can’t wait to show it to you when its finished!
p.s. Don’t forget that this month’s quilt-along prize is the fabulous Ice Cream Soda quilt by Tales of Cloth! Share your finished quilt top with #Apr2019Gypsies by May 5th for your chance to win. I’m going to be starting an Ice Cream soda quilt real soon. It’s the perfect portable summer project!