how to Hang Patchwork Art

Looking to add more patchwork to your home? Rather than finishing your patchwork as a quilt, you can stretch it like a canvas and hang it as wall decor! This alternative to the mini quilt has a clean finished look and is super straightforward to hang. You'll be done in minutes!
::Stretched Patchwork Wall Decor::
Supplies
a blank Painter's Canvas
Patchwork
Staple Gun
Hammer
Assistant
Best Press or preferred starch (optional)

Step 1: Prep Patchwork
Check that your patchwork measures about 2" larger than the canvas on all sides. You may be able to get away with slightly less than 2", depending upon the thickness of your canvas.

Carefully press out any wrinkles as this will be the last time the work is easy to press. If you like, use a little starch to make your patchwork slightly crisp and completely smooth.

Step 2: Staple
This step requires assistance! One person will wrap and hold the patchwork, while the other staples it to the canvas.
Place patchwork wrong side up on your work surface. Center canvas on patchwork. Fold the bottom raw edge of the patchwork under by about 1/4" and pull snugly around the canvas, being careful not to allow the canvas to move. Staple in place near the folded edge. Use as many staples as necessary to secure this one side.


Repeat on the opposite edge of the canvas. Be sure to wrap the patchwork fabric snugly, but do not actually "stretch" the fabric as that will distort your patchwork. Now the top and bottom of your patchwork are secured.
At a corner, pull the patchwork against the canvas like so:

This is a little like wrapping a present! Now secure the corner fold with a staple. Repeat at all four corners.

Next fold one of the remaining raw edges of the patchwork under by about 1/4" and pull snugly around the canvas. Staple in place near the folded edge all along this side.

Repeat on the opposite edge of the canvas to complete the stretching process.
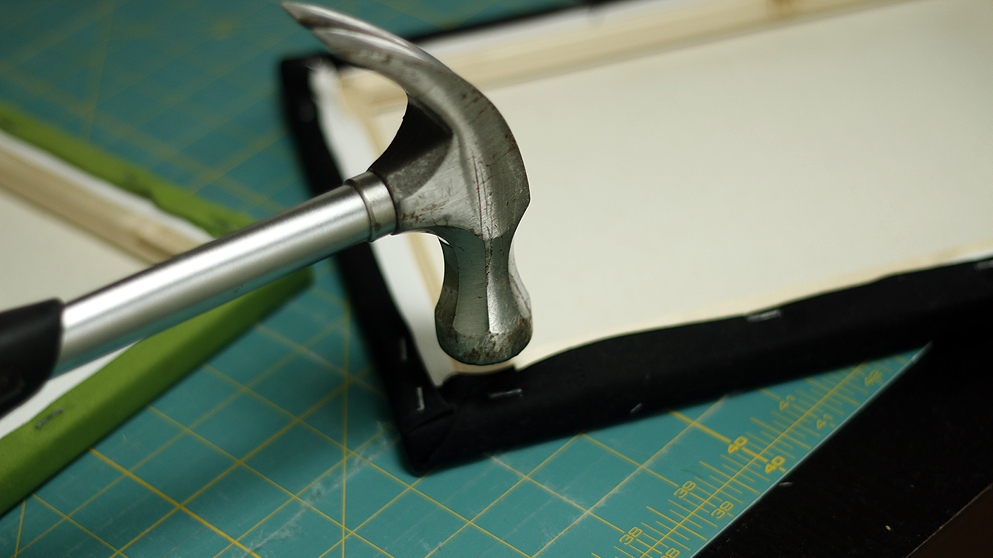
Step 3: Finish
Your patchwork art already looks pretty, but it's not quite done! Use the hammer to strike each of your newly-added staples, working your way around the canvas. This should sink your staples slightly for a smooth backside.
And that's it! Now it is simple to hang your art on a regular nail, just as you would hang a picture! I hang mine by balancing the wooden canvas frame on the nail. If you prefer traditional picture hanger metal teeth, you can purchase those at an art supply store and hammer one right to the backside of your canvas frame.
