Lotus Block tutorial - Part B
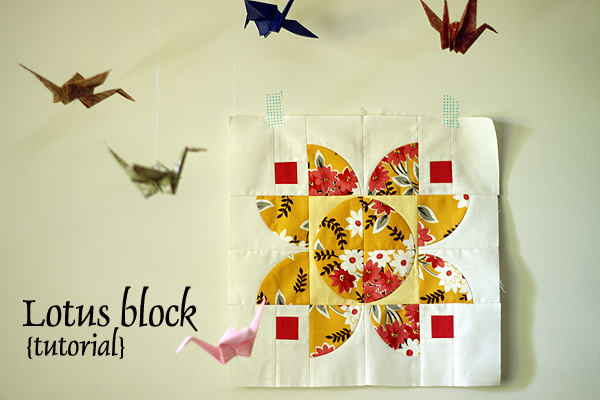
In Part A of the Lotus block tutorial we cut our fabrics and sewed all twelve curves that make up this flower. Today we'll trim those curves and assemble the block!
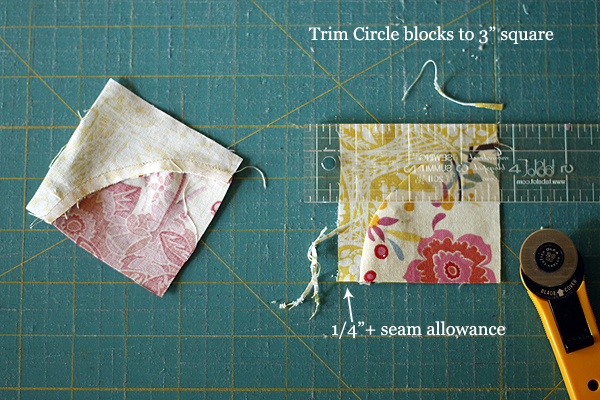
Trim D.P. Curves
Drunkard's Path curves usually benefit from a little trimming to tidy things up. The Lotus block actually requires more trimming than usual. Let's start with the four DP curves that make up the center of the block - the circle/surround fabrics.
If you cut your pieces with the smaller L-shaped printable template, probably because you are a proficient curved sewist, trim slightly to 3" square. You should have a little bit more than 1/4" seam allowance of surround fabric at the corners.
If you've cut your pieces with the Accuquilt 3.5" finished drunkard's path die. OR if you've cut your pieces with the large L-shaped printable template, your surround is quite a bit larger than necessary. Your DP blocks currently measure about 4" square, but need to be trimmed to 3" square. This extra inch needs to be removed from the surround, not from the circle.
First trim the circle portion of the block, ever so slightly, to create two perpendicular straight edges. Next, with those perpendicular straight edges nestled in some perpendicular cutting mat lines, trim the block to 3" square. You'll be taking about 1" of surround fabric off two sides of the block.
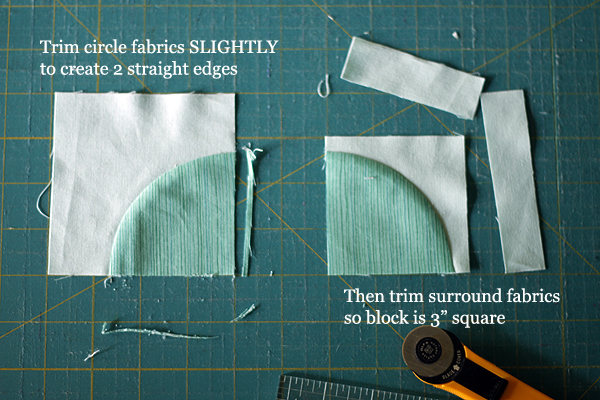
Repeat, trimming all four circle/surround DP curves to 3" square.
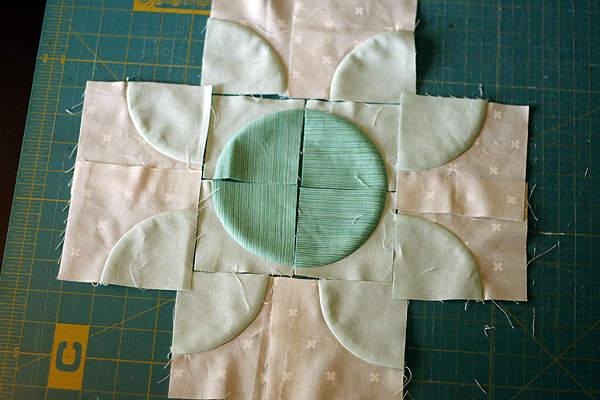
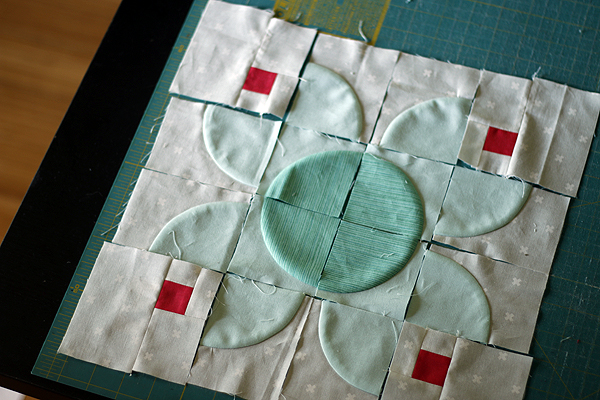
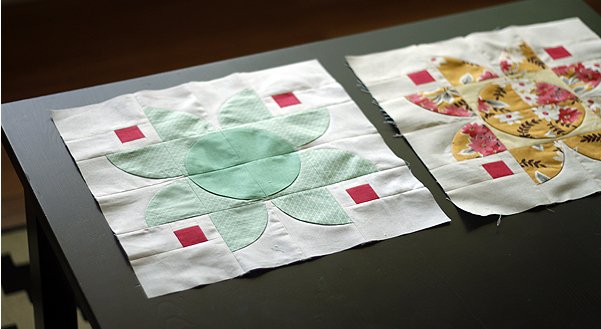
Arrange the circle/surround curves in a circle. Place the petal/background curves around the circle in the Lotus block layout. Notice that petal curves make a partial circle at all four corners of the block when arranged properly. The petal curve elements (4" square) are too large to be sewn to the inner circle curves (3" square). Here I've overlapped the background portion of the petal blocks to make them fit in the Lotus block layout.
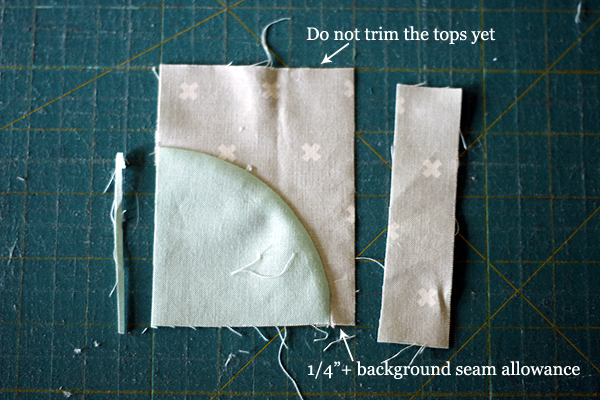
Working in pairs of petal blocks, trim the blocks to 3" wide. Take care to trim background fabric, not petal fabric! You do not want to make the petal part of the block smaller!! Notice that the two trimmed petal blocks are mirror images, with the background being removed from the interior sides so that the curves will finish closer to together.
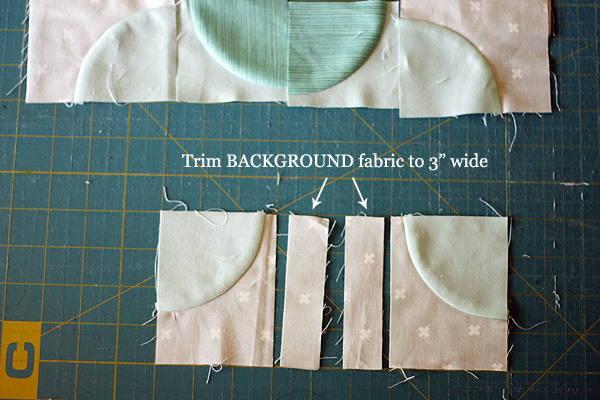
When trimming these petal curves, it's ok to trim the petal fabric slightly to create a straight edge, but the bulk of your trimming (about 1") is removed from the background fabric. Note that you will have slightly more than a 1/4" seam allowance of background fabric after trimming. Allow these blocks to remain 4" tall. Do not trim at the top of the blocks at this time.
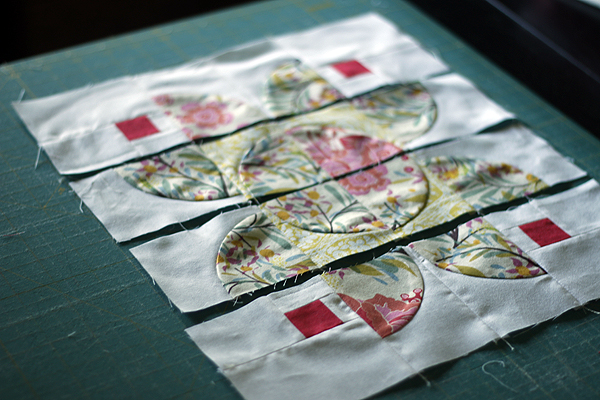
After trimming a pair of petal blocks, return them to the Lotus block layout. Referencing the layout will help you avoid trimming mistakes. Here I've just finished trimming the lower and right side petal pairs.

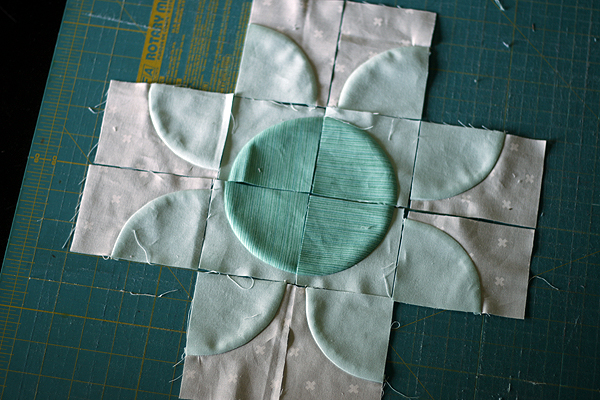
When all DP blocks are properly trimmed, they fit together nicely so that you can see how these elements will be able to join together.
Sew Little Squares
At all four corners of the block, little 1.5" cut squares are nested in background fabric. For this step, you will need 4 of each of the following background pieces: 1" x 1.5", 1" x 2", 2" x 2.5" and 2.5" x 4" (OR 2.75" x 4.25" if you prefer to work with oversized pieces for tidier finished-block trimming). The background pieces should be joined to the little squares in this order:
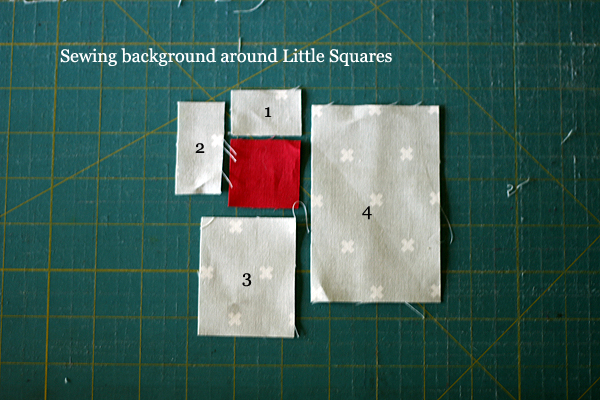
Although the background pieces should consistently be joined in the above order, they are arranged differently for the four corners of the block. The background pieces must finish as shown so that the little squares will tuck into the four corners of the Lotus flower.
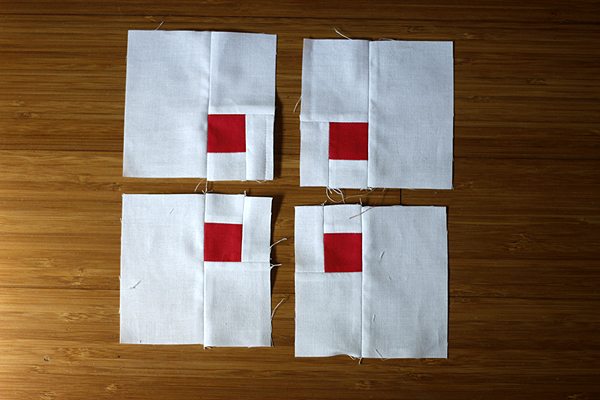
Notice that the littlest background pieces always fall towards the center of the block. Also, the largest background piece is always oriented so that its longest side is vertical. Such a subtle detail in arranging the background pieces creates more elegant seams, and thus a more elegant block.
Assemble Block
Now that all your elements are prepared, you can assemble and finish the block! Place the little squares elements at the four corners of the Lotus block layout. If you have opted to use the slightly oversized background pieces, your four corners will jut out a little bit larger than the petal curves. That's ok! When you join pieces, just keep that excess background sticking out on the outside edges of your block.
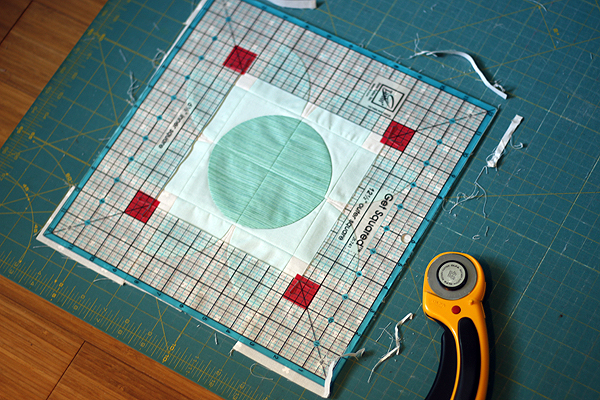
Join elements in 4 rows. As you join, use pins to carefully match seams. Especially when joining the inner circle curves, it's ideal for the curves to match up to create a full circle. Also, sew all joining seams with scant 1/4" seam allowances. Keeping these seam allowances scant will give you more to work with when trimming our finished block. Lastly, join rows to complete block.
Trim block to 12.5" square. If you've opted for oversized background pieces, you will definitely have excess fabric at each corner, making for tidier edges. If you are frustrated to find that your block is smaller than 12.5" square, it may be that you sewed with generous 1/4" seam allowances. Keep in mind that you could opt to trim this block and all your Lotus blocks to 12.25" square, for example. The key is block consistency so that all of your blocks sew together in the end!
All done! I hope you love your pretty lotus flower block! If you are new to curves, take comfort that they are only going to get easier and smoother with more practice. Congratulations for taking the plunge and thanks for sewing with me!
If you use Instagram, tag me at #StitchedinColor. I'd love to peak at your project!