Love Pillow - Step 2

Ready for the next step? Today I'll be sharing my process for creating applique letters, embroidery patterns and applique techniques for my current work-in-progress. You can definitely use these ideas to make your own creations!
Create Letters
Cut letters L, V and E from your scraps. If you have a confident hand, this can be as simple as taking small scissors to your scraps and cutting those letters freestyle. I like to cut my letters in the dauphin font. For my linen patch, letters at 2.5" tall and about 2" wide fit nicely. You could use a program like Photoshop to stretch the letters to the right dimensions, and then print them out, cut them out and trace them onto your scraps. That's the most fool-proof method, I suppose.
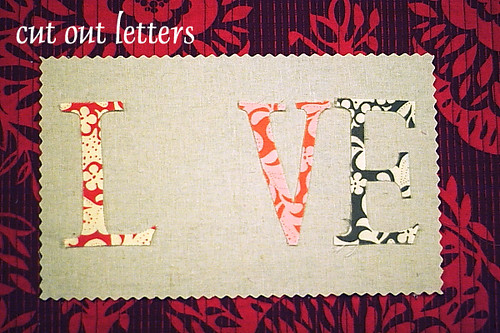
At this point, I'm trying to train myself to copy freehand, which is what I did here. I looked at the dauphin font, measured and marked out how tall the letters should be on my scraps, drew the letters and cut them out. Make sure to make your letters narrow enough that they fit on the linen patch with plenty of room for the O.
In my design the letters have raw edges. I won't be washing this pillow cover too much, so excessive fraying shouldn't be a problem. If you like you could use some fray check on the edges to prevent fraying entirely. Fray check is a clear glue of sorts that is available at most sewing stores.
Create Embroidery Pattern

Now, place your letters on the linen patch exactly where they should be, leaving space for the O. Using a water soluble pencil or a very light pencil mark, place a dot at the center of your O. Take a ruler and make straight lines through that center in a sunburst kind of shape as shown in pink (sorry it's so light). You can make as many lines as you like, but make sure that there is an even amount. I made 8 lines. They weren't absolutely perfectly spaced. That just adds to the effect, right? Some of my lines extend under the L and the V just a tad.
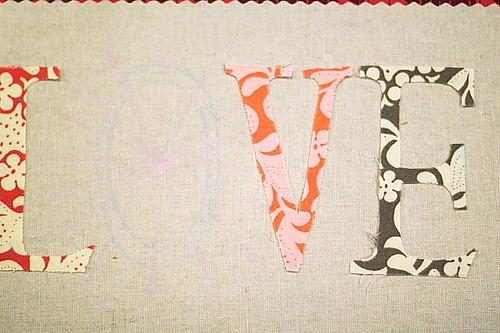
Now draw an O-shape, again using your center dot as a guide. I like how the dauphin O has two edges or lines and how they are wider at the top and bottom and narrower at the edges. These details help the circle translate as an O rather than a simple circle.
Embroider!
Set your letters aside and hoop up your linen. Using a running stitch, embroider along the straight lines, alternating pink and red. So long as you created an even number of lines, this should work out beautifully. Using a back stitch, embroider the O in black. I was looking for lots of contrast here. But, depending on your taste, you may prefer to use another color such as gray or brown.
Applique Letters

There are many ways to attach your letters. I had planned to machine stitch them on with black thread. Just tired that and didn't like it. The thin black thread looked sad next to the embroidery stitches. So, today I am in the process of attaching the letters by hand with embroidery floss in colors that match my letters.
Sometimes I pin the heck out of letters for stitching. Today I opted to use basting spray. I laid the letters wrong side up on a hand towel headed for the laundry bin. One spray of basting spray was all it took. Since basting spray is repositional, it was easy to move my letters around on the linen patch until they were just right. Now I am using a backstitch to permanently attach them. That may take awhile, and I didn't want to leave you hanging, so here we are.
Please let me know if you have any questions! I'm off to get an invisible zipper this afternoon so that I can finish this pillow by the weekend. Stay warm, friends!
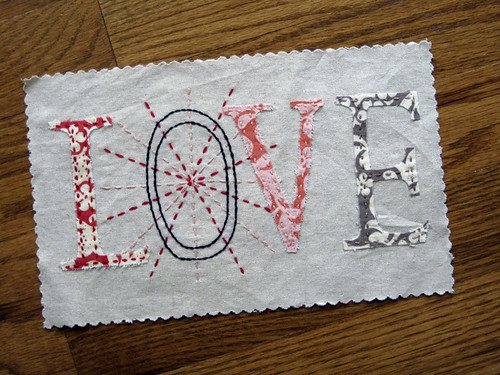
Update
Finished my applique last night! I did decide to go with a running stitch over the backstitch. Here it is. If you click on the image, it'll take you to Flickr, where this is an option to see it bigger if you like.