Basting {a Tale of Two Methods}

Last week I spray basted my Red & Aqua Sampler Quilt for do. Good Stitches. I am now a firm believer in spray basting! But, I'm going to try and give a fair comparison of basting a quilt with pins verses basting with adhesive spray. Please chime in with your thoughts too!
 Pin Basting
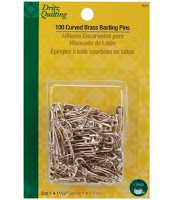
- Equipment: Curved basting pins are designed to move through all 3 quilt layers.
- Cost: $10.50 for a pack of 100. You would need about 225 pins for a large throw quilt like Colorbrick. Since the pins are infinitely reusable, you never need to invest again.
- Time: Professional quilters, like Rita at Red Pepper Quilts, recommend placing a basting pins every 4 inches in a grid pattern. This takes a very. very. long. time
- Skill: It takes some practice to reliably get the pins through all layers of the quilt. If I zone out a bit, this tends to suffer.
- Uggh factor: Like most quilters, I baste on the floor. Sitting and crawling bent over a quilt for this long definitely has it's physical drawbacks.
- Tricks: Try using a knitting needle to close the basting pins. It really saves the fingers!
- How it Quilts: When quilting, you'll have to remove the pins as you go. The constant starting and stopping definitely slows me down. I worry that my quilt is shifting as I release the pins, since I do not have a drop-in sewing machine with a nice flat work surface.

Spray Basting
- Equipment: An aerosol can of spray adhesive. The spray washes out and does not gum up sewing machine needles or tools.
- Cost: spray adhesive is $16.00. One can should last for 5-8 big projects, depending on the size of your quilts and how heavy you spray.
- Time: Once your fabrics are ironed and smoothed out for basting (steps necessary with pins too), the spray basting process takes about 15 minutes.
- Skill: Spray basting is pretty forgiving since the fabrics can actually be repositioned. To avoid a sticky situation be sure to use a light, even coverage. It's like using hairspray. You want a very light spray that does not dampen the fabric at all. Experiment with using less, rather than more.
- Caution: Some adhesive sprays have strong odors that are certainly toxic. There are warnings on the can about using in a well-ventilated space. Gladly, I used Dritz spray, which is odorless. Apparently, the June Tailor brand is too. Still, I used the spray with windows wide open and after my children were in bed.
- Tricks: Use a drop cloth to protect your floors from overspray. Then, just wash that cloth when it's time to wash your finished quilt.
- How it Quilts: Quilting my spray basted quilt was so enjoyable! The quilt sandwich remained tight together throughout, so that I was sewing through one solid piece that couldn't possibly shift. With no basting pin bombs to slow me down or distract, my straight line quilting came together quite nicely!


For the Colorbrick Quilt-Along, I'll be demonstrating exactly how to spray-baste your quilt. For those who prefer to pin-baste, I'll include a link to one of the many existing tutorials in blogland.
So, what do you think? Have you or will you be trying spray basting?