Embroidery 101: Backstitch and Running Stitch tutorials
I've been working on my Love Pillow - and I do Love how it's turning out. Phew! It can make a girl nervous to start a tutorial before a project has really come into it's own. I mean, who does that? But, I was trusting my instinct and, happily, my imagination yielded something I can be proud to share with you. I can't wait to finish!
I'll be using 2 basic embroidery stitches in my Love Pillow tutorial. To simplify things, let's make sure we're on the same page for the backstitch and running stitch today. I'll be adding the next step (the applique and embroidery) in the tutorial tomorrow, if all things go well.
For Starters
Embroidery floss is a lustrous thread that is designed to be easily divisible into 6 strands. The idea is that you can use all six, just one or anything in between to achieve the desired effect. And, no, that isn't completely obvious. I did a bunch of embroidery on one of my first projects last year before my mother-in-law remarked that she'd never seen anyone choose to use all 6 strands at once. What strands?
Anyhoo, I typically use 3 strands. For a fine details I might use 2 strands and 4 strands for a chunky look. For the Love Pillow, I'll be using 3 strands.
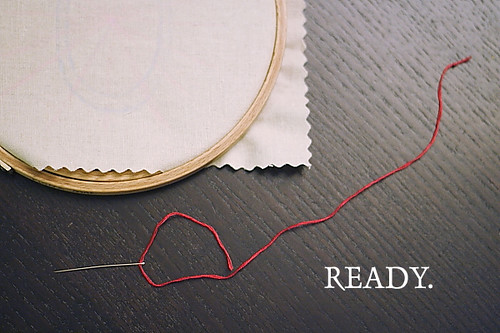
To get started, stretch your embroidery surface on an embroidery hoop. Find a needle with a large enough eye to easily accept 3 strands of embroidery floss (I like crewel needles!). Cut a comfortable length of floss (12 inches is a good ballpark for a beginner - longer lengths can be trickier to handle). Divide and save unneeded strands. Thread. Knot one end. READY.
Running Stitch
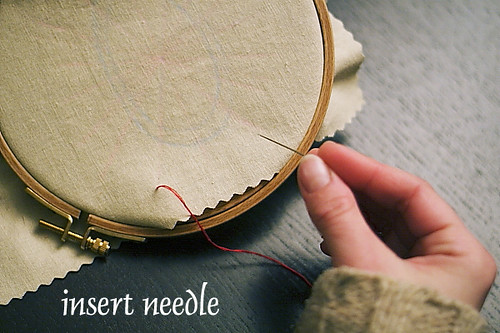
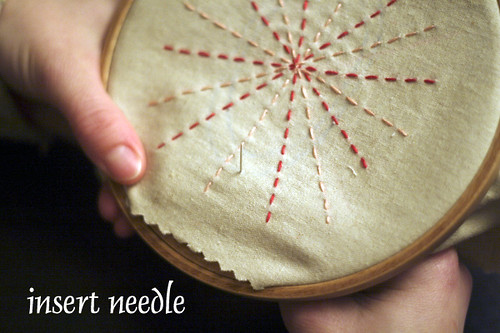
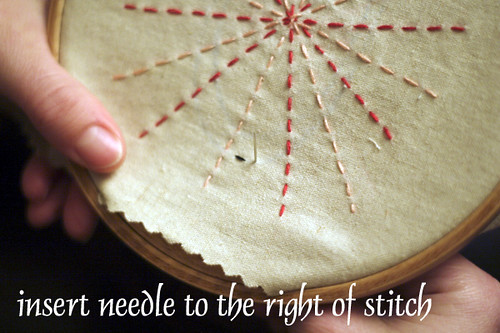
Insert needle. Always start stitching by entering your needle from the back of your work to the front. This will catch the knot where no one need see it. Insert your needle on the stitch line of your pattern.
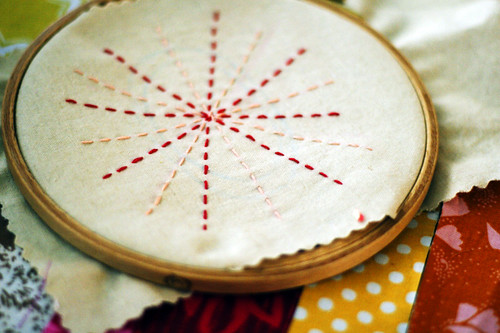
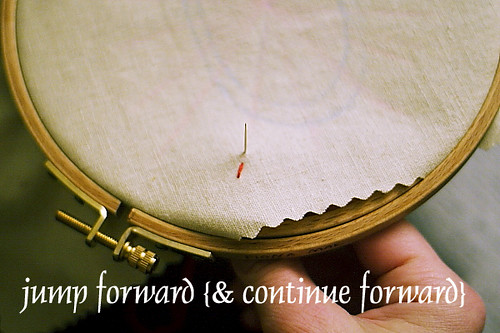
Make a stitch in the direction you want to go or "forward" so to speak, by poking your needle back through to the wrong side of the fabric. Decide right away if you want your stitches to be big or small. It all depends on the project! If your pattern requires lots of sharp turns, small stitches are most practical. Our running stitches will be done in straight lines for this project, so you could do quite large stitches.
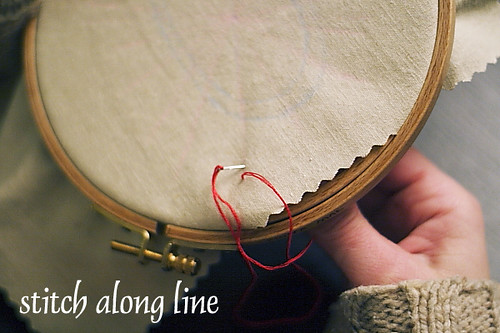
Insert needle back up through your work, jumping forward to leave a little gap between your first stitch and this next one. The gap is what makes this a running stitch. Just as with stitch length, decide how large you want your gaps to be. Your gaps can be the same size as your stitches or smaller. I tend to like smaller gaps than stitches. But, whatever you do the goal is consistency. Consistently spaced stitches and gaps make for beautiful work.
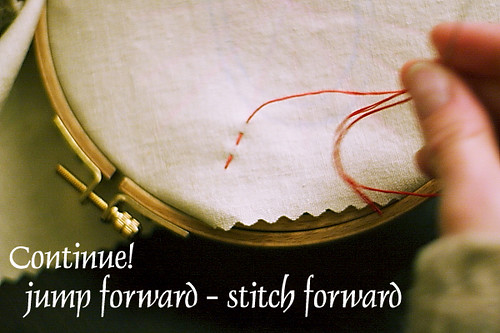
Continue on, making stitches by jumping forward and stitching forward, leaving gaps between your stitches. When you've reached the end of the pattern line, tie a knot in the thread at the wrong side of your work. Voila!
Backstitch
Insert needle on the stitch line of your pattern.
Now, (and this feels weird) make your stitch traveling backwards, away from the direction you want to go. What fool way of stitching, you ask? Trust me. As before, decide on a stitch length and stick to it.
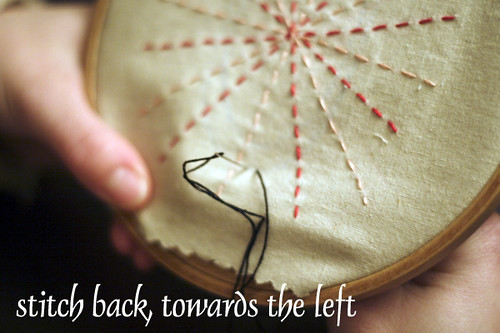
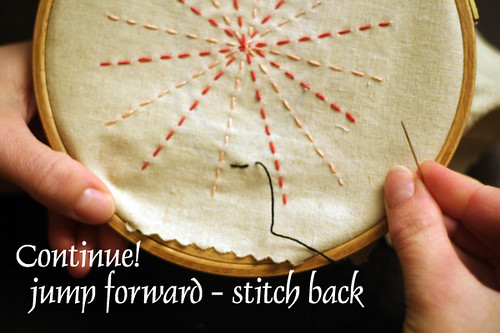
Insert needle back up through your work, jumping forward exactly the length of your desired stitch length.
Make your stitch traveling backwards. This time, place your needle in the very first insertion point. Like exactly in that hole. Pull the needle back to the wrong side of your work. You will have made what looks like a continuous line of stitches. No gap, no swerve.

Continue on, making stitches by jumping forward and stitching backwards, directly into previous insertion points. When you've reached the end of the pattern line, tie a knot in the thread at the wrong side of your work. Oh my, you're so cool!
The running stitch and the backstitch come in handy constantly. A running stitch is a cute way to attach things (like a patch to a pillow) and a backstitch is the simplest way to create a picture with embroidery.
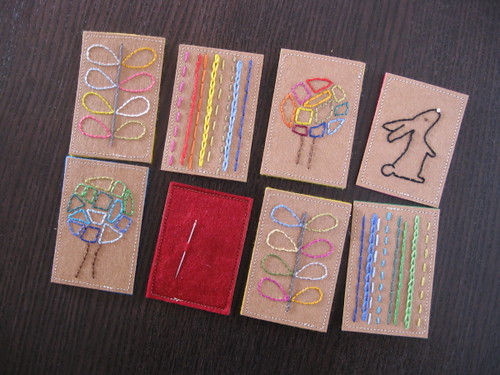
Here are some little needle holders that I made for friends this Christmas. In these works, I only used a few stitches in addition to the backstitch and running stitch - the chain stitch, stem stitch and French knot. Hey, that may sound impressive, but it's really just so easy, and so, so relaxing to make (like crocheting or knitting).
Oh, speaking of crocheting, I did order those additional colors. Wait, why do you not look surprised?. But, due to some snow and ice, our wimpy mailman has not delivered mail since Saturday (while I traveled cross town to do inventory at my store). I really miss my hooks, but I can't bring myself to start more squares without the new colors. Hoping for tomorrow!