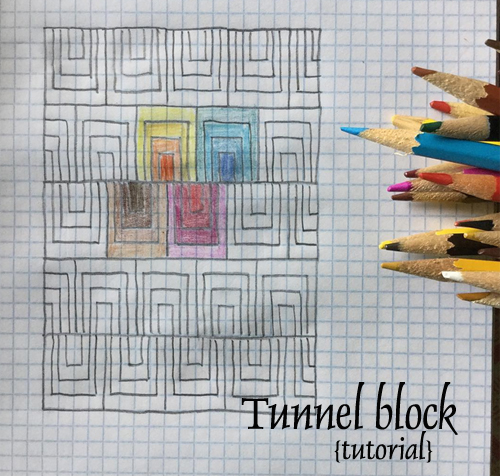
Tunnel block tutorial
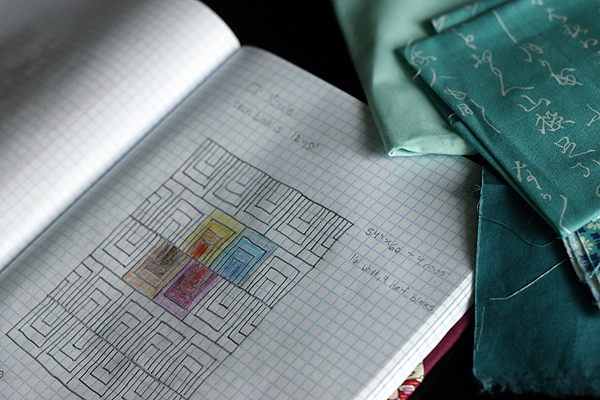
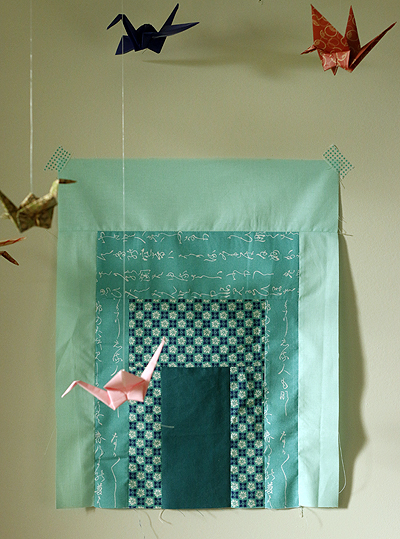
As a part of my #30DaysofQuiltDesign challenge, I sketched a design based on a three-sided log cabin, elongated to form a sort of tunnel. This simple block seems like a nice choice for the bee quilt I'll be leading this October. Tunnel is suitable for your first quilt and would be delightfully graphic worked up in all-solids. Each block finishes 12" x 15". Enjoy!
Step 1: Fabrics
This basic block could be used for lots of purposes, but to create a tunnel-effect, I suggest you choose 4 fabrics per block that range from dark to light. I'm asking my bee mates to choose any color they like - four fabrics in one color to form a gradient. My demo block is pale aqua to dark teal.
It's best to avoid fabrics that have more than one color (other than neutrals). Solids work wonderfully, but other textures and simple prints also communicate well so long as they make one strong color statement.
Step 2: Cutting
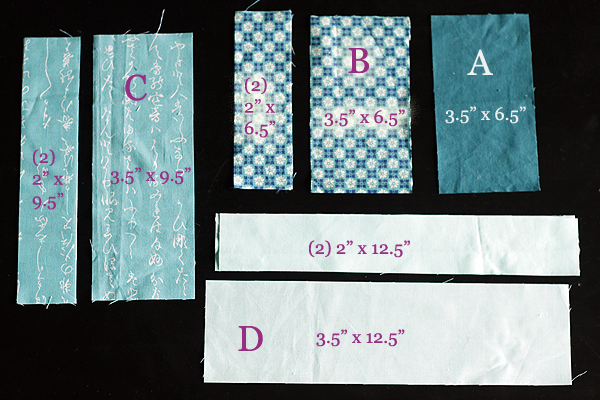
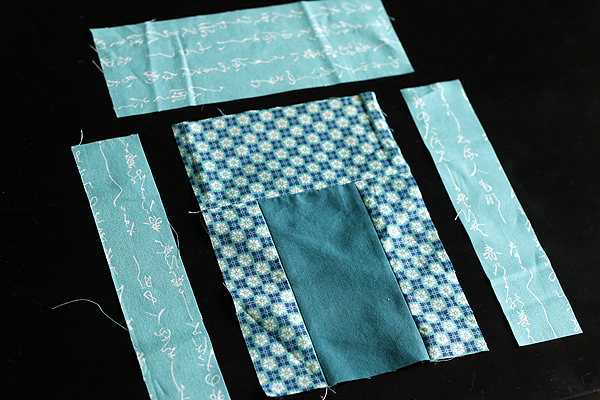
The block will be sewn in 4 layers with the darkest colored fabric at center (A) and the lightest colored fabric at the outer edges (D). Cut as follows:
A: 3.5" x 6.5"
B: 3.5" x 6.5" and (2) 2" x 6.5"
C: 3.5" x 9.5" and (2) 2" x 9.5"
D: 3.5" x 12.5" and (2) 2" x 12.5"
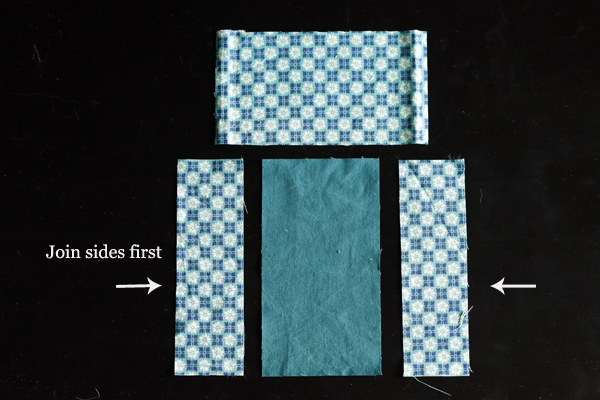
Step 3: Sew
Begin with piece A. Sew the 2" sides of layer B to either side of A. Press. Then add the wider, 3.5" piece of layer B at the top of the developing tunnel.
In the same way, add layers C and D. Always join the 2" wide sides of the layer first. After pressing, add the 3.5" wide top section of the layer to complete.
In a jiffy you'll be churning out 12.5" x 15.5" unfinished tunnel blocks. To create the offset arrangement I sketched in my design (first images), chop some blocks in half to place at row ends.
Happy sewing!