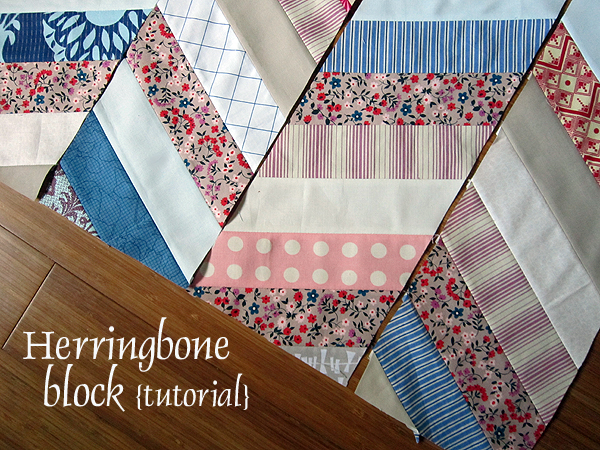
Herringbone block tutorial
In 2011, I wrote a Herringbone Block tutorial based on 1.5" finished strips. Well, my quilting skills have come a long way since then! I want to revisit the herringbone style, this time with 2" finished strips and using the angle on my ruler to cut the blocks more consistently. Both tutorials will work, but I do think this one is the better!
Herringbone Block Tutorial
*Finished size 12" x 20" (12.5" x 20.5" unfinished)
*Supplies: 2.5" wide strips and 6" x 24" rigid quilting ruler
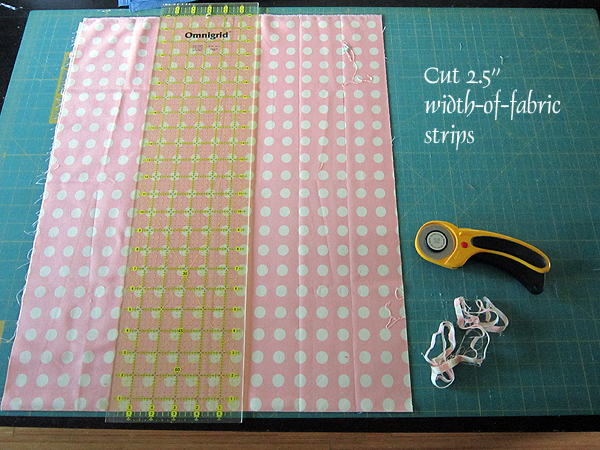
Step 1: Cutting
You might use jelly rolls for this block, since they are already 2.5" wide. Segment your fabric strips to 2.5" x 10.75" pieces.
If you're cutting from yardage, this tutorial is designed to minimize waste.
First place your fabric on the cutting mat, aligning the fold with a horizontal line. Cut 2.5" wide strips the full width of fabric. How many? I don't know! Depends on how big of a quilt you're making and how many fabrics you're using.
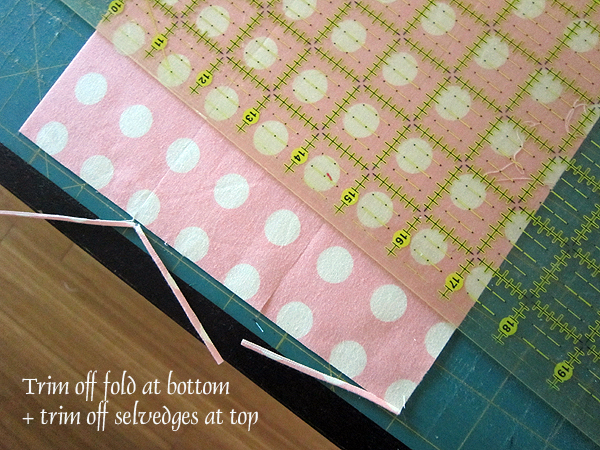
Remove the excess yardage, but leave the cut strips in place. Using your ruler, expose just the tiny fold at the bottom edge of your strips. Cut off the fold. Also, cut off the selvedges at the top of the strips.
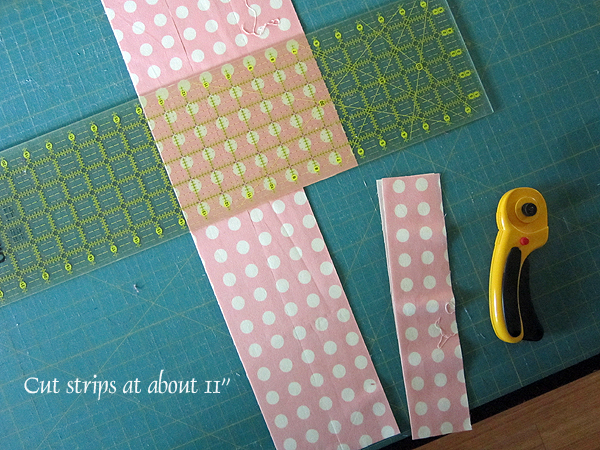
Last, cut across all your strips at about 10.75"-11" long. You'll be able to cut 4 pieces from each width-of-fabric strip.
Step 2: Layout
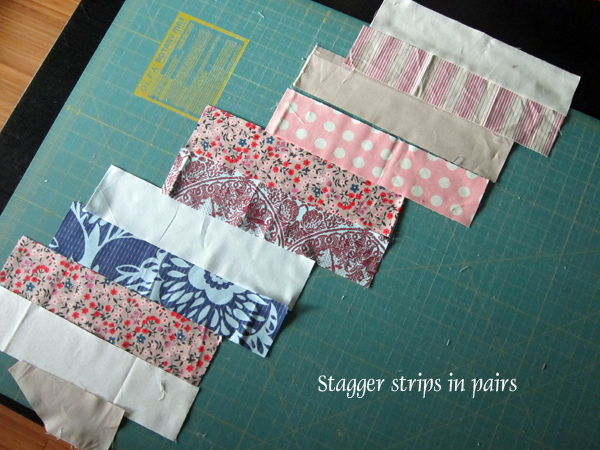
The Herringbone block is worked in two separate halves. For your first block half choose 11 pieces of fabric. Arrange them in a pleasing order. Make 5 pairs, with 1 leftover loner at the bottom. (You can actually use a shorter strip for that piece at the bottom. After you start making blocks, your trimmings can be used this way!) Now, stagger them on your work surface in pairs, spacing each pair about 2" to the right of its neighbor, like so:
Step 3: Sew Pairs
At the sewing machine sew your pairs together, matching the long side of each strip with right sides together. Use the standard 1/4" seam allowance now and throughout the tutorial. If your fabric pieces are of uneven length, match them flush on the right end consistently, so that just the left ends of the pairs are uneven. This will increase your accuracy for the trimming stage.
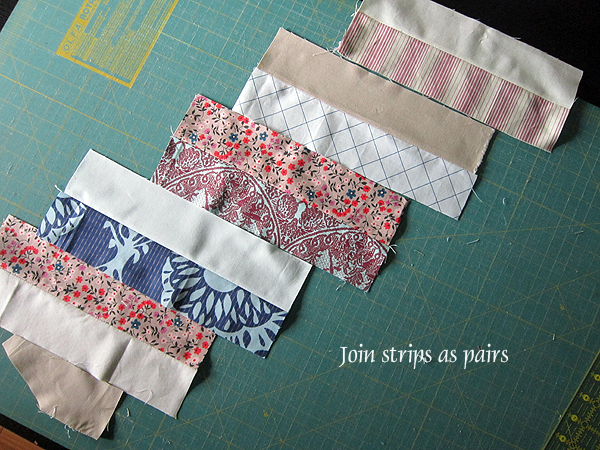
You do not have to press fabrics after this step, but I did so that you can see what's happening clearly.
Step 4: Sew Stagger
Lay out your strips again on your work surface. It's time to sew them all together, maintaining the staggered spacing. To start, use a ruler to measure 2.25" at the right end of the first pair. Flip the loner piece (bottom piece) onto the first pair, right sides together and flush with the 2.25" measurement. Sew the loner piece to the first pair with this staggered arrangement.
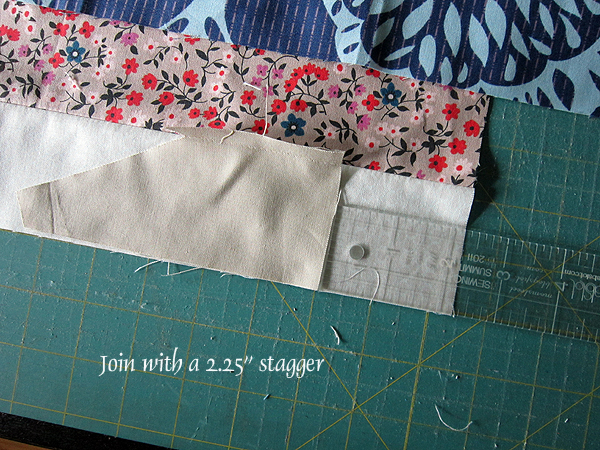
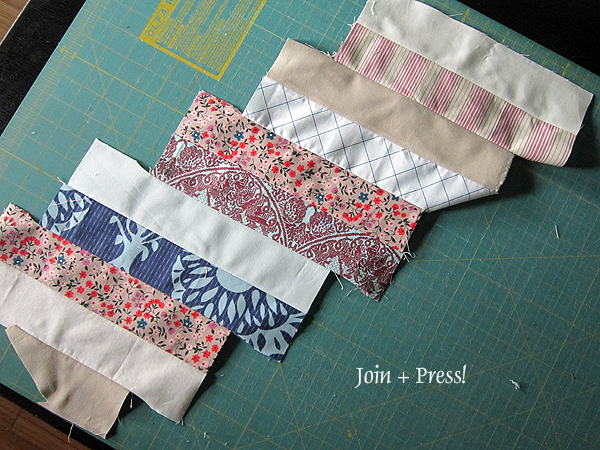
Continue joining pairs, working your way up the block. Always join pairs with a 2.25" stagger.
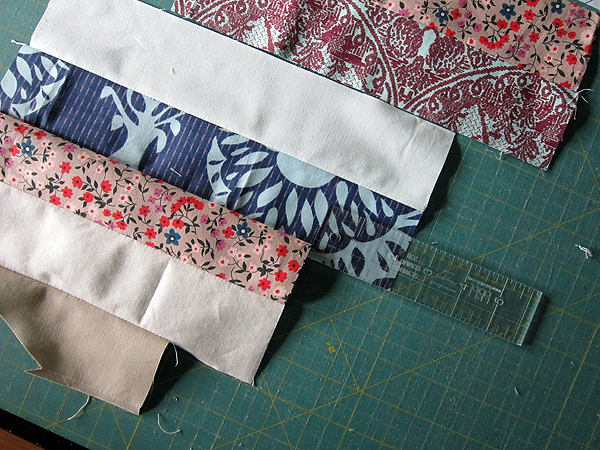
After pressing seams, you'll have one long, funny-looking piece!
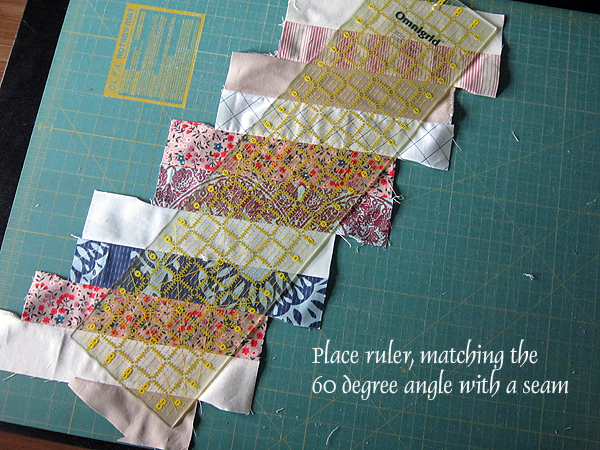
Step 5: Trim
Place your ruler over the work, matching a 60 degree angle line on the ruler with a seam on the block. This will establish a 60 degree angle when you trim the long edge of the block.
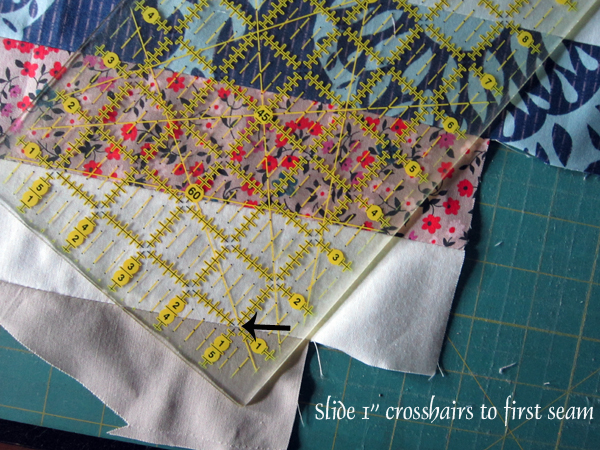
Before cutting, find the 1" crosshair at the bottom of your ruler. This is the point 1" high and 1" across on your ruler. Match this point to the bottom seam of your block, while keeping the 60 degree angle line on or parallel to a seam. Also, slide your ruler all the way to the right, so that you are trimming off just triangle-shaped scraps all along the long side of the work. You want to keep the work as wide as possible!
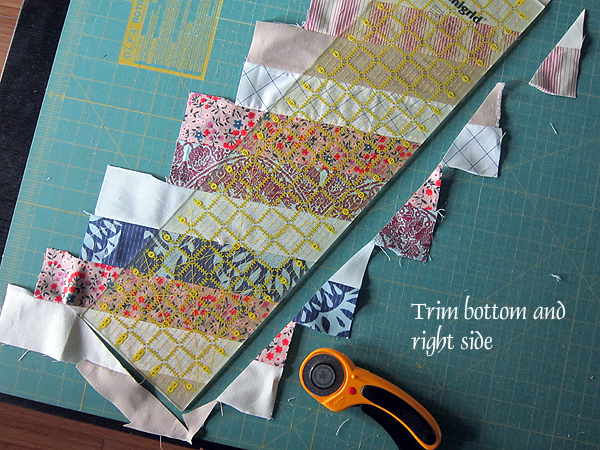
Now trim the bottom edge and right edge of the work only.
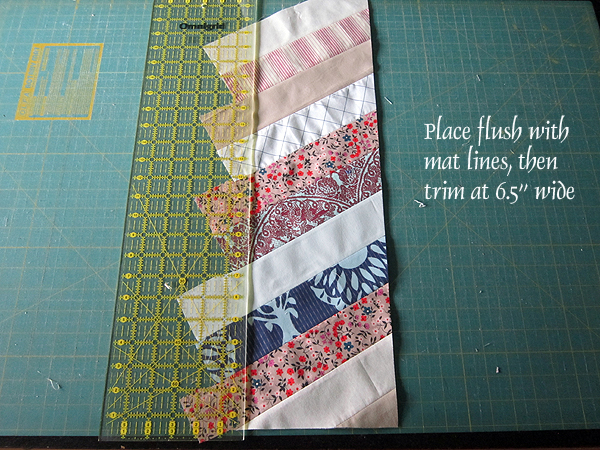
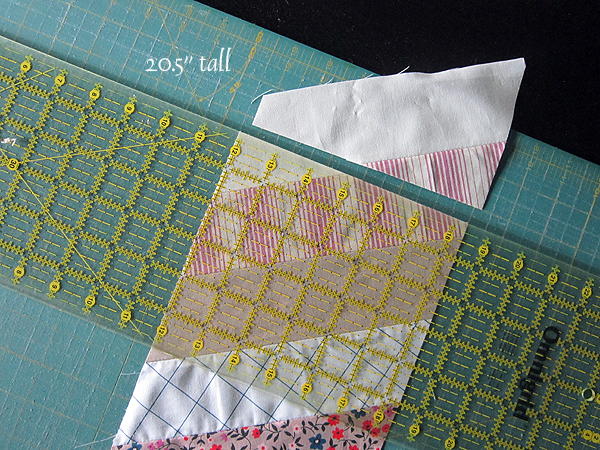
Move the work-in-progress so that the trimmed edges are flush with mat lines. Measure and trim the block 6.5" wide...
and 20.5" tall.
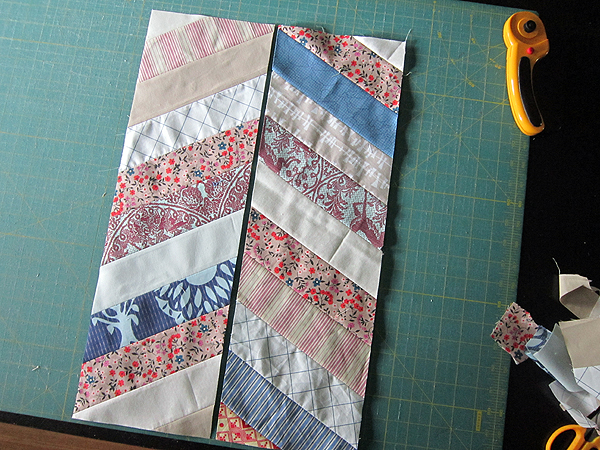
Step 6: Make Opposite Half
Great, you've made 1/2 of a Herringbone block! I think you know what comes next. Repeat Steps 2-5 working with 11 new fabric pieces. This time, stagger and sew your strips in the opposite direction, towards the left. After trimming, you'll have two mirrored halves, each 6.5" x 20.5".
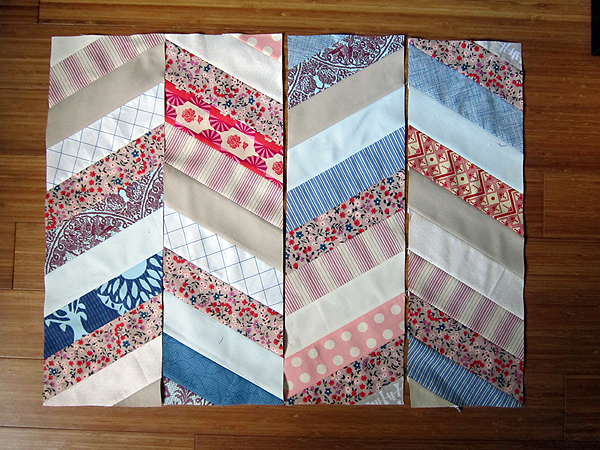
Match and pin each seam to join them at center! Or, you can also opt to keep your halves independent until final quilt top assembly. This would allow you to arrange and rearrange them before committing to the perfect layout.
Thanks for sewing with me!