Lattice block tutorial
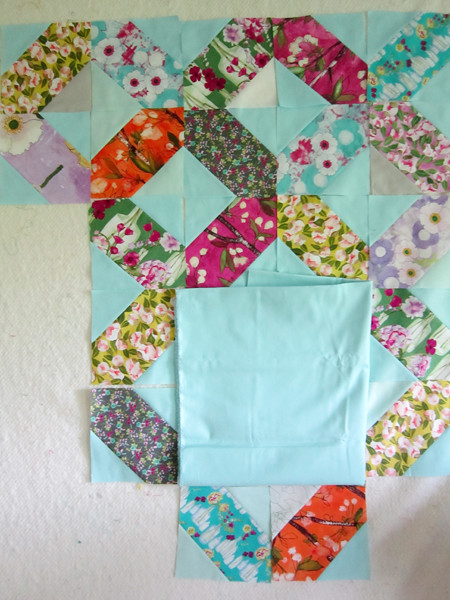
My current work-in-progress was inspired by a vintage Kansas Dugout quilt. To avoid y-seams I simplified construction, bringing out the lattice-like design with simple, straight seams. The resulting quilt block is easy enough for confident beginners! Let me walk you through...
::Lattice quilt tutorial::
This tutorial yields (4) 6" finished blocks. Sew all four blocks together to create a 12" finished "X" shape. I am not joining my 6" blocks until the end so that I can rearrange blocks as desired. To add variety, I may interrupt my quilt now and then with solid "background" blocks in either 6.5" or 12.5" cut squares. Mix it up as you like!
In this tutorial I use a 6.5" clear square quilting ruler. If you like to quilt this is a worthwhile investment! If that's not practical now, see if you can adapt another size quilting ruler to suit by using extra tape to mark off the 6.5" limits.
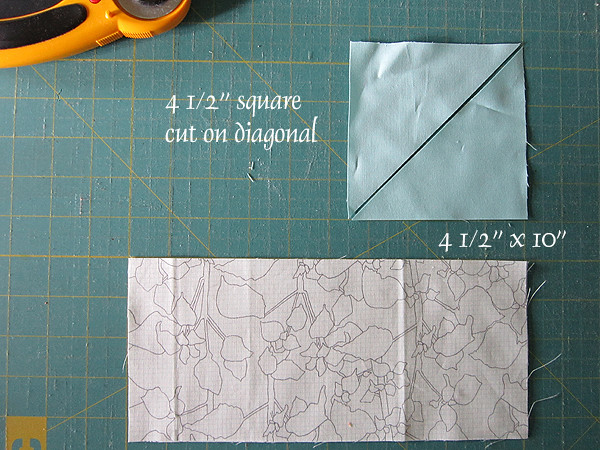
Step 1: Cutting
from Background Fabric
Cut (4) 4.5" squares
Cut squares in half on diagonal, yielding 8 triangles
from Feature Fabric
Cut (4) 4.5" x 10" strips. It's OK if the strips are longer than 10", as we will trim off the excess.
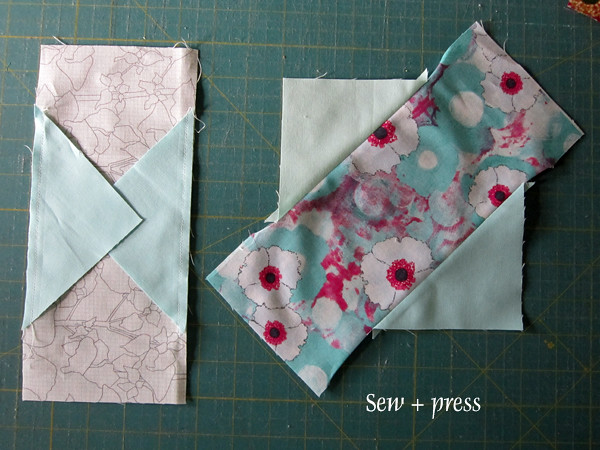
Step 2: Sewing
Sew two background triangles on opposite sides of each feature fabric strip. You will be matching the long, bias edge of the cut triangles to the long edge of the feature fabric strip. Roughly center these triangles on the strip. Don't worry about being precise! As you place the triangles, just check that the center triangle points are roughly opposite.
Press seams open. The straight grain edges of the background triangles should fall on the outer edges of the quilt block.
Step 3: Trimming
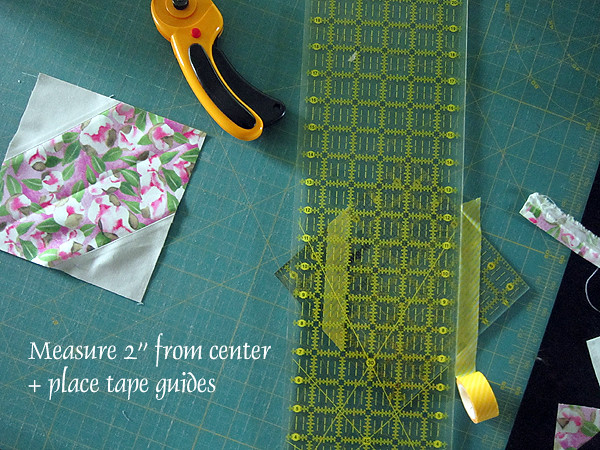
Use masking tape or washi tape to place guides on your 6.5" square quilting ruler.
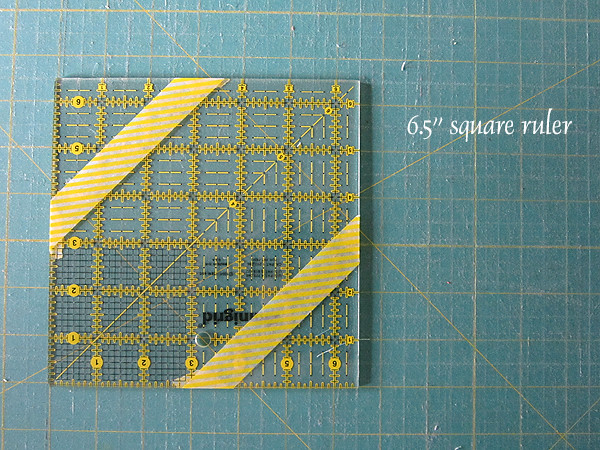
To place the tape, imagine a line running diagonally from corner to corner on the ruler. (Your ruler may actually have such a line!) Then, with another quilting ruler, measure 2" to the side of that center diagonal line. Place tape at 2" from center on each side of the ruler's center diagonal line.
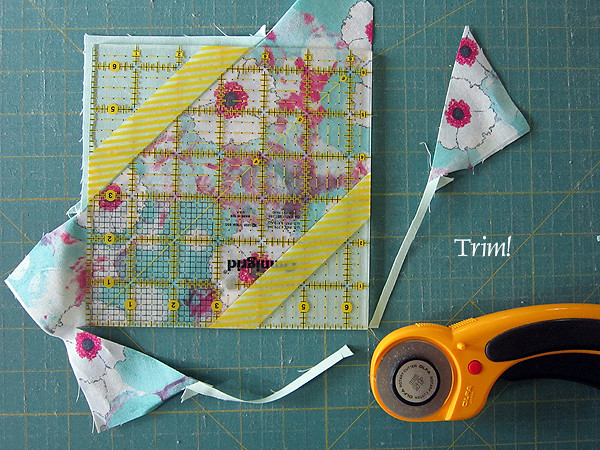
Use this rule to trim all blocks to 6.5" square. Match the tape edge with the diagonal seams on each block. Then trim all four edges of the block without shifting the ruler.
Step 4: Assemble
After completing your 6.5" unfinished blocks, join in groups of four to create larger 12.5" unfinished "X" blocks. Then join blocks into rows and join rows to complete your quilt top.
As this is a rather quick little block, I expect to have a quilt top to share within a week!