Continuous Eight Quilting tutorial
At about a year and a half into really, actually free motion quilting, I now free motion quilt (FMQ) a bit more than half my quilts. I'm so happy to be on this leg of the journey because I certainly had a few false starts with this tough skill. If you're struggling to find your groove with it, you're not alone! For me the keys were a high quality sewing machine, a defined quilting pattern and making the commitment to do a whole quilt.
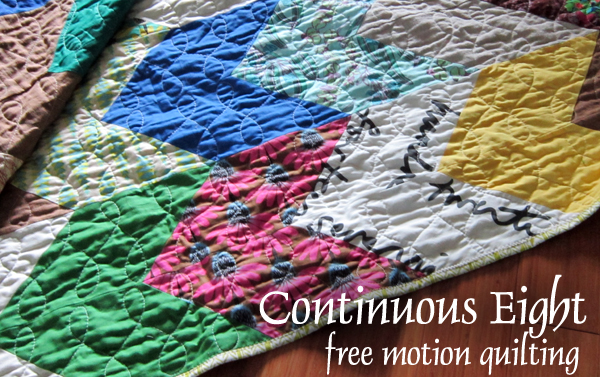
My current favorite quilting pattern is the continuous eight, which I first tackled in October. Now it's my fastest way to quilt, seems really secure and compliments most any flavor of quilt. Today I'll pass on some tips that might help you master the continuous figure eight.
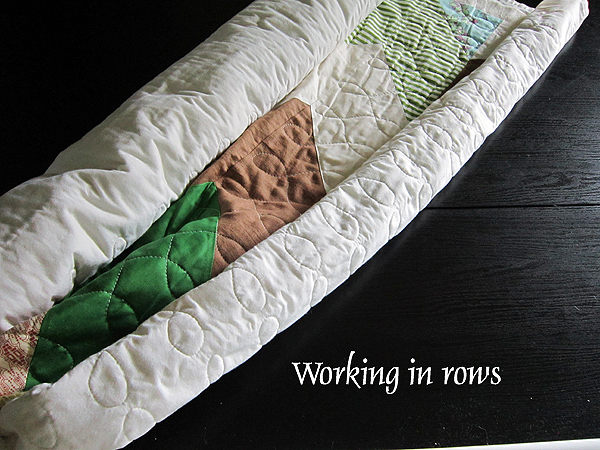
The continuous eight is a FMQing pattern that works in rows across the quilt. This means you can start and stop off the edge of the quilt, minimizing any times you need to pick up the bobbin thread (a task that always annoys me) to only those times when you run out of thread mid-row.
Since we're working in rows, prep your quilt like you would when straight line quilting - roll up the sides to expose only the section you'll be quilting.
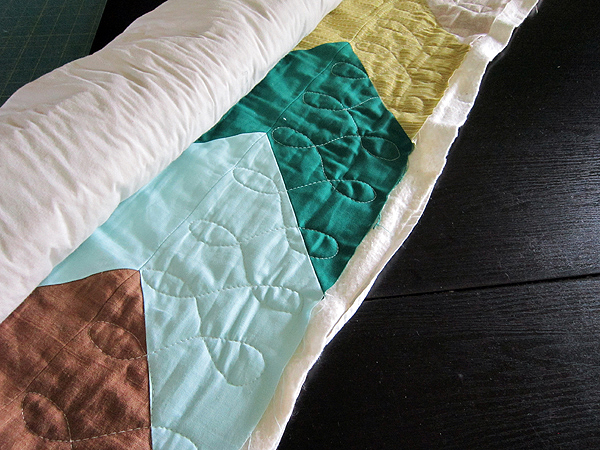
I often start with a center row, but I've also started on a side and worked inwards with no problems. Note that quilting along the edge is the hardest part because there's so little to grab!
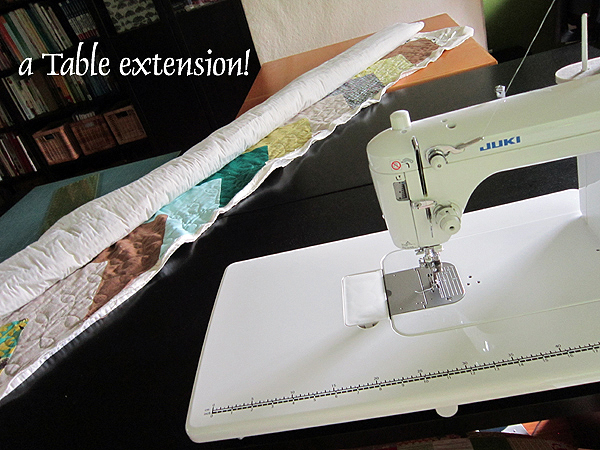
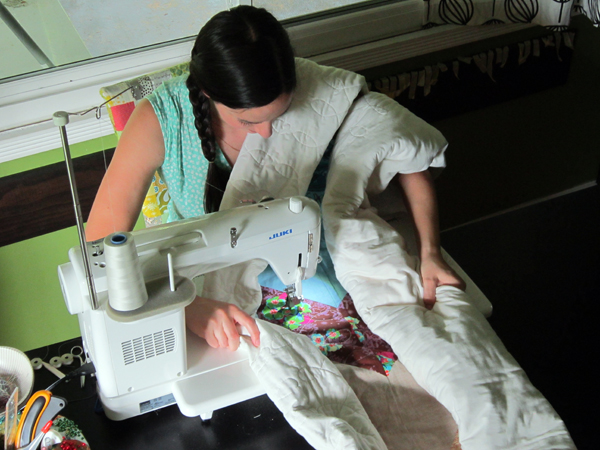
I am quilting this king-sized quilt with a continuous eight pattern on my fabulous Juki TL 2010Q sewing machine. I'm in awe of how easy this is! I literally don't feel the difference side-to-side under the sewing machine between quilting a twin and quilting this king. I do notice, however, that there are more rows to quilt! When quilting bed-length quilts, it's worth extending my table length by dragging over an extra table, so that my quilt is supported all the long way.
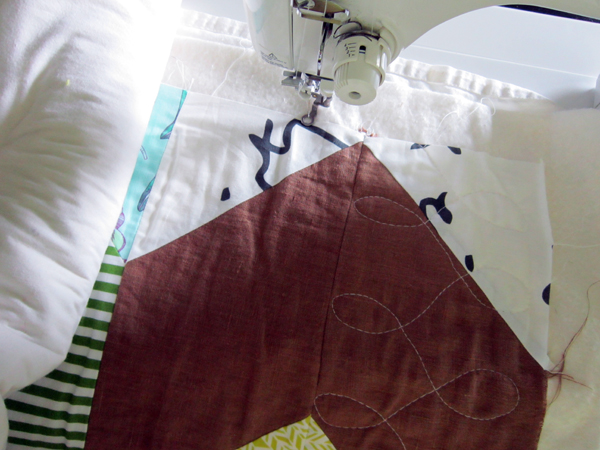
I like to support the weight of the quilt on my shoulder and push it through the sewing machine in the same direction as I would work if straight line quilting. I grip the quilt rolls with serious intent. As I go, I'll stop (with the needle down) and reposition my hands quite often, so as to maintain control over the quilt top at all times.
If you're new to FMQing, it'll be easier to quilt smaller continuous figure eight shapes. Consider starting out with 3-4" wide rows. Work this on a quilt that already has rows or use a marking tool, like a hera marker, to mark rows. I am comfortable quilting this pattern over 5-6" wide rows. 6" may be my max!
This simple video is the easiest way to show how I approach the continuous eight:
Before attempting a new free motion pattern, it's always wise to first draw it on paper and then test it out on a practice quilt sandwich, especially to make sure your tension is right. Remember to drop your feed dogs, set stitch length to zero and attach a free motion quilting foot. On the real quilt, be sure to double check the back of the quilt after quilting a little bit, to make sure all is well tension-wise before going to town.
By the way, if you find that NO MATTER WHAT you always have tension issues, especially on curves, the problem may really and truly be your machine. I had a machine like that! When I tried FMQing at a retreat on two different higher end machine, I realized that it wasn't my fault that I couldn't get the tension right. If thread breakage is a frequent problem, you may need to use a higher quality thread.
You might also like to check out two other FMQing tutorials I've shared for more tips on tackling this skill: Dogwood Quilting and Chrysanthemum Quilting.
Hope this helps you go out there and bravely go where you have never gone before!