how to Finish a Quilt (and Spray Basting)
For a new quilter, the part that comes after the quilt top is finished is the hardest part. Granted there are lots of good and valid ways to finish a quilt, but maybe that's part of the problem. Your first time around, options can be more daunting than delightful. I helped a good friend finish her first large quilt last week. Watching her uncertainty reminded me how overwhelming it all can be. So, if you're new to quilting, here is some basic advice for getting it finished.
The quilt back. So, the quilt back can be anything. But to simplify, a large piece of fabric would be quick and easy. Buy yardage for your quilt back that's wide enough so that you don't have to cut and piece a big backing. If your quilt is large, check out the 90" and 108" wide solid flannel backings available online at stores like Fabric.com. I particularly like these for bed quilts where the back is unlikely to be seen anyways.
Add good batting. I sent my innocent friend to the local big box sewing store, and she came home with some low-loft cotton batting that practically disintegrated under our hands. As we tried to spread it out during the basting process, the thin batting stretched and pulled apart. Bad, bad, bad!
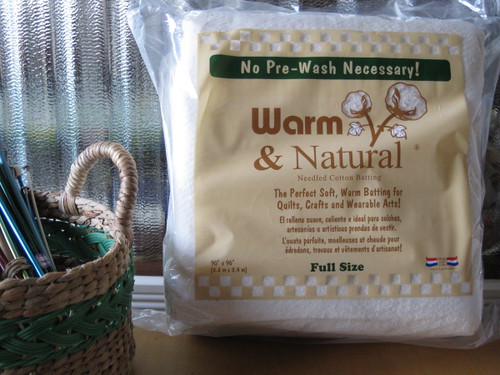
She decided to return that batting and use my Warm & Natural batting instead. I highly recommend this affordable batting made by The Warm Company. Warm & Natural and Warm & White (which is bleached white) are low-loft cotton battings with a sturdy construction that only requires quilting every 10". That means you don't have to do as much quilting work if you don't want to. Yay. Warm & Natural is thicker than the stuff my friend found locally, but it is light enough for all-year-long use. You may be able to find it locally; otherwise, try good ol' Amazon (affiliate links above and round about).
Basting. Now you need to get all of those layers (quilt top, batting, backing) sandwiched together so that you can quilt that puppy. Basting is the process of securing those layers together temporarily. Ideally, you baste "well" so that nothing shifts during quilting, causing frustrating puckers and such. There are lots of basting options, but I think basting spray is easiest by far. Basting spray is a temporary adhesive spray designed for fabrics. A high-quality spray will be easy for your machine to sew through without any gunky build-up. You quilt or tie your quilt and then wash the basting out when you wash your quilt.

Amongst spray-basting quilters there seems to be an overwhelming majority who love 505 temporary adhesive spray. Me too! It works really well, which is key, but I also love that it is odorless and made in France, carrying no warning labels about using it outside or in a ventilated area. Most sprays have a strong odor, which is a telltale sign of toxicity. I'm not saying you should merrily inhale the stuff, but I feel good about using it in the house. The only bummer is that spray (unlike basting pins) is not reusable. We are a family who's banished disposable plastics and papers from our kitchen. Heck, I even used cloth diapers, so it's not like I won't work for the sake of the environment. But basting spray is my exception. It just works so well and makes the process sooooooo fast. Take a look:
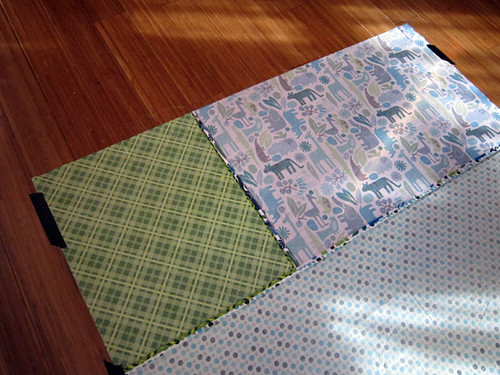
Tape your backing to the floor wrong side up with masking tape. Make it smooth, but not stretched.
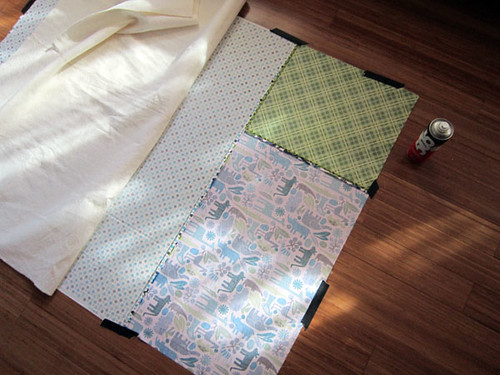
Lay out the batting smoothly. Then fold back half of the batting and spray the exposed backing with basting spray. Spray in a side to side sweeping motion, evenly covering, with the can at 12" from the backing. I've found that if I let the can drift farther from the fabric (say 18") the spray does not hold as well.
Replace the batting down on the backing, smoothing it out from the center to the edges. Repeat on opposite side to finish sticking the batting to the backing.

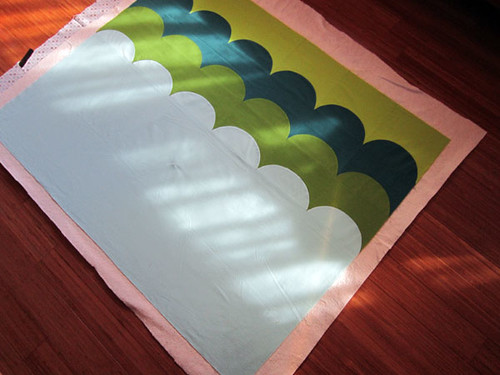
Now lay out the quilt top on the batting with right side up. Make it smooth and centered and straight as per the backing. I peak under the batting to see reference the backing at this point. Then fold back half of the quilt top and spray the exposed batting with basting spray. Remember to keep the can 12" from the batting as you sweep side to side, covering well with spray.
Replace the quilt top down on the batting, smoothing it out from the center to the edges. Repeat on opposite side to finish sticking the quilt top to the batting.
Easy! I can do this in about 15 minutes. If you've ever pin-basted, you know that's a quilting miracle. Then, remove the masking tape and voila all done.
The best deal I've ever seen for 505 basting spray is at Sew for Less. They have the HUGE 17 oz can for just $13.50! That's almost 3 times as much product for just $4 more than what I was paying locally for the Dritz brand with coupons. I bought myself 2 large cans of 505 for $35 including shipping. And, I couldn't be happier!
Quilting or Tying. Options, options. For a small quilt, using your sewing machine to machine quilt is a good idea, even for your first quilt. Straight lines are generally the easiest way to start, but you'll need a walking foot attachment to do a really nice job. For a large throw, twin or queen-sized quilt, maybe you want to ease into it by hand-tying. I like to hand tie with heavy weight thread and a large-eyed needle (like Chenille 24 needles). Try a double or triple "square knot" It's as simple knot you could learn on Youtube.
Binding. Remember my uncertain friend? She machine bound her first quilt last week using my Zigzag binding tutorial. After making the binding, she was able to attach and finish a super large throw in a few hours. Hurray! And, the zigzag stitch finish is so forgiving that her binding was attached securely front and back with no need to redo any sections. Total success!
I hope this helps you navigate any uncertain waters towards a lovely finished quilt! If you have any questions about this or any other topics, please feel free to ask away. I'd love to be a resource for you!