Make Merry Tree Cards tutorial

Fabric cards are tres easy to make and quite the wise avenue for any small, dear scraps. As such, they're lovely for Liberty fabrics! My Christmas tree cards are made with 5" x 7" blank notecards, which can be purchased with envelopes at most craft stores. The tiny fabric mosaic takes just snippets of scraps. Here, I'll show you how!
Supplies
Misc. fabric scraps
5 x 7" blank notecards and envelopes
downloadable Tree Template
Acid-free glue stick
Water soluble pencil or other fine-tipped marking tool
Pencil
Small Scissors
Thread to match notecards and dark thread for trunk
Optional - pinking shears and 4.5" x 6.5" fabric
Note: Stitching through paper quickly dulls a needle. You'll want to change to a fresh needle after completing this project. I keep a "paper" needle just for such times.
Step 1: Prepare
Start by selecting 5-6 scraps that play together nicely. Here I've made piles of two color families. I ended up using 5 different fabrics for each card.

Print the tree template (actual size, no scaling) and cut it out. With pencil, lightly trace template onto blank notecard. Do not fold notecard. Leave open and flat until card is finished!
Step 2: Create Tree Mosaic
Choose a favorite scrap or print to start and cut it to a small, random size. Place it on the outer edge of the traced tree shape. Most likely, it will not match the edge. Use a water soluble pencil or other fine-tipped marking tool to mark where the scrap must be trimmed to match. Pick up the scrap and cut it to fit, using small sharp scissors. When you are satisfied with the fit, fix the scrap in place on the notecard with a glue stick.


Choose another scrap and place it in the tree beside the first scrap. Again, make marks on the scrap as to where you must trim so that this new scrap will fit into the tree shape beside the first scrap. Maintain a distance between scraps of approximately 1/8". It is not important to be exact about this spacing, so don't fret!
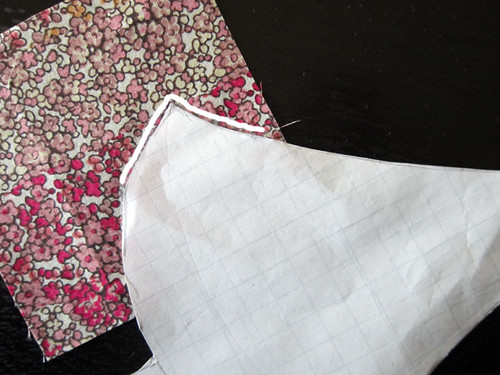
Another way to cut pieces to fit the curves is to lay the tree template over your fabric and trace the desired part of the tree onto your scrap.
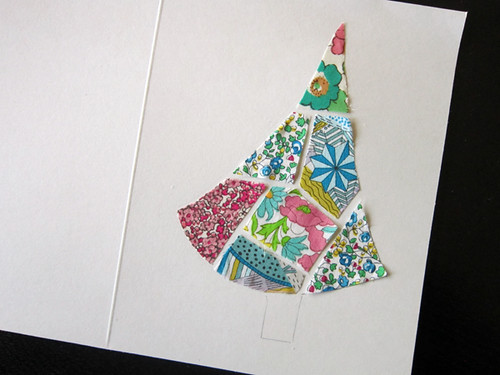
Continue adding scraps until you have filled the tree shape. Work from the curved edges and then fill the center. Keep in mind that smaller mosaic pieces makes the project more challenging and time-consuming. I used only 7 pieces for each tree.
Step 3: Stitch Mosaic
Using thread to match the notecards and a regular stitch length, now stitch around each scrap to permanently secure them in place. Do not backstich to secure threads and do not start/stop stitching between scraps. Instead, stitch in one continuous path traveling through all of the scraps and doubling over your stitch lines in some places to secure threads.

Begin stitching on a scrap along the edge. Stitch around that scrap at approximately 1/8" from the scrap's edge. Before continuing on to the neighboring scrap double over the part of the scrap where your stitching originated. This double stitching will secure threads. To reach the next scrap, stitch for a small distance on blank notecard. Take the shortest path possible to the next scrap. Stitch around that scrap, again at 1/8" from its edge and again doubling over part of your stitch line as you make your way to the next scrap.
In this way, continue securing scraps and traveling to the next one, taking a loopy path through the entire mosaic. On the last scrap, be sure to double over a stitch line before finishing your sewing. Trim threads close to the card.
Step 4: Stitch Trunk
Rethread your machine with a dark thread. Here I've used dark gray. If possible, set your machine to a slow stitch pace. Unlike fabric, the notecard paper will show any mistakes, as the needle will leave a hole wherever it has punched. For that reason, take your time and go slow!

The trunk is stitched as one continuous line. Begin stitching the outline, directly over the pencil-traced line. Then, make tiny columns of organic straight lines to fill the trunk up. Small curves and clustering lines just enhance the look!
To secure the trunk threads, turn the card over to see the back of your stitching. Gently pull on the thread tail where you began stitching. Pull until the upper thread loop begins to slip towards the back of the work. Place your scissors or a sewing pin into the loop and pull gently to bring the upper thread to the back of the work. Repeat with the thread tail where you finished stitching. You should now have 4 thread tails at the back of your work. Knot them together close to the card and trim tails for a neat finish.
Step 5: Fabric Finish (optional)
Sometimes I enjoy seeing the stitch path inside the card, but this time I opted to cover the evidence of my work with a fabric inlay. This works best with Liberty lawn or voile, as thin fabrics are easy to glue.

Cut fabric to slightly smaller than the card itself (about 4.5" x 6.5") using pinking shears to give the raw edges a pretty finish. Use the glue stick generously to attach the fabric to the inside of the card without stitching. Fold the card closed and place a heavy book on top to simultaneously "set" the fold and securely glue the fabric inlay.

Admire. Repeat. Make Merry!