Journal Cover tutorial

Journal covers make great gifts and are a super-fun way to use fabric scraps. My tutorial is based off of this one by Jennifer Paganelli with a few modifications. Appearing here by popular demand! It's designed to cover a composition book, which measures 9 3/4" x 7 1/2" and has a nice firm outer. These are widely available at back to school time in the States or anytime at an office supply store. I buy the "grid rule" kind online via Staples, since graph paper is great for sketching quilts.
I know you're itching to make one, so let's dive right in!
Step 1: Prepare Fabric
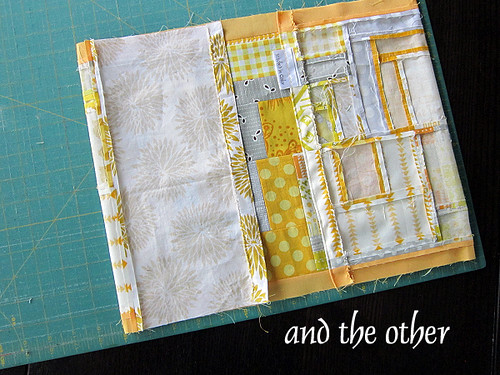
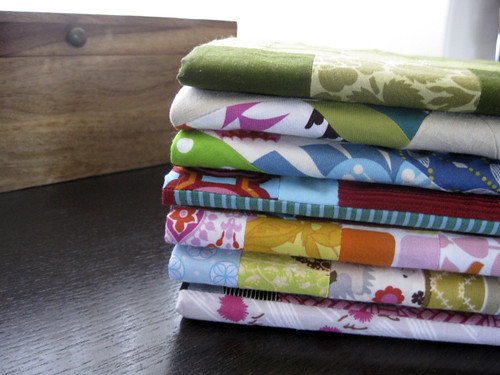
I've made journal covers in a myriad of piecing styles. Just go for it! This is a great way to test color combos and techniques. When all is said and done, trim your work to 12" tall by 29.5" long.

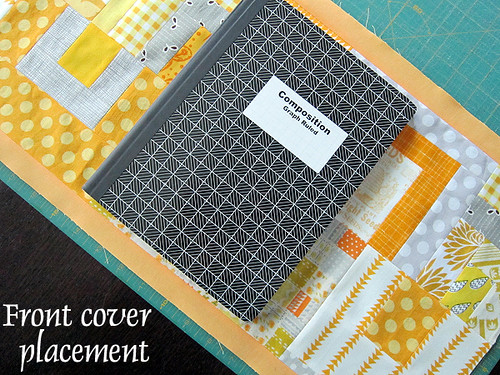
As I'm designing a cover, I keep a composition book on hand for visual reference. I like to drape my work-in-progress on the cover to see how the piecing will look on the finished dimensions. I often place favorite parts of my fabric design on the front of the cover. The left edge of the front cover will fall at 14 3/4". Here I've placed the composition book at the 14 3/4" mark. I'll lift or roll the composition book to focus on the fabric just underneath as I visualize the finished effect.
If your fabrics are very light in color, you may want to add a second layer of lightweight muslin or the like to prevent your cover from being see-through. This is very rarely a problem, so lay your fabric over your composition book to check before opting to add a lining. Cut the lining fabric to 12" x 29.5", just like the exterior. Layer the lining under your exterior fabric and baste with a line of stitches along both 29.5" sides at 1/2" from the raw edge.
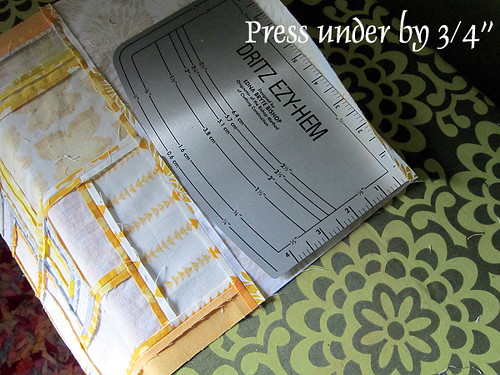
Step 2: Side Edges
Turn under the 12" sides of the cover by 3/4". The Dritz EZY-Hem makes fast, accurate work of this step! Press neatly.

Finish the turned under edge with a 1/8" topstitch. Be sure to use coordinating thread for this part, as it will show! I also attach my Stitched in Color tags (made by gutenTAGS) at the same time.
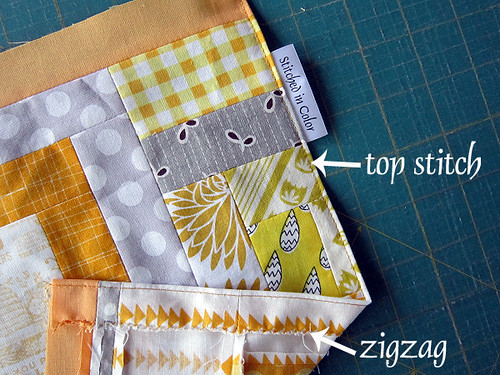
Lastly you may wish to finish the raw, turned under edge of the 12" sides with an overcast or zigzag stitch to prevent fraying should the item be machine washed. If your entire cover is patchwork, there are actually lots of seams inside that could fray. Ideally, the cover would be hand washed or washed in a delicate bag to minimize fraying. I'm not sure that it's important to overcast the two 12" side edges, but it can't hurt. And, they are the ones closest to the outer part of the cover. (By the way, I do this step after the top stitching because I feel it helps me press under/top stitch more accurately to delay it.)

The top and bottom of the journal cover has a full 1" seam allowance that is mostly encased when the cover is complete. The long edges do not need any special treatment.
Step 3: Sew it Up!
Back at your cutting mat, lay the work right side up. Fold one side in about 6 1/2" and then fold the other side in about the same amount.
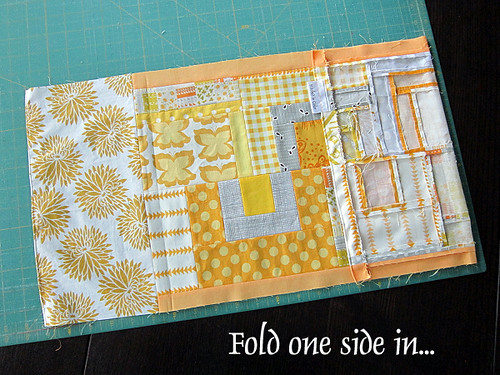
As you fold, you are exposing the wrong side of the work and creating the inside flaps of the journal cover. Fiddle with it until your folded work is 15" long, with both flaps about the same size (about 6 1/2" each). Check the total length (15") against the cutting mat lines. A bit of the right side portion should still be revealed at center.
If you added a lining, used heavy fabric or did lots of applique that made your work thicker than regular quilting cotton, make your work 15 1/4" long to account for the extra bulk of your fabric.
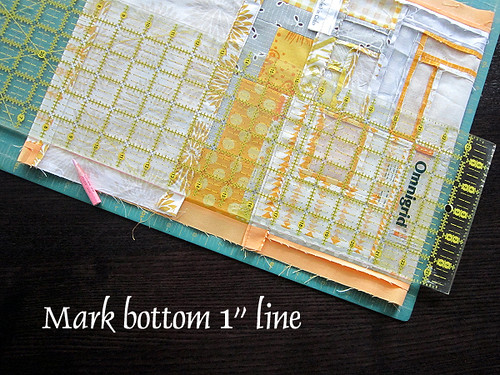
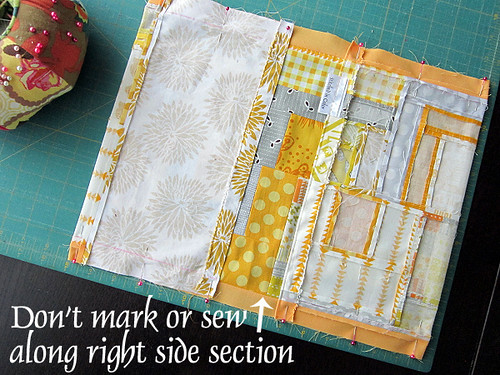
Now, use a clear quilting ruler to mark sewing guidelines at 1" from the top and bottom long edges. Mark these guidelines over the wrong side portion only, skipping the right side exposed at center. I'm using my favorite Clover water soluble pencil, worn down to a nub!

Pin along the line over the folded portions.
Sew along these lines, backtacking at the start and finish of each line.

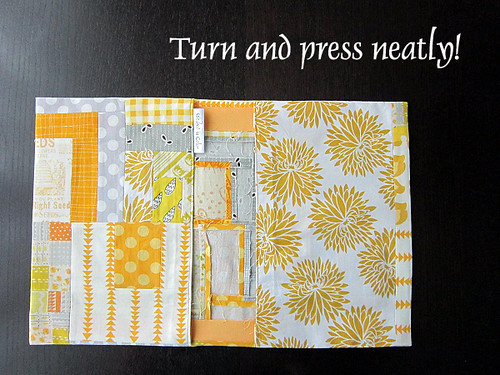
Clip corners and turn right side out.
Step 4: Finishing
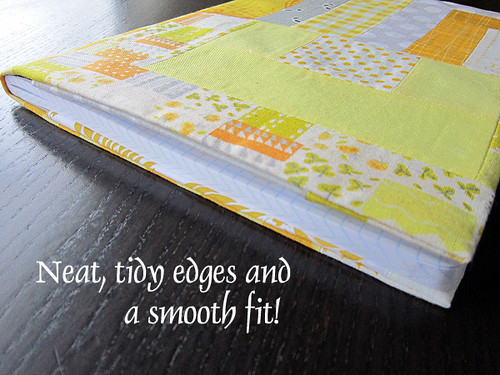
Before inserting the composition book press thoroughly. Once the cover is on the book, you won't be able to iron it. Of course, you can take it back off to iron or wash, but now's the time to press to perfection! A little spray starch is a good idea to give it a nice, crisp look.
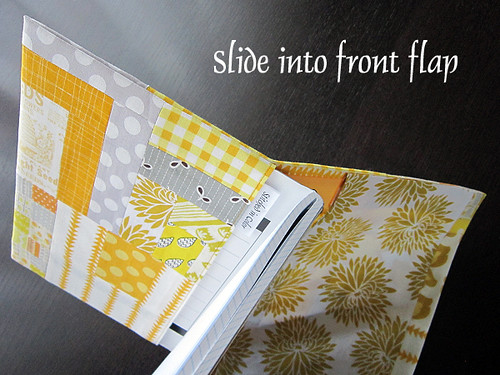
To put it on your composition book, first slide the book's cover into the front flap.
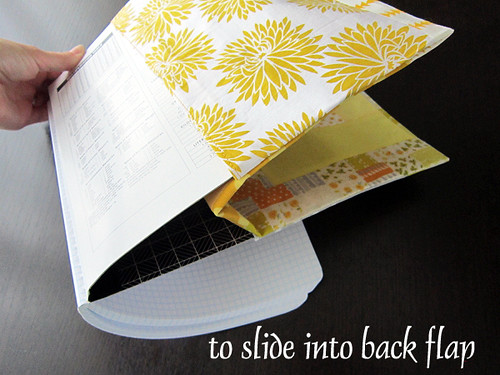
Then, bend the back cover really far open so that it can reach the inside back flap.

I practically open the back cover until it is almost touching the front cover to make this work!
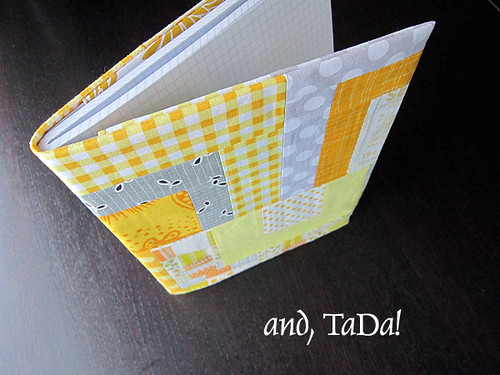
Once inside, close the book and admire!
Ok, if your cover is too small (pulling too tight once you get it on) or too large (kind of baggy on the composition book), it's not too much work to fix that. Take the cover off, turn it wrong side out and remove those last stitch lines across the top and bottom of the cover. Then, make your adjustments in the amount the flaps are folded and sew those stitch lines again. I still make adjustments from time to time for a perfect fit!
I can't wait to see your journal covers! Share on Instagram with #StitchedinColor.
Happy sewing!