Gemstone block tutorial
It's my turn to lead a charity quilt for the Faith circle of do. Good Stitches. Woohoo! This time I took inspiration from one of my very first Flickr "favorites", an image by Philistine Made:
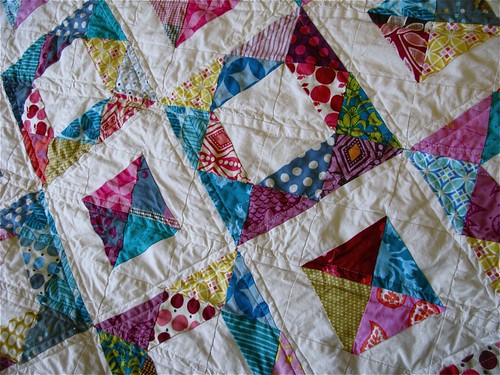
I don't recall if I've seen this quilt block anywhere else, but I imagine it has some traditional heritage. Don't you absolutely adore the triangle-pieced squares and reversed layout she's used? Simple, but delicious! Something about the way the triangles intersect reminds me of sharply cut gemstones.
I went back and forth about recreating the exact same block layout or doing something different. Last night I finally admitted that even if my "different" version is not as pretty as this one, I'll probably feel more satisfied for trying something of my own. So... I'm asking my circle mates to make this block but in a range of sizes. Once all blocks are received, I'll scatter them across some negative space and see what evolves.
In this tutorial, I used 5" cut squares as my starting point, and my completed blocks are 12" unfinished. To alter the size of the finished block, start with smaller or larger cut squares. I'll ask the Faith circle to choose a starting square size in the range of 2" to 6". The tutorial makes a pair of blocks (one in each layout) of the same finished size.
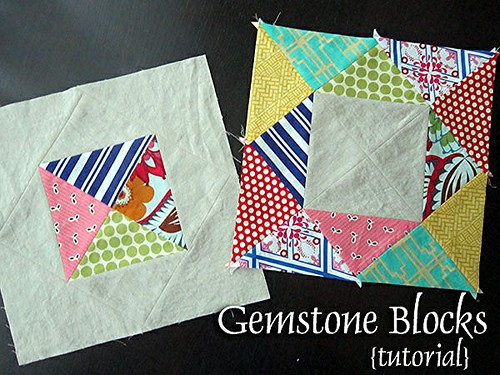
Gemstone Block Tutorial
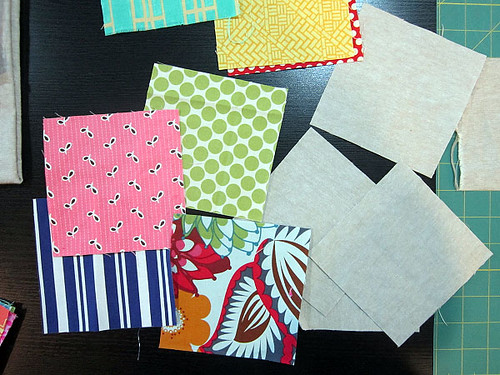
Cut (8) printed squares in your starting square size. Cut (4) solid squares in the same starting square size and reserve some solid fabric for a later step.
{Block A}
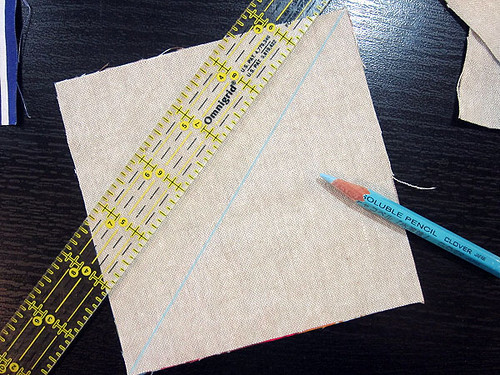
Choose (4) printed squares to make into half square triangles. Match these squares right sides together with the (4) solid squares. Draw a line dividing the solid square in half.
Sew at 1/4" on each side of that dividing line (sorry, my thread is SO hard to see). So, the dividing line will be sandwiched in between two stitch paths. Cut on the dividing line to separate. Press seams. Each set of matched squares produces 2 half square triangles. Sew all 4 printed/solid square sets in this way to produce 8 half square triangles.

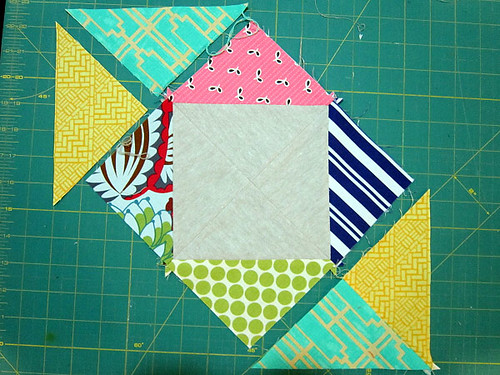
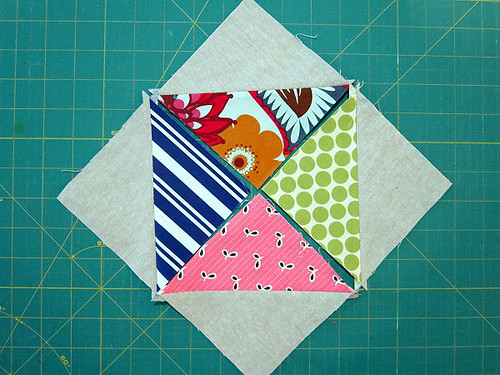
Choose 1 half square triangle in each print for your first block. Arrange the solid portion of each half square triangle in a square formation with the prints on the outside.

Sew as pairs and then again, matching seams to create the center of the block.
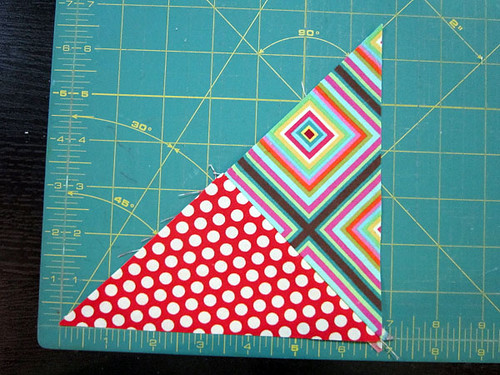
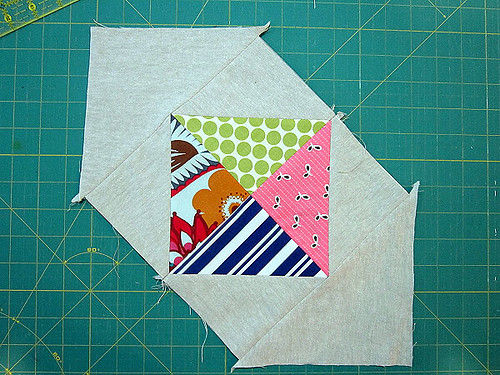
Now, cut the remaining (4) printed squares in half on diagonal. This creates (8) printed triangles. Arrange as shown around the center block. Turn the center block on point and use the printed triangles to fill out the 4 corners of the block. Sew the triangles in pairs and then sew the 2-triangle pairs to opposite sides of the center block. Always center the triangle on the side of the square with triangle points poking out equally on both sides.
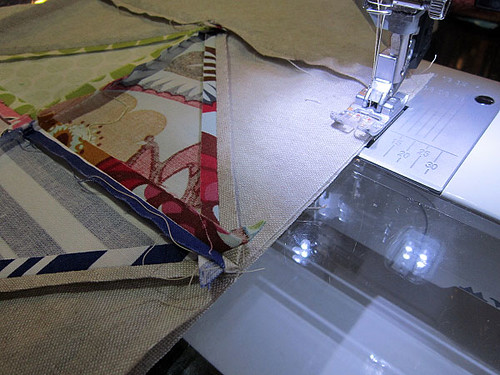
When sewing along the seam of the center block, have the center block on top so that you can be careful to sew just to the point of the center block. This really helps me not chop off those points! In this photo I'm sewing Block B, but it illustrates the same idea.
Press seams after sewing. Prepare second batch of triangle pairs. Before sewing them into the block, take a moment to measure the short side of the triangle pair. Round up by about a 1/4" to a nice, happy number. I rounded to 7 inches. Note this measurement as "large solid square size" for Block B.
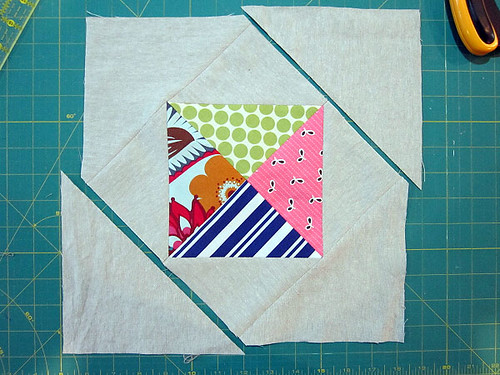
Sew the second batch of triangle pairs onto opposite sides of the center block.

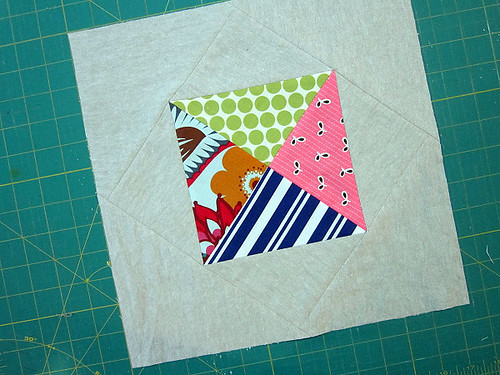
Press seams and finish! Square up if necessary, taking care to leave a 1/4" seam allowance beyond all points.
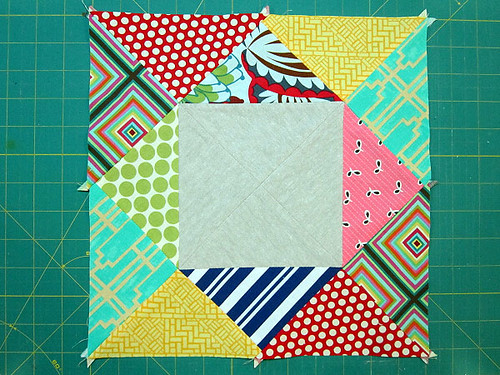
{Block B}
For the reversed block, arrange your remaining half square triangles as shown, with the solids on the outside.
Sew as pairs and sew again, matching seams to create the center of the block.
Cut two solid squares in the "large solid square size" recorded in the making of Block A. Cut each solid square in half on diagonal. Sew to opposite sides of your center block. Remember, center the triangle on the side of the square with triangle points poking out equally on both sides. Press seams. Depending on how much you rounded up for your "large solid square size" your triangle ends may or may not poke out like mine after sewing.
If they do poke out, you may wish to trim for a straight edge before proceeding.

Sew solid triangles to remaining sides.
Press seams and finish! Square up if necessary, taking care to leave a 1/4" seam allowance beyond all points.
Let me know if you have any questions! I really enjoyed making this block and especially loved that there is no fabric waste! Have a lovely day!