Quilted Sleeping Bag tutorial
To me summer is synonymous with ocean, camping, kites, sand and surf. My favorite family tradition is our annual beach front camping trip at Hunting Island, a South Carolina state park. Every year friends join us there to celebrate summer's arrival mid May. Although I'm not a huge fan of camping, I'll do almost anything to spend a day at the beach. The only dull spot to the entire trip is putting the kids to bed at night. It gets pretty stuffy in those tents and the kids always look downright miserable chasing sleep on rustling polyester sleeping bags.
When Jennifer of Ellison Lane Quilts asked me to join her Summer Sewing blog hop, it took me about two seconds to realize that this was my chance. A deadline was just what I needed to find motivation to make the lightweight cotton sleeping bags I'd once vaguely dreamed up.
Ok, so I only made one. But, with my preoccupation lately with Handstitched Class, I guess I'm mostly proud that I did make one at all! And now that I know how to do it and how easy a sleeping bag actually is, I'm sure Aria's bag won't be long behind. Here is a quick tutorial for you, should you like to make a quilted sleeping bag...

Quilted Sleeping Bag Tutorial
Step 1: Prepare the Quilt Top
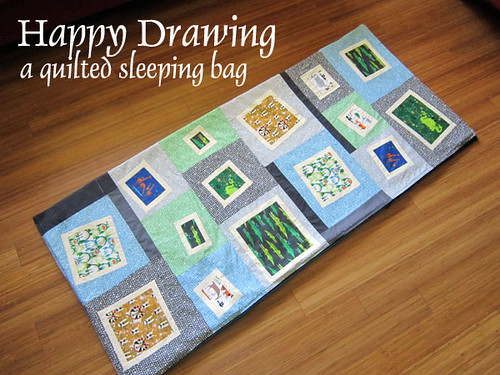
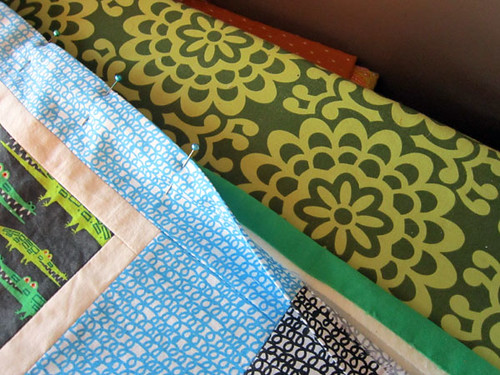
I fussy cut a selection of prints from Happy Drawing by Ed Emberley for Cloud 9 Fabrics. They're framed in 3/4" muslin scraps and then in larger swaths of variously hued Scribbles prints. I squared up the scribble print round with the fussy cut centers tilted this way and that and then set like-sized blocks together in rows filling in with solid grays here and there.

My finished quilt top is 28" x 60", which is a good size for a large child - adolescent sleeping bag.

Step 2: Piece or Cut More Sections
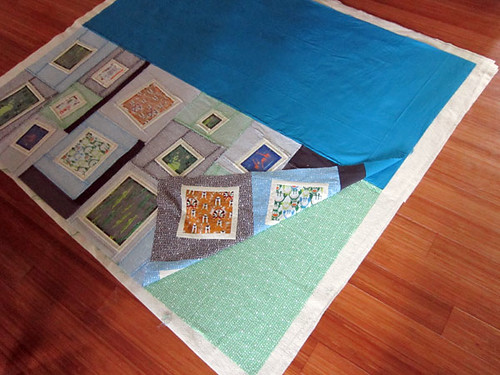
You'll need (3) more cuts of fabric equal in size to your quilt top. So, I needed (3) more 28" x 60" fabrics. Here's the anatomy of a sleeping bag:
Outside Top - my Happy Drawing pieced quilt top
Outside Bottom - I used Kona Cyan for this section, which faces the ground when the bag is finished
Inside Top - I used Kona Fern combined with the green squiggly print for this section, which you see when the bag is unzipped and the top is folded open
Inside Bottom - I used the Alligator Happy Drawing print, combined with more Kona Cyan for this section, which you lie upon when you get in the bag
Join the Outside Top with the Outside Bottom along the long, 60" side. Sew a normal 1/4" seam with right sides together and press seam open. Next, join Inside Top with Inside Bottom in the same way. Now you have (2) 56" x 60" pieces - the Outside and the Inside.
Step 3: Add Batting
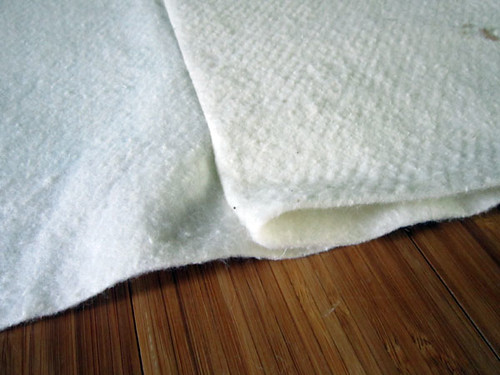
Prepare (2) pieces of batting about 4" larger than your Inside, so 60" x 64" in my case. For a summer sleeping bag, I want 3 layers of batting on the bottom (the layer the child will lay on) and 1 layer of batting on the top (the layer that goes over the child). Here's what I did....

Lay the Inside on the floor, right side down. Secure all around edges with masking tape. Lay both batting pieces over the Inside, centering them and spreading them smooth. Fold back both battings to expose one half of the Inside and spray with basting spray. Replace batting and smooth out. Fold back the opposite side of battings to expose the rest of the Inside and spray/replace batting/smooth out again. Now one of your batting layers is spray basted to the Inside and the other batting is lying directly on top of the first. Place a row of basting pins just along the center seam of the Inside piece.
At the sewing machine, sew in the ditch of the that center seam with the Inside right side up. Carefully remove basting pins as you go. You do have to remove the basting pins from underneath the work, which is annoying, but doable. Now you have stitched both battings along the center of the sleeping bag only and all basting pins have been removed.
Lay the work on the floor, batting up. Fold the top layer of batting (which was not spray basted) towards the Inside Bottom. Now there are 3 layers of batting over the Inside Bottom side and 1 batting layer over the Inside Top side. Place a few pins along the outer long edge of the Inside Bottom side to keep the batting smoothly folded towards that edge.
Step 4: Assemble Sleeping Bag

Flip your work over so that the batting side is down and the right side of the Inside section is up. Layer the Outside section over the Inside section, right sides together.
Make sure that Outside top is over Inside Top and Outside Bottom is over Inside Bottom. This part kind of puts knots in my head. It might be easier to actually stick a label on each section with it's name (ex. Inside Top) if you're spatially challenged like me. Also, make sure that the center seam of each section is aligned. Done properly, the outer edges will all match up.

Pin along outer edges through all layers of the work. Leave a section unpinned, about 24" wide for turning. Ideally, place this opening where the kids' feet would be when they are in the sleeping bag. I suggest leaving the opening on the top side of the work since it only has 1 layer of batting to deal with. Sew all the way around the work with a 1/2" seam, but not through the section left unpinned for turning. Trim off the extra batting and turn work right side out.

At the opening, fold the unsewn edges in and press neatly so that the seam matches the sewn edges. Pin copiously!
Now, edgestitch around the whole work a scant 1/4" from the edge. This will close the opening and give the edge a nice finish.
Step 5: Quilt
With basting pins, baste the sleeping bag for quilting. I quilted 5 or so lines spaced evenly apart. It's nothing fancy, but for whatever reason I wanted a "traditional" sleeping bag quilting pattern.

Step 6: Insert Zipper
Yes, you can buy sleeping bag zippers. They're black and chunky and available where most zippers are sold. You may have to shorten yours. I took off 14".

Fold your sleeping bag as if it had a zipper and lay the zipper from the fold at the bottom, along the bottom corner and up to the top of the bag. If the zipper extends past your bag, measure how much you need to remove and shorten the zipper from the bottom of the zipper. If you've never shortened a zipper before, it's super easy. Most zippers have instructions on the package.
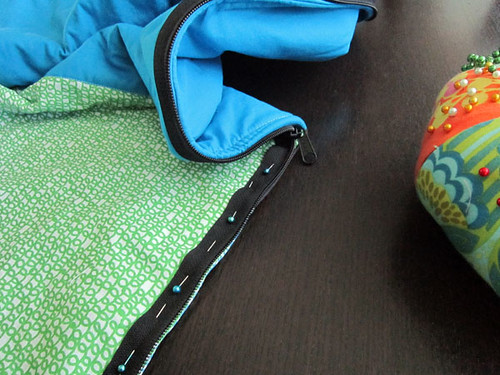
After studying a regular sleeping bag, I decided not to insert my zipper in the traditional manner. I wanted to leave the bottom corner sharp and avoid making the edges of the bag bulkier. My method does not cause the edges of the bag to turn under again at the zipper.

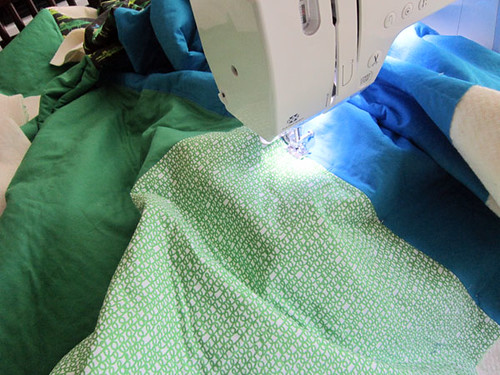
Load your sewing machine with black top thread to match the zipper tape and bobbin thread to match the outside of your sleeping bag. Install your zipper foot. Open the zipper all the way and place the bottom of the zipper at the bottom of the sleeping bag, at the center seam. Pin the zipper tape there with the right side of the tape facing the inside of the bag. Allow the teeth to extend just slightly past the edge of the bag. Pin the zipper along the bottom, curving at the corner and up to the top. Sew one side of the zipper to the bag, always sewing with the zipper tape facing you and your needle sewing about 1/8" inside from the zipper teeth.
Now pin the other side of the open zipper to the other inside half of the bag. Again, pin the zipper's right side to the inside of the bag. It's hard to get it just right near the center seam of the bag. Just do your best, pin for about 12" and then close the zipper to see if things are going to look good. If necessary, unpin and adjust and then close the zipper to check again. When you're set, open the zipper and keep pinning along the bottom edge. After pinning along the curve at the bottom corner, zip the zipper again to make sure that your sleeping bag corners match up when it's closed. Finish pinning. Your zipper tape should stop at the top of the bag near the same place it stopped on the other half of the bag. If it didn't your bag will zip funny, so unpin the zipper and adjust. When all is well, sew that zipper half on and you're done!
