Herringbone Block Tutorial

This month it's my turn to lead the quilt design for the Love circle of do. Good Stitches. Mmm... I love it when my turn comes around! I get to pondering all the many, many, MANY ideas I have for quilts and then to pinpoint one (darn, just one?) to bring to fruition with the 9 other members of our quilting bee circle. This month I'm drawing inspiration from Holly of Bijou Lovely's beautiful Herringbone quilt, made with the Inspire circle of do. Good Stitches earlier this year:
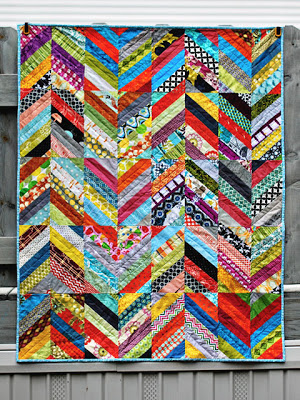
I had thought to send my circle to Holly's great tutorial for her 12.5" square chevron blocks and that would be that. But, well, I couldn't resist changing a few things. And that's totally the fault of my scraps!
Really! Ok, partly.
Holly's tutorial calls for 2.5" wide strips, but the bulk of my scrap strips are 2" or narrower. Obviously, the scraps insist. And, then, while I was doing my own thing I figured I may as well make the block narrow and long. I seem to have this thing against square quilt blocks. Who can fathom why?
Herringbone Block Tutorial
*Finished size 11" x 22" (11.5" x 22.5" unfinished)
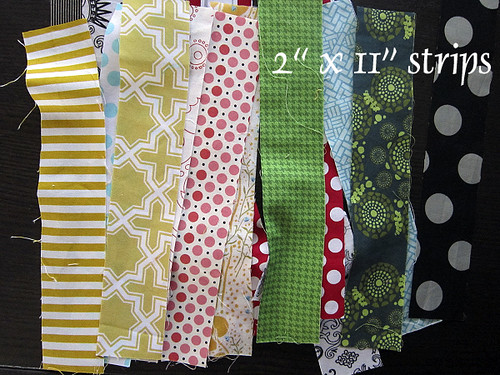
*Supplies: 2" wide strips and 6" x 24" rigid quilting ruler
Step 1: Cutting
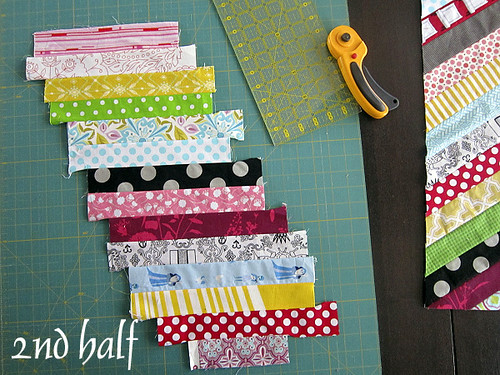
Sort through your scraps to find strips that are at least 2" wide and 11" long. (You can squeak by with 4 that are only 8.5" longto work in at the ends, but the rest will have to be 11" or longer!) For this block you'll need a total of 28 strips. Trim them down to 2" x 11", being especially careful to cut the 2" width accurately.
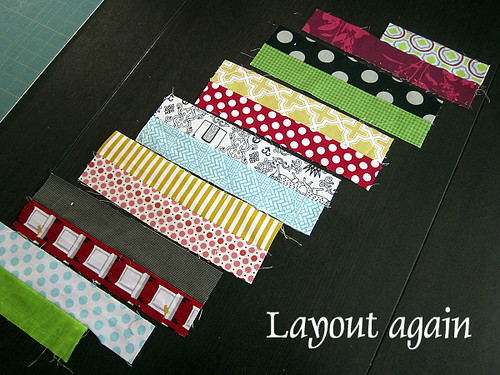
Step 2: Layout
The Herringbone block is worked in two separate halves. For your first block half choose 14 strips. Arrange them in a pleasing (or random!) order. If you're using some shorter strips (at least 8.5" long) place those at either end of your row of strips. Now, stagger them on your work surface in pairs, spacing each pair about 1.5" to the right of it's neighbor, like so:
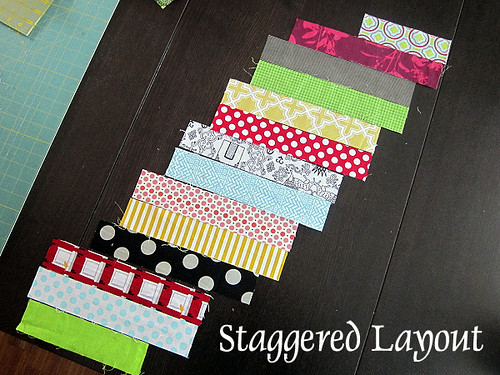
I admit that there's something funky going on at the very bottom of my stagger, but you'll see I fixed it in the next step.
Step 3: Piece Pairs
At the sewing machine piece your pairs together, matching the 11" side of each strip with right sides together. Use the standard 1/4" seam allowance now and throughout the tutorial. Chain-piecing saves time here and is really easy. After you sew one pair together, don't cut your threads. Sew for a bit past the pair with nothing under your presser foot, then feed in the new pair. Here's I've pulled aside the first pair so that you can see the thread connection.
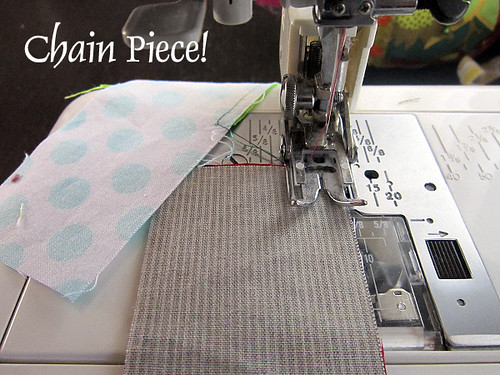
You can bust through all 7 pairs really quick this way. Once sewn, cut the connecting threads and press seams open.
Step 4: Piece Stagger
Lay out your strips again on your work surface.
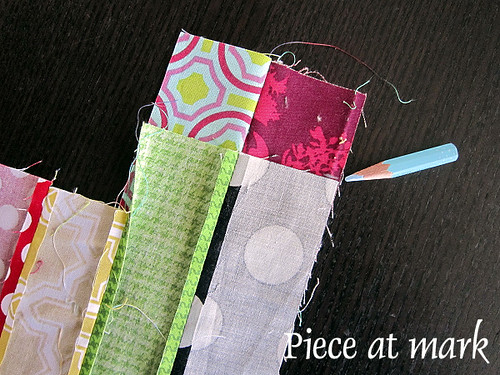
It's time to sew them all together, maintaining the staggered spacing. To start, place a mark at 1.5" from one edge of each pair, to designate where the next pair should be sewn in.
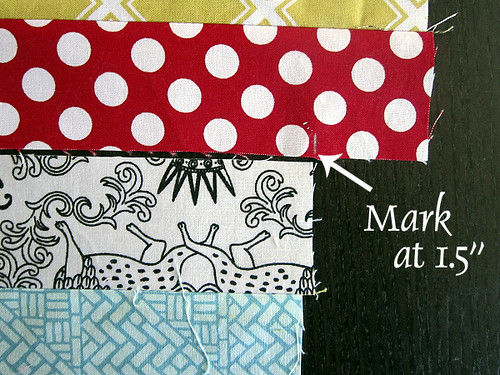
Then, with right sides together, connect all the pairs according to your marks.
After pressing seams open, you'll have one long, funny-looking piece!
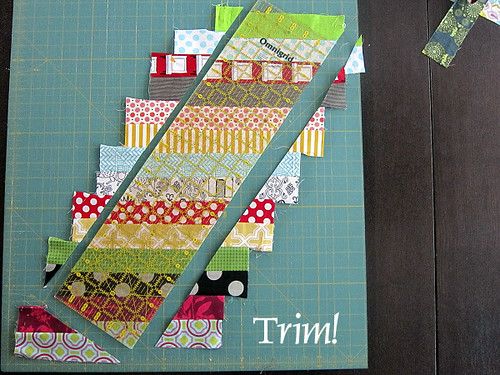
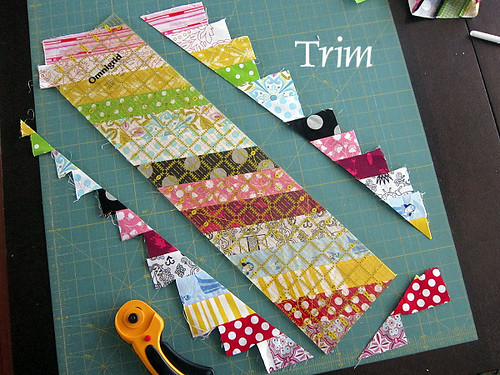
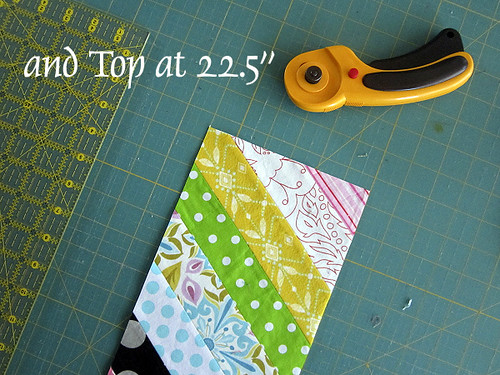
Step 5: Trim
Place your work on a cutting mat. Now you'll trim this staggered piece into one rectangle measuring 6" x 22.5". This is easy with a 6" x 24" quilting ruler! If you don't have one, use another ruler to cut one long side of the rectangle first and do whatever shifting is necessary to cut the piece 6" wide and 22.5" tall.
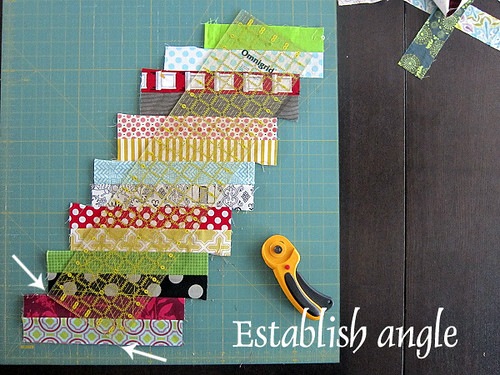
Place one corner of your 6" x 24" quilting ruler at the seam of the fabric strip second to the bottom, right where that seam meets the raw edge of your work. Next, rotate the ruler until its other corner touches the bottom raw edge of the first strip at the very bottom. See?
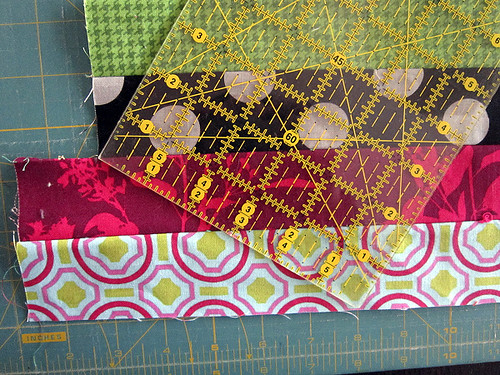
Essentially, we are establishing the angle of your cut. Do this carefully, as you'll want all of your Herringbone blocks to have the same angle. When it's just right, your ruler should be entirely over fabric. Holding the ruler in place, cut at the bottom of the ruler and along both long sides.
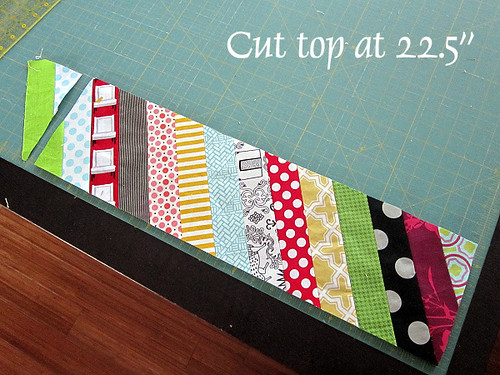
Lastly, align the long edges of your newly trimmed piece with the lines of your cutting mat. When everything is square, trim the top edge straight across at 22.5" long.
HELP!
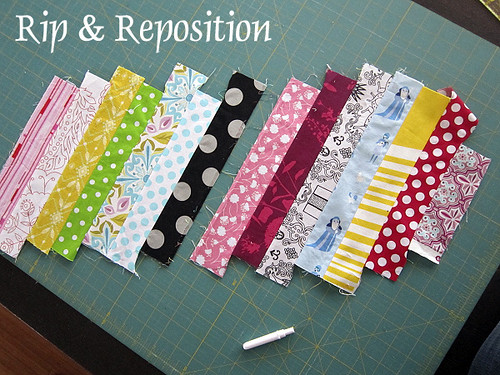
What if you go to trim, establish the angle and find that all of your ruler is NOT over fabric? Ah, my friend, do not despair. These things do happen what with variances in personal seam allowances and slightly off strip-widths that are exasperated with such a long block. If this happens to you, study your piece with the clear ruler in place to see which seam you should unpick to shift the strips in the right direction. Most likely, you can unpick just one strip, resew it as needed and trim away!
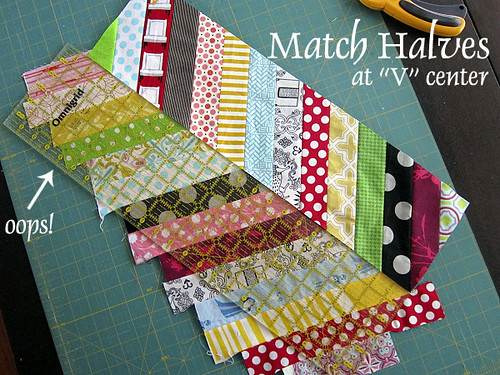
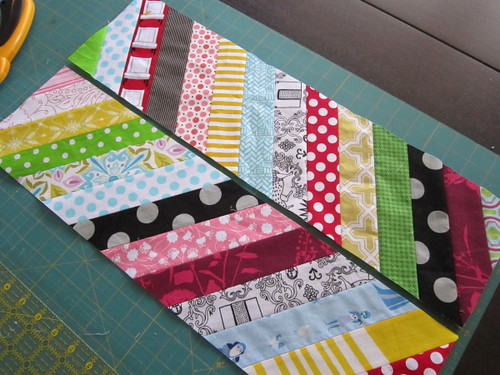
Step 6: Make Opposite Half
Alrighty then, you've made 1/2 of a Herringbone block! I think you know what comes next. Repeat Steps 2-4 working with the remaining 14 strips. This time, stagger your strips in the opposite direction, like so.
When it comes time to trim up your staggered piece (Step 5), use your ruler to establish the angle of your cut as before. But this time, before cutting, check to see that your angle actually matches the cut on your first half. Here I've placed my right half against the ruler. I rotated the ruler a bit more until all of the strips matched with a nice, sharp "V". At that point you'll see that not all of my ruler is over fabric (check out the upper left side. See, that's why I knew you might need "help".)
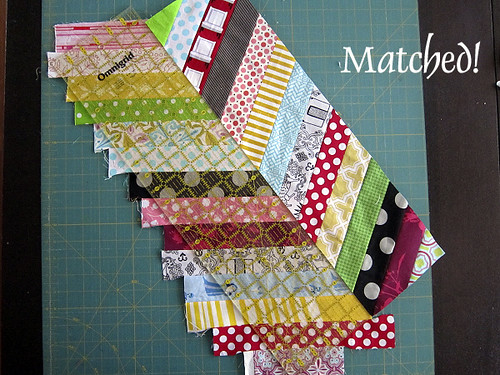
After unpicking a seam at the center, I was able to make my cut with perfectly matched lines!
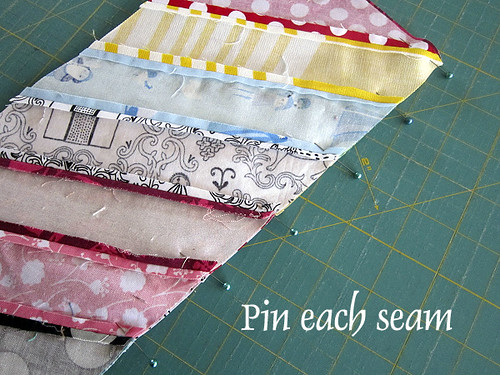
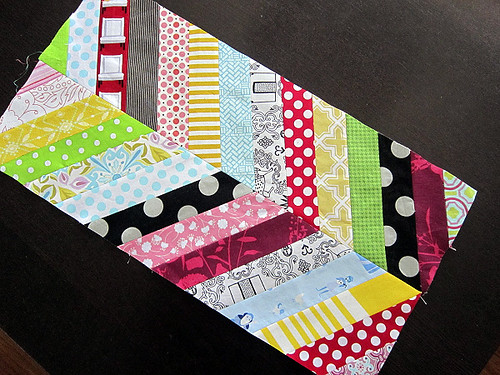
Step 7: Finish
Now that you've made both block halves, match them up with right sides together. Place a pin at each seam to ensure matched points. Sew them up, press open and admire your handsome Herringbone block!
As always, if you make any Herringbone blocks, I'd love to see them via #StitchedinColor. Thanks to all the ladies in the Love circle who will be making blocks for this quilt. I can't wait to see what we put together for Wrap Them in Love this time!
NOTE: In 2015 I updated this tutorial using 2.5" strips and a more precise approach based on my growing experience as a quilter. You can download a free PDF version of the updated tutorial right here.
Happy sewing!