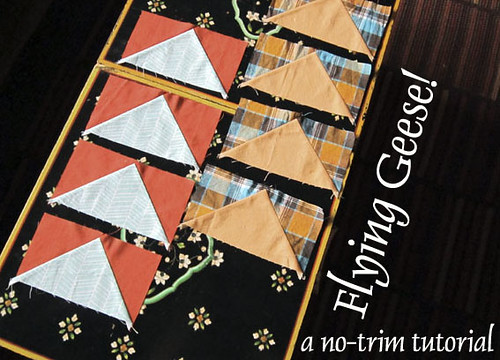
Flying Geese: a no-trim Tutorial
I have the flying geese bug, bad . I love how quilts made with flying geese have so much movement all the while presented in a simple repeated block.
Sewing the Swoon block was my first encounter making flying geese. In the Swoon method, you cut a rectangles for the large inner triangles of the flying geese and squares for the small outer triangles. After marking center lines and sewing, you trim off lots of fabric waste in discarded fabric triangles. Triangle scraps are the most tricky sort of folks, so I was not too keen on making a ton of flying geese in that method.
In my research, I found that there are many clever ways of making flying geese, both with and without special rulers. I wanted a method that didn't involve a lot of marking and special cutting, didn't waste fabric and didn't require me to square up (ie trim up) blocks at the end. In other words, I wanted straightforward cutting, simple sewing and voila - a nice block. Too much to ask? I think not.
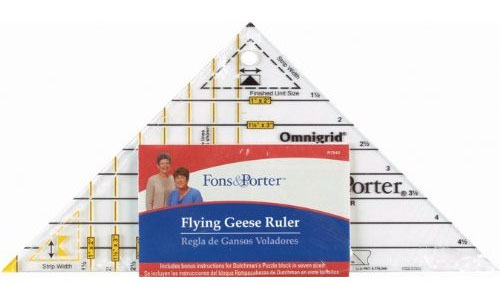
Enter the Fons & Porter Flying Geese Triangle made by Omnigrid. The Fons & Porter flying geese ruler was a small investment compared to a pair of Go! Baby cutters I was considering, and they fit all my criteria. There were extras too! This ruler cuts both sizes of triangles needed for a block from the same width fabric strip, making it easy to cut triangle sides and centers from the same print. And, it tells you which strip width to cut right there on the ruler. Plus, this ruler includes guides for making a whole passel of flying geese sizes. With the Go! Baby cutters, I'd be hemmed into one size. Score!
The past few nights I've enjoyed making flying geese using my new ruler with very happy results! I'm sure Brandon thinks I'm loony to be positively giddy about easy-to-line-up corners and smart seam allowances. Good thing you all understand me here. What could be more exciting than rulers that make sewing fun? (Ok, so there are a few things.) Well, without further ado, I present to you...
Flying Geese {a no-trim Tutorial}
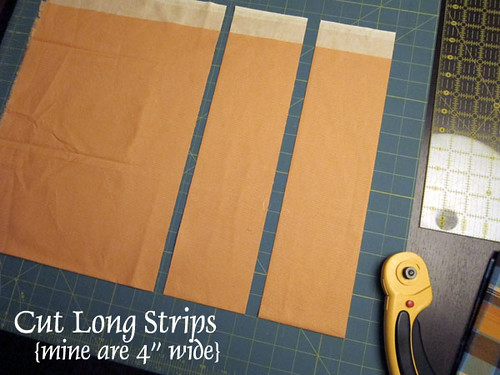
Step 1: Cut Strips
First choose your flying geese finished block size from among the sizes offered by the ruler. I believe the sizes offered range from 1" x 2" to 4" x 8" blocks. Next, cut strips in width directed by the ruler. I'll be making a lot of flying geese, so I cut long strips. I folded my half-yard cut of fabric the long way and lined up the folded edge with a horizontal line on my cutting mat. Then I cut two 4" wide strips the entire width of the fabric.
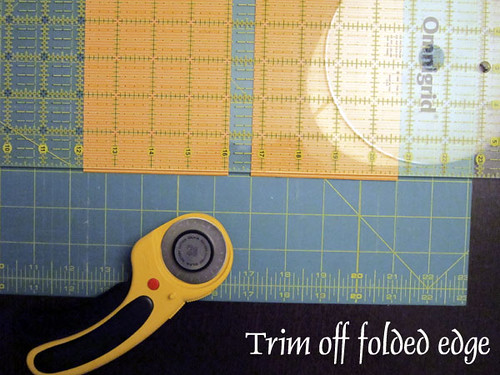
Step 2: Trim Folded Edge
Keep your strip folded in half on the cutting mat, just moving aside any extra fabric so that you can cut one strip at a time. Use a normal straight quilting ruler to trim 1/8" offat the folded edge. With the fold removed, you can now use your flying geese ruler to cut two layers of fabric at once.
Step 3: Cut Small Triangles
Use the guides on the ruler to align the ruler properly for a small triangle cut. Notice that little bit of ruler that sticks out to the left side? There is a mark on the ruler that helps you position the ruler just so that the same little bit sticks out each time. This little bit creates a squared-off corner to help you sew the pieces precisely while also eliminating extra bulk at the point of the finished flying geese block. Basically, you really like the squared off corner!

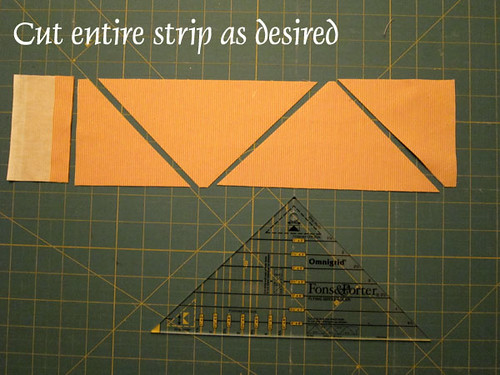
When cutting your strips, you can of course cut as many small or large triangles as you like. You could even cut all small triangles from one strip, or all large triangles. I wanted a mix of both, so that's what you'll see here. If you are doing a mix, starting with the small triangle at the trimmed edge, as shown, saves fabric.
Step 4: Cut Large Triangles
To cut large triangles, orient the entire width of the ruler over your strips as shown. Once again the guides on the ruler make lining things up quick and painless. And, once again, a bit of the ruler pokes out beyond the strip at the tip of your triangle to create that squared-off corner for easy sewing!

Continue cutting until you've used up your strip!
Step 5: The Sewing
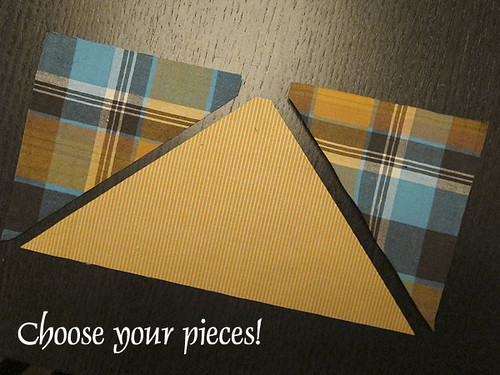
If you thought the cutting was easy, the sewing is even better. First, choose your pieces:
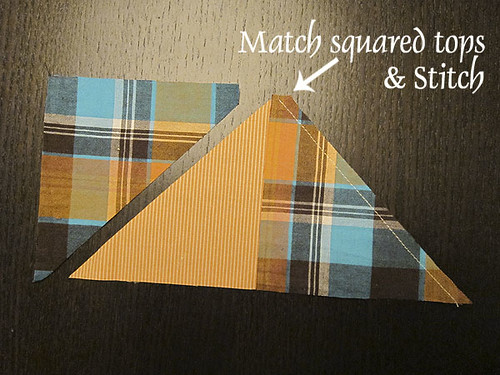
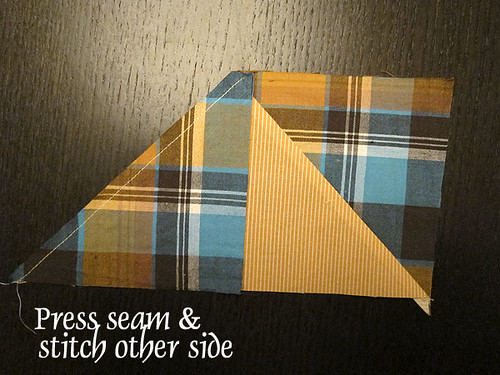
Then, flip one small triangle over the large triangle matching up the squared off tip at the top. Sew with a 1/4" seam, traveling from the square tip down towards the point.
Press your first seam and then work with the second small triangle. Align the small triangle with the squared off top once again. This time you will begin sewing over the first small triangle so that they slightly overlap. This is essential - it creates your seam allowance so that the flying geese point is not chopped off when you piece a row of geese together. Sew pieces with a 1/4" seam, this time with the large triangle fabric piece facing up so that you can travel as before from the squared off top towards the point.
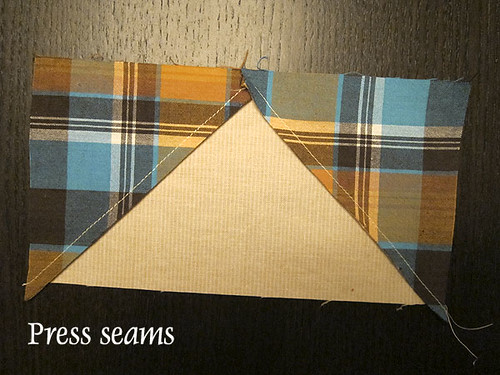
By the way, I chose to press my seams towards the large triangle. It's quick and makes that triangle "pop" a bit from the front! However you choose to do it, press that last seam....
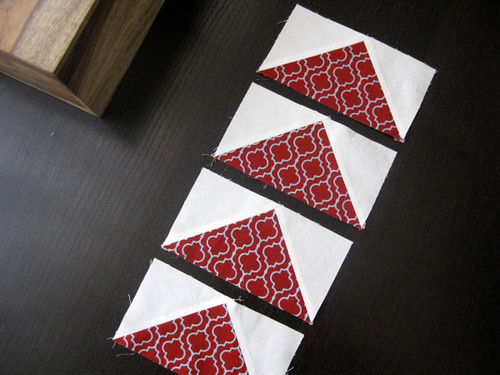
and You're Done!
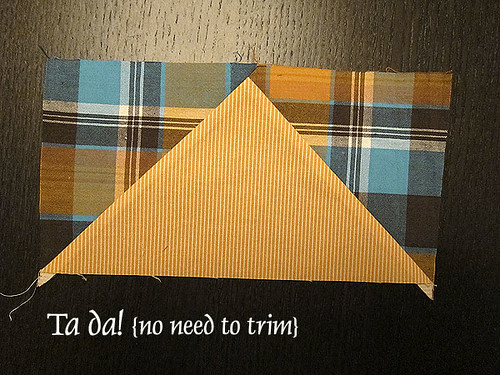
With any luck, your flying geese block is already square, or square enough! See those little dog ears peaking out at the bottom? Well, just ignore them. They will be matched to the top of a flying geese block where there are no dog ears to speak of. As such, they aren't going to cause a bulk issue or any other kind of harm. So, be nice to yourself, save time and move on!
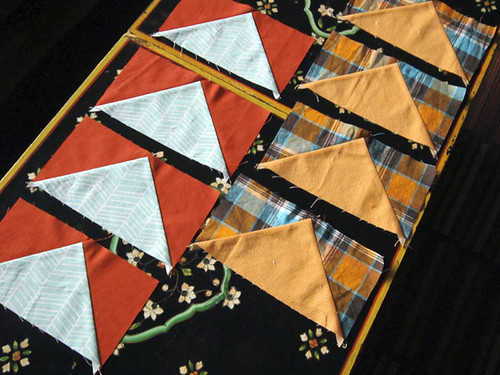
Before you know it, you'll have a whole flock of geese. These really do work up so fast! My flock will grow by just a few each night until they find a way to arrange themselves as new curtains for dear little Liam. Yes, that dear little Liam who broke!!! his curtains and is now living with curtains that are forever closed. I'll keep you updated on the progress!